ASIA PACIFIC
18 Brandl Street, Eight Mile Plains, QLD 4113, Australia P: +61 7 3854 5000 | F: +61 7 3854 5001 | Email: [email protected] |
www.lumacape.com.au
NORTH AMERICA
1300 Industrial Road, Unit #19, San Carlos, CA 94070, USA Phone +1 650 595 5862 | Fax +1 650 595 5820 | Email: [email protected] |
www.lumacape.com
6 / 9
IN0206 N190610
Linealux
L3
LS9031
Installation Instructions
Products and specifications are subject to change without notice.
LS9031
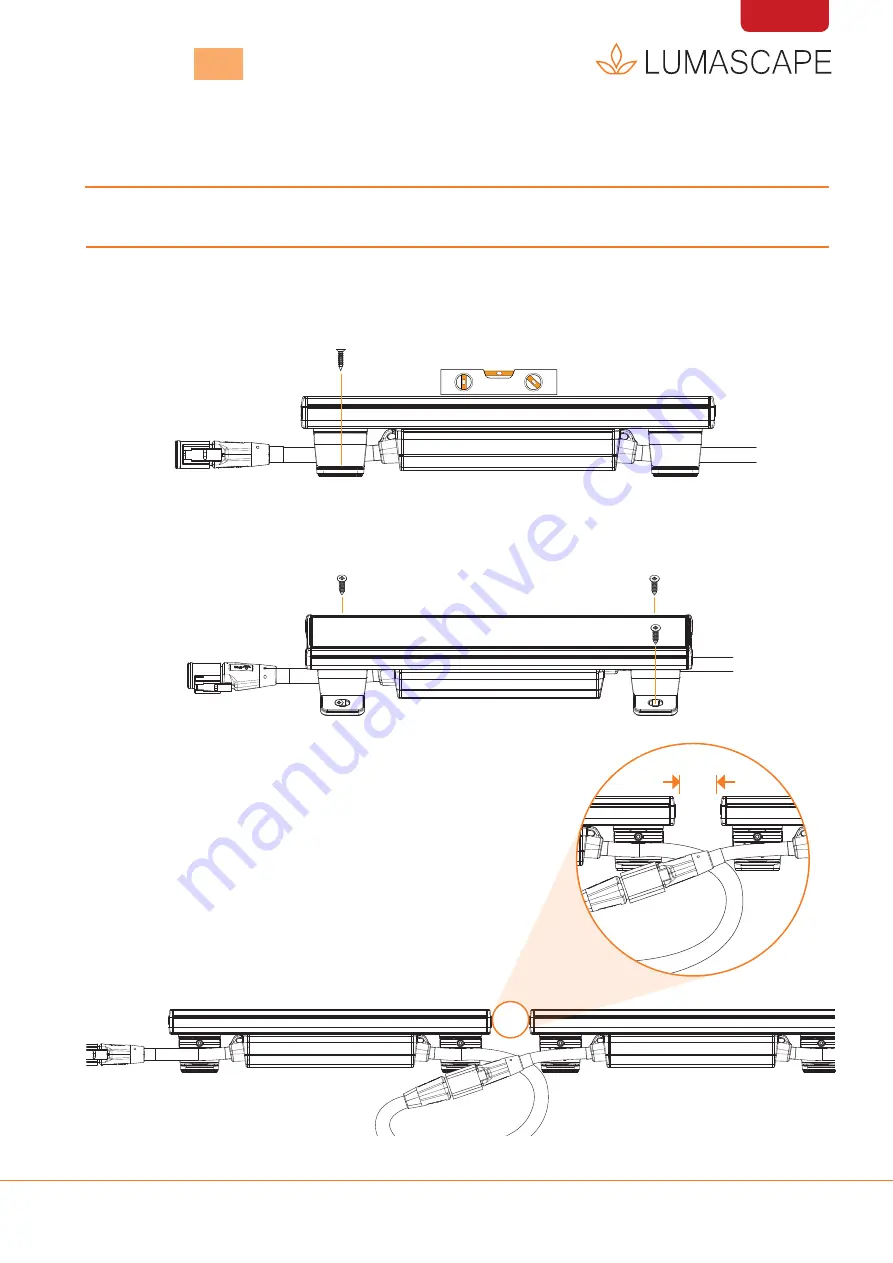
Step 4
Repeat the above steps to mount every luminaire in the
chain. When placing the luminaires in and end-to-end setup
be sure to leave a minimum gap of 0.4” (10mm) to allow for
thermal expansion.
Minimum thermal
expansion gap
between luminaires
Minimum
0.4” (10mm)
Mounting the Luminaire
Step 1
It is recommended to mount the luminaire with SS316 Stainless Steel screws. To start put a single
screw into one bracket. Use a spirit level or digital inclinometer to make sure the luminaire is level.
Once the luminaire is level secure with a second screw on the opposing side.
Step 2
Insert the remaining screws required. Each
adjustable mounting bracket
should be secured with one
SS316 Stainless Steel screw. Each
fixed mounting bracket
should be secured with two SS316 Stainless
Steel screws.


