Distribution Limited
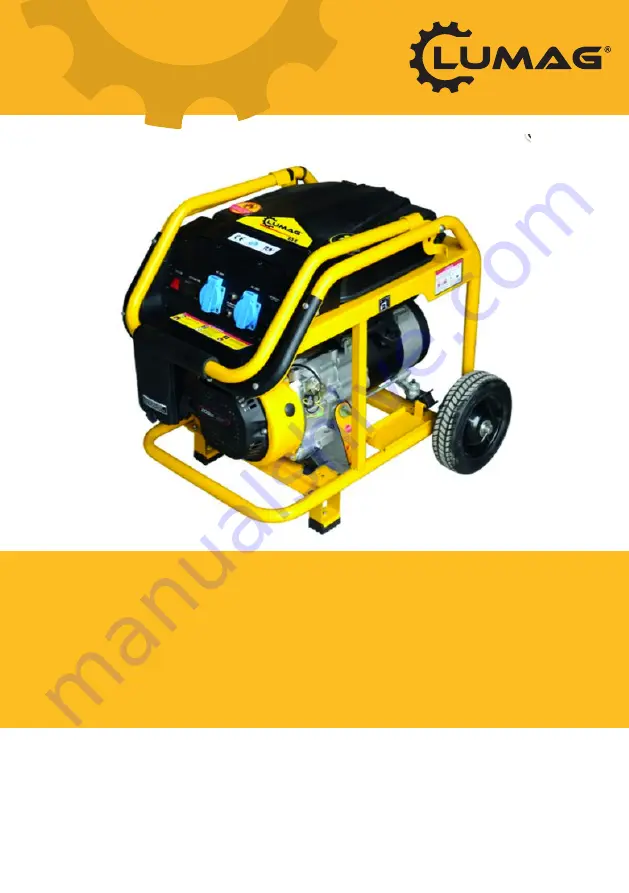
3 kw Petrol Generator
Operator’s Manual
G3E
FOR YOUR SAFETY
READ AND UNDERSTAND THE ENTIRE MANUAL
BEFORE OPERATING THIS MACHINE
Page 1: ...Distribution Limited 3 kw Petrol Generator Operator s Manual G3E FOR YOUR SAFETY READ AND UNDERSTAND THE ENTIRE MANUAL BEFORE OPERATING THIS MACHINE...
Page 2: ......
Page 3: ...y occasionally use this email address to make you aware of news technical advice and special offers If you do not wish to receive such emails please tick this box Unit 10 Hatchmoor Industrial Estate H...
Page 4: ......
Page 5: ...ekly 20hrs 1st Month 50hrs 2nd Month 100hrs 6th Month 300hrs Yearly Fasteners Tension Check Check X Clean Machine Check X Drive Belt Check Adjust X Replace X 2 All Other Moving Parts Cables Lubricate...
Page 6: ...________________ Purchase Date ____________________________ Date Description of checks work carried out Parts Used Y N Parts Invoice Number Dealers Name Engineers Name Engineers Signature Please note...
Page 7: ...________________ Purchase Date ____________________________ Date Description of checks work carried out Parts Used Y N Parts Invoice Number Dealers Name Engineers Name Engineers Signature Please note...
Page 8: ...________________ Purchase Date ____________________________ Date Description of checks work carried out Parts Used Y N Parts Invoice Number Dealers Name Engineers Name Engineers Signature Please note...
Page 9: ...nerationn for bank shop or resturant and so on The manual gives information with respect to operation and maintenance of the gasoline generator Please read it carefully first before operating If any t...
Page 10: ...edures may result in injury to or death of personnel if not strictly observed CAUTION A caution is used to alert the user to fact that hazardous operation and maintenance procedures may result in inju...
Page 11: ...r Safety 5 3 Introduction to Parts and Components 7 4 Pre operation Inspection 8 5 Starting the Engine 12 6 Service 14 7 Stopping the Engine 19 8 Maintenance 20 9 Storage 24 10 Troubleshooting 26 11 A...
Page 12: ...d Engine Rated Rotate Speed rpm 3000 3600 Voltage Adjust Type AVR Ignition System CDI Start Model Recoil Start Electric Start Fuel Tank Capacity L 9 15 25 25 Engine Oil Capacity L 0 5 0 6 1 1 1 2 Nois...
Page 13: ...5 2 GENERATOR SAFETY 1 1 Never operate it in an enclosed room Fig 3 Fig 1 1 2 Never connect to home circuit Fig 2 Fig 4...
Page 14: ...te it under wet circumstances 1 4 Place inflammable away from the unit at least one meter 1 5 No smoking when filling fuel Fig 5 Fig 6 1 6 Always fill fuel after stopping it Fig 7 1 7 Do not spill out...
Page 15: ...the unit are located as follows 1 Fuel sensor 2 Fuel filler cap 3 AC plug socket 4 AC breaker 5 Voltmeter 6 Dipstick 7 Ignition switch 8 Drain plug 9 Starting handle 10 Fuel cock 11 Air cleaner 12 Cho...
Page 16: ...1 Turn out the oil filler cap and clean the dipstick with a clear cloth Fig 9 2 Insert the dipstick back into the oil filler hole without turning it in Fig 10 3 In the case that the oil ever is below...
Page 17: ...9 4 2 FUEL LEVEL 1 Open the fuel filler cap Fig 13 2 Fill fuel to the shoulder of the filter Fig 14 3 Check the fuel level and fill fuel if necessary Fig 15 4 Reinstall the fuel filler cap well Fig 16...
Page 18: ...n If it is broke replace it with a new one Fig 17 4 Put the filter element in to the original position install the cover and secure it well 3 If the core is filthy clean it in the following sequence a...
Page 19: ...11 4 4 BATTERY Check and make sure that the electrolyte level of each battery cell is between is upper and lower level marks Fig 20 1 upper level mark 2 lower lever mark...
Page 20: ...NERATOR 5 1 Remove all loads from AC socket 5 2 Switch off AC breaker Fig 21 5 3 Turn on the fuel cock Fig 22 5 4 Set the choke lever to OFF position Don t close the choke when starting the engine in...
Page 21: ...ever to ON position Fig 26 5 6 Pull the start handle gently until feeling an anti action and then pull it up strongly WARNING After starting up release the starting lever slightly so avoid injuring pe...
Page 22: ...14 6 SERVICE Always do as the following so as to keep the generator in a sound condition WARNING 6 1 Always connect the generator to the earth to prevent misusing Fig 27...
Page 23: ...Description Start Rating Typified Electric device Start Rating Incandescent lamp Heating device 1 1 Incandescent lamp TV Incandescent lamp 100W 100VA W 100VA W Fluorescent lamp 2 1 5 Fluorescent lamp...
Page 24: ...16 6 3 If the generator is to supply two or above loads with power supply be sure to connect them one by one with higher start current first Fig 28...
Page 25: ...ows a Correct b Forbidden c Correct Fig 29 WARNING When connect the generator to home power supply be sure that a skilled electrician does this job Improper connecting between the generator and loads...
Page 26: ...18 6 5 USE INSTRUCTION WHEN PROVIDING ALTERATIVE CURRENT SUPPLY 5 1 Start the generator Fig 30 5 2 Connect devices Fig 31 5 3 Switch on the AC breaker Fig 32...
Page 27: ...STOPING THE ENGINE 7 1 Switch off AC breaker Fig 33 7 2 Turn the ignition switch to OFF Fig 34 7 3 Set the fuel cock to off Fig 35 NOTE To stop the generator in an emergency turn the ignition switch t...
Page 28: ...Or every 6 months Or every one Year Ref page Engine oil check Check P8 Replacing engine oil Replace Replace P21 Air cleaner check Check P10 Air cleaner wash Clean P10 Oil filter cup Clean P23 Battery...
Page 29: ...pty the engine oil from the crankcase 3 Screw on the drain plug 4 Fill engine oil to the upper level mark of the dipstick Engine oil recommended 4 stroke gasoline engine oil engine oil class SE SF fro...
Page 30: ...smantle the spark plug by means of a special tool Fig 39 3 Clear away carbon fouling around the spark plug Fig 40 4 Check the spark plug gap and adjust it if necessary The gap should be 0 7 0 8mm Fig...
Page 31: ...F FUEL FILTER CUP 1 Set the fuel cock to OFF and disdmantle the fuel filter cup and gauze 2 Fit the fuel filter cup gauze to the original position Fig 43 3 Fit the fuel filter cup and gauze to the ori...
Page 32: ...procedures as follows 9 1 Empty the fuel the fuel tank 9 2 wash the fuel filter cup and gauze install them to the original position Fig 45 9 3 Discharge the fuel from the carburetor Fig 46 9 4 Turn of...
Page 33: ...ug fill engine oil to the upper level mark of the dipstick followed by fitter cap to the original position Fig 48 9 6 Pull up the handle gently until feeling an anti action Fig 49 9 7 Place the genera...
Page 34: ...ig 51 1 Check to see if the ignition switch is at ON Fig 52 2 Check engine oil level Fig 53 3 Check the fuel inside tank Fig 54 4 Remove the spark plug and check it for proper sparks Fig 55 5 If the g...
Page 35: ...27 10 2 TROUBLE the unit fails to generate electricity 1 Check the light bulb 2 Check AC breaker is at ON Fig 57 Fig 58 3 If such check is still unsatisfactory see your dealer for help Fig 59...
Page 36: ...en secure them with washer and split pin 2 Mount the assembled axle on the frame with bolt and nut 1 Inner side 2 Shorter side 3 Longer side 4 Latch 5 Stopping disc 6 Engine location 7 Retainer Fig 60...
Page 37: ...ttom of the fuel tank 10 2 3 Connect the earth line with line with the rear end of the generator 10 2 4 Connect the starting cable to the positive lead of the battery first and then to the negative on...
Page 38: ...30...
Page 39: ...31...
Page 40: ...32...
Page 41: ...33...
Page 42: ...Distribution Limited PART DRAWINGS FOR YOUR SAFETY READ AND UNDERSTAND THE ENTIRE MANUAL BEFORE OPERATING THIS MACHINE...
Page 43: ...G3 E...
Page 44: ...Estate Hatherleigh Okehampton Devon EX20 3LP www lumag gb co uk 01837 811741 Lumag Distribution Limited Company Number 09267547 VAT Number GB154566788 Hatherleigh Plant and Tool Hire is a trading nam...