background image

LulzBot TAZ 5 GUIDE 


--PRE-SETUP

-- 

1.


Ensure print bed and nozzle are clean. The print bed should be smooth across the 

surface. 

2.


Ensure the filament reel has enough filament for your print. Make sure the filament is 

not tangled on itself, and that none of it is broken leading from the reel to the extruder 

nozzle. Make sure the reel is able to spin freely on the handle. 

3.


Close any windows around the printer, so the temperature around the machine will not 

fluctuate. Fluctuating temperatures may cause the filament to gunk up inside the 

extruder as well as warp your print.  


--Machine— 


Section 1: 

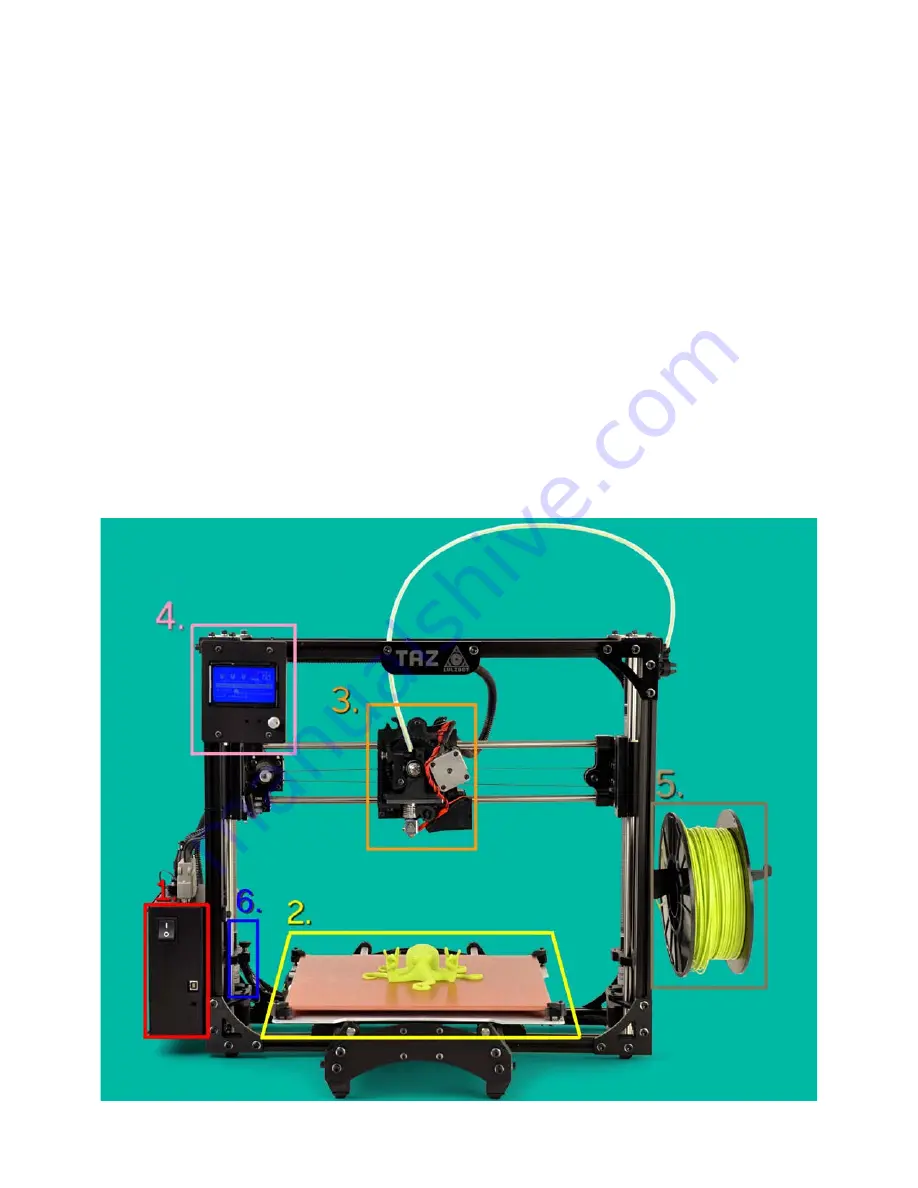
The switch is the power-switch while the port is a USB type B. Using a USB type A 

Summary of Contents for TAZ 5

Page 1: ...nd that none of it is broken leading from the reel to the extruder nozzle Make sure the reel is able to spin freely on the handle 3 Close any windows around the printer so the temperature around the m...

Page 2: ...they should have enough space for the filament to only be guided down toward the center of the extruder Section 4 The interface panel The turn dial navigation button on the bottom right corner is use...

Page 3: ...arget temperatures in Section 1 before printing can begin Section 3 This area marks the fan speed Section 4 The elapsed time of the current print It is read as hours minutes Section 5 A progress bar t...

Page 4: ...nformation screen press the navigation button once to enter the screen shown below Move to Temperature The picture above is the Main menu 3 Next depending on the type of filament being used select and...

Page 5: ...opriate temperatures the print may come out erroneously or you may damage theprinter Extrusion Test Once the current temperatures match the target temperatures it is best to do an extrude test to ensu...

Page 6: ...le up and away from the print bed 3 If the nozzle is a sufficient distance from the print bed pressed the navigation button again to go back to the previous screen select Move axis and then select Ext...

Page 7: ...an instructor 5 If the extruder test is successful remove the filament test strands using the tweezers Go back to the Movement menu and select Auto home This zeros out the printer to the origin point...

Page 8: ...me out at all o If you see either case occur immediately stop the print because damage may occur to the machine o The blocked filament could gum up inside the extruder And the nozzle dragging along th...

Page 9: ...fter the print finishes while the print bed is still warm If needed preheat the bed again for easier removal DO NOT SCAPE THE PRINT BED 2 From the Main menu click onto Temperature Cooldown This will a...

Reviews: