


255-700-025
4-13
PacketStar
™
Access Concentrator 60 User Guide
, Issue 1
Release 6.3.0
Chapter 4 Configuring the Basic System
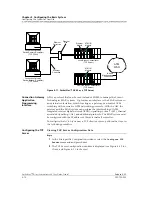
Configuring the System for Your Site
Begin
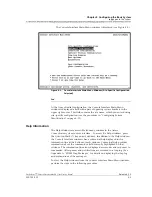
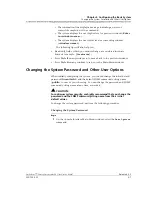
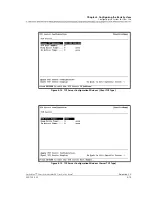
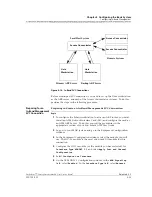
Viewing OAM Properties
1
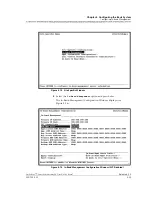
Select the values for the fields in the Master ATM Address and OAM
related data panel as described in Table 4-1.
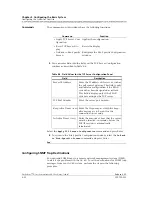
2
Select the
Apply Site-Specific Configuration
command and press
Enter.
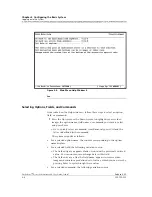
3
To return to the Console Interface Main Menu window, press
Ct r l+B
.
End
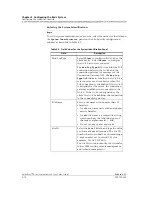
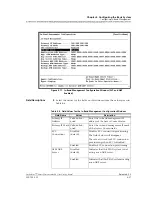
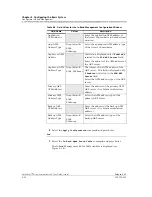
Table 4-1. Field Values for Master AT M Address and OAM Related Data
Panel
Field
Description
Master Node Addr
Enter the master node address to where
the traps will be sent (20 octets).
Address Type
Select an address type from the pull-
down menu:
Nsap,
E164
, or
E164nsap.
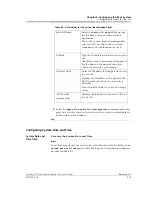
Loopback Location ID
Enter the unique identifier of the ATM
node where the loopback is to occur (8
octets).
Loopback Location ID
is the location
identifier of the local switch. It is used as
"Source Location Id" in all the outgoing
OAM loopback cells and will be
compared with the "Destination Location
Id" of a received OAM loopback cell to
decide if the received OAM loopback cell
should be looped back by this switch or
not. You must enter a unique value in
the
Loopback Location ID
field to
perform OAM loopback tests.
(For more information about OAM
loopback tests, see Chapter 5, "Using
System Diagnostics.”)
Debouncing Period
Enter a value between
1000
and
300000
(default value is
2000
).
This field is used in OAM; it is the
maximum time (in milliseconds) for
clearing OAM AIS and RDI alarms.