background image

Waypoints, routes, and trails

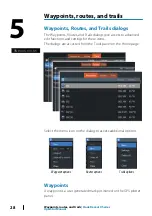
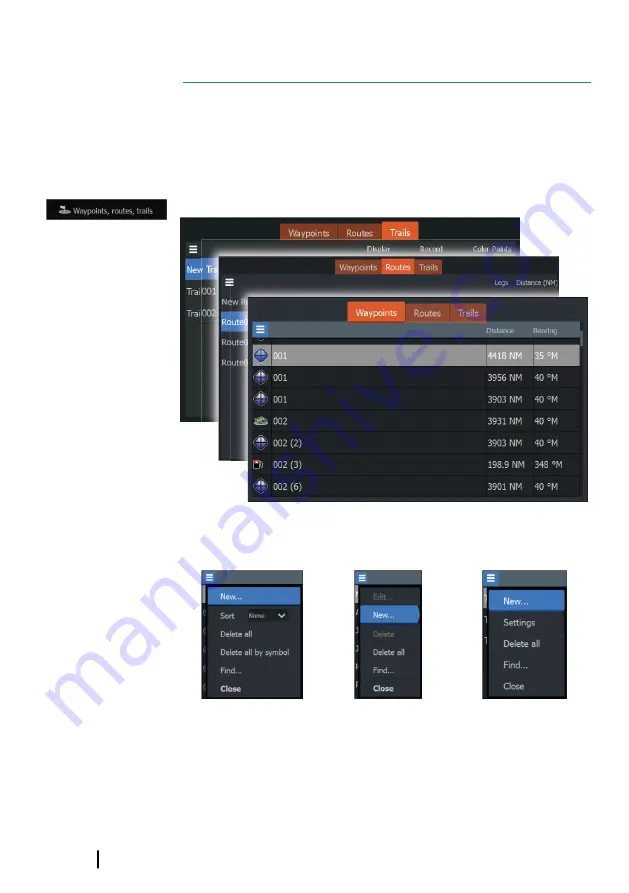
Waypoints, Routes, and Trails dialogs

The Waypoints, Routes, and Trails dialogs give access to advanced
edit functions and settings for these items.
The dialogs are accessed from the Tools panel on the Home page.

Select the menu icon on the dialog to access additional options.

Waypoint options

Routes options

Trails options

Waypoints

A waypoint is a user generated mark positioned on the GPS plotter
panel.

28

Waypoints, routes, and trails

 | Hook Reveal X Series

Operator Manual

Summary of Contents for Hook Reveal Series

Page 1: ...www lowrance com ENGLISH Hook Reveal X Series Operator Manual ...

Page 2: ......

Page 3: ... Holding AS and its subsidiaries branches and affiliates reserve the right to make changes to specifications without notice Governing language This statement any instruction manuals user guides and other information relating to the product Documentation may be translated to or has been translated from another language Translation In the event of any conflict between any Translation of the Document...

Page 4: ...ur sole responsibility that the product conforms with the requirements of CE under RED 2014 53 EU United States of America Warning The user is cautioned that any changes or modifications not expressly approved by the party responsible for compliance could void the user s authority to operate the equipment Australia and New Zealand Navico declare under our sole responsibility that the product confo...

Page 5: ...ires special attention from the reader is emphasized as follows Ú Note Used to draw the reader s attention to a comment or some important information Warning Used when it is necessary to warn personnel that they should proceed carefully to prevent risk of injury and or damage to equipment personnel Manual version This manual is written for the first version of software delivered with Hook Reveal X...

Page 6: ...6 Preface Hook Reveal X Series Operator Manual ...

Page 7: ...18 Screen capture 19 Customizing your system 19 Customizing the Home page wallpaper 19 Data overlay 20 Custom pages 21 Adjusting the split on multiple panel pages 23 GPS plotter 23 GPS plotter page 24 Vessel symbol 24 GPS plotter page scale 24 Panning the GPS plotter image 24 Waypoints Routes and Trails 24 Navigating 24 More options 27 GPS plotter settings 28 Waypoints routes and trails 28 Waypoin...

Page 8: ...ata 43 Customize the image settings 43 Custom and Ice Fishing mode options 46 More options 48 Sonar settings 51 SideScan 51 About SideScan 51 The SideScan image 51 Zooming the image 52 Using the cursor on the panel 52 Viewing history 53 Recording SideScan data 53 Setting up the SideScan image 56 DownScan 56 About DownScan 56 The DownScan panel 56 Zooming the DownScan image 56 Using the cursor on t...

Page 9: ...message 65 Alarms dialog 66 Tools 66 Settings 69 Waypoints routes trails 69 Info 69 Storage 70 Maintenance 70 Preventive maintenance 70 Cleaning the display unit 70 Checking the connectors 70 Service assistant 71 Software updates 71 Backing up your system data 74 Importing backed up files 75 Simulator 75 Retail mode 75 Simulator source files 76 Advanced simulator settings Contents Hook Reveal X Se...

Page 10: ...10 Contents Hook Reveal X Series Operator Manual ...

Page 11: ...ge press to return to the multiple panel page In menus and dialogs press to return to previous menu level and to exit a dialog 5 Menu Enter On any full screen page with no menu or dialog active press to display the menu On multiple panel pages press to maximize the current selected panel In menus and dialogs press to confirm a selection 6 Cursor Waypoint Press to activate deactivate the cursor Pre...

Page 12: ... Page icons on the Home page vary with model type 1 Tools panel Select a button to access dialogs used for carrying out a task or for browsing stored information 2 Application page icons Select a button to display the application page 3 Customize Activate customize mode to delete or modify custom pages 12 Introduction Hook Reveal X Series Operator Manual ...

Page 13: ...e system is presented on panels Custom pages The system is delivered with one preconfigured custom page and you can create your own All custom pages can be modified and deleted To add a custom page refer to Addingnewcustompages on page 20 To edit or delete a custom page refer to Editordeletecustompages on page 21 Multiple panel custom pages You can have up to 4 panels on a custom page Refer to Add...

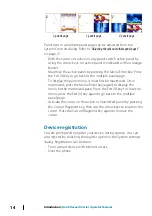
Page 14: ...d Once maximized press the Menu Enter key again to display the menu for the maximized pane Press the Exit X key to close the menu press the Exit X key again to go back to the multiple panel page Activate the cursor on the active or maximized panel by pressing the Cursor Waypoint key then use the Arrow keys to position the cursor Press the Cursor Waypoint key again to remove the cursor Device regis...

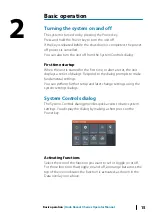
Page 15: ...s Respond to the dialog prompts to make fundamental settings You can perform further setup and later change settings using the system settings dialogs System Controls dialog The System Controls dialog provides quick access to basic system settings You display the dialog by making a short press on the Power key Activating functions Select the icon of the function you want to set or toggle on or off...

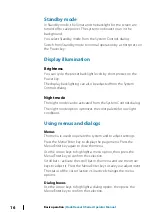
Page 16: ...g The night mode option optimizes the color palette for low light conditions Using menus and dialogs Menus The menu is used to operate the system and to adjust settings Press the Menu Enter key to display the page menu Press the Menu Enter key again to close the menu Use the Arrow keys to highlight a menu option then press the Menu Enter key to confirm the selection Scroll bars activate the scroll...

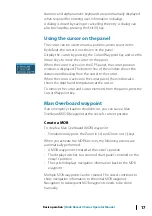
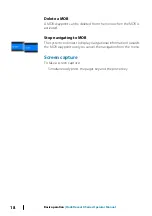
Page 17: ...ndow also shows the depth and temperature at the cursor To remove the cursor and cursor elements from the panel press the Cursor Waypoint key Man Overboard waypoint If an emergency situation should occur you can save a Man Overboard MOB waypoint at the vessel s current position Create a MOB To create a Man Overboard MOB waypoint Simultaneously press the Zoom In and Zoom out keys When you activate ...

Page 18: ...vigating to MOB The system continues to display navigational information towards the MOB waypoint until you cancel the navigation from the menu Screen capture To take a screen capture Simultaneously press the pages key and the power key 18 Basic operation Hook Reveal X Series Operator Manual ...

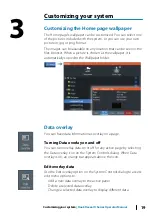
Page 19: ...older Data overlay You can have data information as overlay on a page Turning Data overlay on and off You can turn overlay data on or off for any active page by selecting the Data overlay icon on the System Controls dialog When Data overlay is on an orange bar appears above the icon Edit overlay data Use the Edit overlay option on the System Controls dialog to access edit menu options to Add a new...

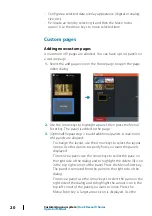
Page 20: ...ls A maximum of 4 panels are allowed To change the layout use the Arrow keys to select the layout option Use this option to specify how you want the panels displayed To remove a panel use the Arrow keys to select the pane on the right side of the dialog and to highlight the delete X icon in the top right corner of the panel Press the Menu Enter key The panel is removed from the pane on the right s...

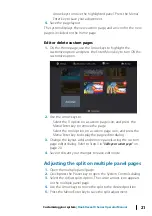
Page 21: ... the tool option on a custom page icon and press the Menu Enter key to display the page editor dialog 3 Change the layout add and remove panels using the custom page editor dialog Refer to Step 3 in Addingnewcustompages on page 20 4 Save or discard your changes to leave edit mode Adjusting the split on multiple panel pages 1 Open the multiple panel page 2 Quick press the Power key to open the Syst...

Page 22: ...22 Customizing your system Hook Reveal X Series Operator Manual ...

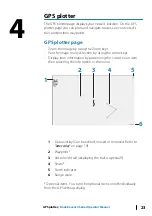
Page 23: ...ng the Arrow keys Display item information by positioning the cursor on an item then selecting the Info option in the menu 1 2 3 6 4 5 1 Data overlay Can be edited moved or removed Refer to Dataoverlay on page 19 2 Waypoint 3 Vessel with trail displaying the trail is optional 4 Route 5 North indicator 6 Range scale Optional items You turn the optional items on off individually from the GPS setting...

Page 24: ...r elements from the page press the Cursor Waypoint key This also centers the image to the vessel position Waypoints Routes and Trails You can position and manage waypoints routes and trails on the page For more information refer to Waypoints routes andtrails on page 28 Navigating You can use the page for navigating to the cursor to a waypoint or navigate a route Refer to Navigating on page 37 More...

Page 25: ...s out of space the feature will turn itself off and the option is disabled in the menu The more passes of an area included in the live sonar soundings log results in better Genesis live maps Genesis live is accurate up to 20 knots Ú Note Genesis Live data is not adjusted for tidal offset Genesis live menu options Transparency Adjusts the transparency of the overlay Contour interval Defines the den...

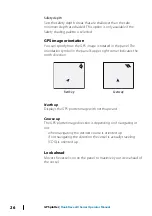
Page 26: ...el s upper right corner indicates the north direction N Northup N Courseup North up Displays the GPS plotter image with north upward Course up The GPS plotter image direction is depending on if navigating or not when navigating the desired course is oriented up if not navigating the direction the vessel is actually traveling COG is oriented up Look ahead Moves the vessel icon on the panel to maxim...

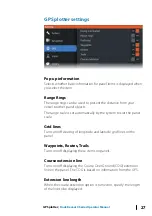
Page 27: ... suit the panel scale Grid lines Turns on off viewing of longitude and latitude grid lines on the panel Waypoints Routes Trails Turns on off displaying these items on panels Course extension line Turns on off displaying the Course Over Ground COG extension line on the panel The COG is based on information from the GPS Extension line length When the course extension option is turned on specify the ...

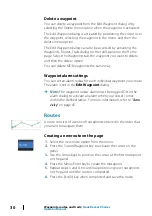
Page 28: ... settings for these items The dialogs are accessed from the Tools panel on the Home page Select the menu icon on the dialog to access additional options Waypointoptions Routesoptions Trailsoptions Waypoints A waypoint is a user generated mark positioned on the GPS plotter panel 5 28 Waypoints routes and trails Hook Reveal X Series Operator Manual ...

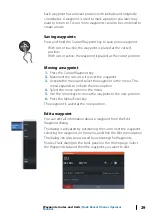
Page 29: ... the menu and select the waypoint in the menu The menu expands to include the move option 4 Select the move option in the menu 5 Use the Arrow keys to move the waypoint to the new position 6 Press the Menu Enter key The waypoint is saved at the new position Edit a waypoint You can edit all information about a waypoint from the Edit Waypoint dialog The dialog is activated by positioning the cursor ...

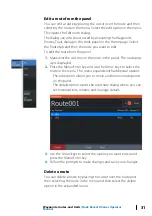
Page 30: ...alarm is set in the Edit Waypoint dialog Ú Note The waypoint radius alarm must be toggled ON in the alarm dialog to activate an alarm when your vessel comes within the defined radius For more information refer to Alarms dialog on page 65 Routes A route consists of a series of routepoints entered in the order that you want to navigate them Creating a new route on the page 1 Select the new route opt...

Page 31: ...2 Press the Menu Enter key and use the Arrow keys to select the route in the menu The menu expands with additional options The edit option allows you to move and remove routepoints on the panel The details option opens the edit route dialog where you can set route options rename and manage details 3 Use the Arrow keys to select the option you want to use and press the Menu Enter key 4 Follow the p...

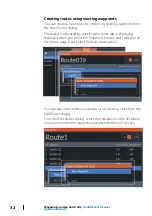
Page 32: ...isplayed when you select the Waypoint Routes and Trails tool on the Home page Next select the New route option You can also insert existing waypoints in an existing route from the Edit Routes dialog From the Edit Routes dialog select the routepoint in the list where you want to insert the waypoint and press the Menu Enter key 32 Waypoints routes and trails Hook Reveal X Series Operator Manual ...

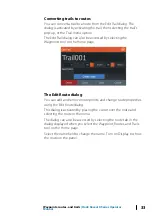
Page 33: ... dialog You can add and remove routepoints and change route properties using the Edit Route dialog This dialog is activated by placing the cursor over the route and selecting the route in the menu The dialog can also be accessed by selecting the route tab in the dialog displayed when you select the Waypoint Routes and Trails tool on the Home page Select the name field to change the name Turn on Di...

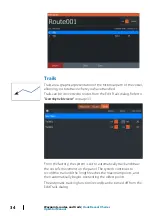
Page 34: ...oroutes on page 33 From the factory the system is set to automatically track and draw the vessel s movement on the panel The system continues to record the trail until the length reaches the maximum points and then automatically begins overwriting the oldest points The automatic tracking function record can be turned off from the Edit Trails dialog 34 Waypoints routes and trails Hook Reveal X Seri...

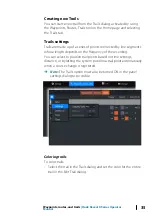
Page 35: ...uency of the recording You can select to position trail points based on time settings distance or by letting the system position a trail point automatically when a course change is registered Ú Note The Trails option must also be turned ON in the panel settings dialog to be visible Coloring trails To color trails Select the trail in the Trails dialog and set the color for the entire trail in the E...

Page 36: ...36 Waypoints routes and trails Hook Reveal X Series Operator Manual ...

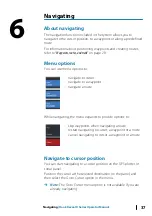
Page 37: ...gate a route While navigating the menu expands to provide options to skip waypoints when navigating a route restart navigating to cursor a waypoint or a route cancel navigating to cursor a waypoint or a route Navigate to cursor position You can start navigating to a cursor position on the GPS plotter or sonar panel Position the cursor at the selected destination on the panel and then select the Go...

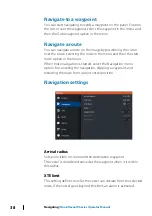
Page 38: ...tion in the menu When route navigation is started select the Navigation menu option for canceling the navigation skipping a waypoint and restarting the route from current vessel position Navigation settings Arrival radius Sets an invisible circle around the destination waypoint The vessel is considered arrived at the waypoint when it is within this radius XTE limit This setting defines how far the...

Page 39: ...sed on time distance or by letting the unit position a point automatically when a course change is registered Specify one of the following logging types in the Navigating Settings dialog Auto the unit positions a point automatically when a course change is registered Distance select the Distance field and enter the distance you want to record Time select the Time field and enter the time you want ...

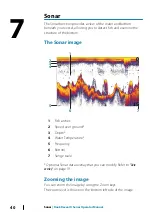
Page 40: ...ge 4 3 2 5 7 1 6 1 Fish arches 2 Speed over ground 3 Depth 4 Water Temperature 5 Frequency 6 Bottom 7 Range scale Optional Sonar data overlay that you can modify Refer to Data overlay on page 19 Zooming the image You can zoom the image by using the Zoom keys The zoom level is shown on the bottom left side of the image 7 40 Sonar Hook Reveal X Series Operator Manual ...

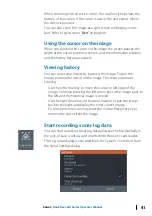
Page 41: ...n the cursor on the image This stops automatic scrolling Use the left Arrow key to move the cursor to left edge of the image Continue pressing the left Arrow key so the image pans to the left and the historical image is viewed Use the right Arrow key in the same manner to pan the image back to the right and display the most current image To resume normal scrolling press the Cursor Waypoint key to ...

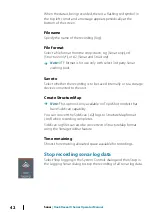
Page 42: ...internally or to a storage device connected to the unit Create StructureMap Ú Note This option is only available on TripleShot models that have SideScan capability You can convert the SideScan sl2 logs to StructureMap format smf when recording completes SideScan log files can also be converted to StructureMap format using the Storage toolbar feature Time remaining Shows the remaining allocated spa...

Page 43: ...that only experienced sonar users use the customize settings to further customize the image Select Auto in the menu and change to custom or ice fishing mode to customize image settings Use More options in the menu to set access additional options for the image Refer to Moreoptions on page 46 Custom and Ice Fishing mode options Custom and Ice fishing modes allow access to controls for manually tuni...

Page 44: ...Note Auto Sensitivity is the preferred mode for most conditions Auto sensitivity Auto sensitivity automatically adjusts the sonar return to the optimal levels Auto sensitivity can be adjusted to your preference while still maintaining the auto sensitivity functionality Adjusting Sensitivity 1 Select the Auto sensitivity menu option to turn off the auto setting 2 Use the Arrow keys to highlight the...

Page 45: ...bubbles can clutter the image The noise rejection option filters the signal interference and reduces the on screen clutter Surface clarity Wave action boat wakes and temperature inversion can cause onscreen clutter near the surface The surface clarity option reduces surface clutter by decreasing the sensitivity of the receiver near the surface Colorline Allows the user to adjust the colors of the ...

Page 46: ...side of the display shows the range that is magnified If you increase the zooming factor the range is reduced You see this as reduced distance between the zoom bars Bottom lock The bottom lock mode is useful when you want to view targets close to the bottom In this mode the left side of the panel shows an image where the bottom is flattened The range scale is changed to measure from the seabed 0 a...

Page 47: ...splay palettes Fish ID You can select how you want the fish targets to appear on the screen You can also select if you want to be notified by a beep when a fish ID appears on the panel Traditionalfisharches Fishsymbols Fishsymbolsanddepth indication Ú Note Not all fish symbols are actual fish Fish ID beeps When selected the system beeps when a fish is identified Overlay DownScan When a DownScan ca...

Page 48: ...ints and the distance listed in the Cursor Information window 4 Continue selecting new measuring points if required You can use the menu to re position the start point and the end point as long as the measuring function is active When you select Finish measuring or press the Exit X key the measuring function stops Press the Cursor Waypoint key to remove the cursor from the image and the image resu...

Page 49: ...ffset All transducers measure water depth from the transducer to the bottom As a result water depth readings do not account for the distance from the transducer to the lowest point of the boat for example bottom of the keel rudder or skeg in the water or from the transducer to the water surface Before setting the offset measure the distance from the transducer to the lowest point of the boat in th...

Page 50: ...ation is used to adjust the water temperature value from the sonar transducer to match the data from another temperature sensor It may be required to correct for localized influences to the measured temperature Calibration range 9 9 9 9 Default is 0 Ú Note Water temperature calibration only appears if the transducer is temperature capable Check transducer type selection if this option should be av...

Page 51: ...cer connected The SideScan image The SideScan image can be set up to show left side right side or both left and right side scanning 1 Speed over ground 2 Depth 3 Temperature 4 Frequency 5 Range scale Zooming the image To specify the distance out to the left and right of the center displayed in the image use the zoom keys use the range menu setting 8 SideScan Hook Reveal X Series Operator Manual 51...

Page 52: ...cursor and the cursor elements from the panel press the Cursor Waypoint key Viewing history You can view history by panning the image To pan the image press the Cursor Waypoint key to position the cursor on the image This stops automatic scrolling Use the down arrow key to move the cursor to bottom edge of the image Continue pressing the down arrow key so the image pans down and the historical ima...

Page 53: ... 55 When the cursor is active some options in the menu are replaced with cursor mode features Press the Cursor Waypoint key to remove the cursor from the image and cursor menu options Custom options Range The range setting determines the water depth and SideScan range that is visible on the screen Auto range When the range is set to Auto the system automatically sets the range depending on the wat...

Page 54: ...ve your settings Advanced settings Surface clarity Wave action boat wakes and temperature inversions can cause on screen clutter near the surface The surface clarity option reduces surface clutter by decreasing the sensitivity of the receiver near the surface Ú Note By default surface clarity is set to Low for optimal image return and clarity Restore mode default This menu option is available if y...

Page 55: ...point from where you want to measure the distance 2 Start the measuring function from the More options menu option Ú Note The measure function is not available in the menu unless the cursor is placed on the image 3 Position the cursor on the second measuring point A line is drawn between the measuring points and the distance listed in the Cursor Information window 4 Continue selecting new measurin...

Page 56: ...em The DownScan panel 3 2 1 4 5 1 Speed over ground 2 Depth 3 Temperature 4 Frequency Depth 5 Range scale Zooming the DownScan image You can zoom a DownScan image by using the Zoom keys Using the cursor on the DownScan panel By default the cursor is not shown on the DownScan image To position the cursor on the image press the Cursor Waypoint key 9 56 DownScan Hook Reveal X Series Operator Manual ...

Page 57: ...eft Arrow key to move the cursor to left edge of the image Continue pressing the left Arrow key so the image pans to the left and the historical image is viewed Use the right Arrow key in the same manner to pan the image back to the right and display the most current image To resume normal scrolling press the Cursor Waypoint key to remove the cursor from the image Recording DownScan data DownScan ...

Page 58: ...els Allows for the selection of a specific depth range that is not tied to the depth of the water Frequency DownScan can be used at 800 kHz or 455 kHz 800 kHz provides the highest resolution with less range 455 kHz has the best range but with lower resolution Restore mode default This menu option is available if you customize one or more settings When selected all the customized settings are chang...

Page 59: ...ayed Colorline Adjusts the colors of the fish arch data to help differentiate them from other targets Adjusting the colorline can help separate fish and important structures on or near the bottom from the actual bottom Surface clarity Wave action boat wakes and temperature inversions can cause onscreen clutter near the surface The surface clarity option reduces surface clutter by decreasing the se...

Page 60: ... Position the cursor on the point from where you want to measure the distance 2 Start the measuring function from the More options menu option Ú Note The measure function is not available in the menu unless the cursor is placed on the image 3 Position the cursor on the second measuring point A line is drawn between the measuring points and the distance listed in the Cursor Information window 4 Con...

Page 61: ...erlay on your GPS panel When Structure overlay is selected in the GPS panel menu the menu increases to show options for the Structure overlay The example below shows a GPS panel with Structure overlay combined with a traditional SideScan panel You move around in the GPS panel as usual when you have a Structure overlay Use the Zoom keys to zoom the GPS panel and the scanned image StructureMap tips ...

Page 62: ...Ú Note The message includes information about file size Keep the size of your logs to 100MB or less to allow for faster file conversion The recording is stopped by selecting the stop logging function in the system controls dialog Converting SideScan data to StructureMap format A SideScan log file sl2 is converted to StructureMap format smf after recording from the recording dialog or from the file...

Page 63: ...are almost hidden by the Structure overlay Palettes Used for selecting the image s color palette Contrast Determines the brightness ratio between light and dark areas of the screen Water column Shows hides the water column in Live mode If turned OFF schools of bait fish might not be seen on the SideScan image If turned ON the accuracy of the SideScan image on the map might be affected by the water...

Page 64: ...s are used Color Importance Red Critical alarm Orange Important alarm Yellow Standard alarm Blue Warning Green Lite warning Alarm messages An alarm message is displayed with the name of the alarm as the title and with details for the alarm Acknowledging a message The alarm dialog options for acknowledging a message vary depending on the alarm Close Sets the alarm state to acknowledged The siren bu...

Page 65: ... on a message or the siren They remain active until they are acknowledged or until the reason for the message is rectified Alarms dialog Enable the alarm siren from the Alarms dialog Select the settings option to open the Alarms Settings dialog All alarms are setup in the Alarms Settings dialog Alarms Hook Reveal X Series Operator Manual 65 ...

Page 66: ... system settings System settings The system settings provides access to the following options Language Controls the language used on this unit for panels menus and dialogs Changing the language causes the unit to restart Boat settings Used to specify the physical attributes of the boat Text size Used for setting the text size in menus and dialogs 12 66 Tools Hook Reveal X Series Operator Manual ...

Page 67: ...ation Magnetic variation is the difference between true bearings and magnetic bearings caused by different locations of the Geographic and the Magnetic north poles Any local anomalies such as iron deposits might also affect the magnetic bearings When set to Auto the system automatically converts magnetic north to true north Select manual mode if you need to enter your own local magnetic variation ...

Page 68: ...or your navigation such as arrival radius XTE limit XTE Alarm Trails and Logging Type Refer to Navigationsettings on page 38 GPS plotter Provides options and dialogs where you specify settings for your GPS plotter Refer to GPSplottersettings on page 27 Sonar Provides options and dialogs where you specify settings for your sonar Refer to Sonarsettings on page 48 Alarms Provides the option to enable...

Page 69: ... the position s latitude longitude Trip Provides trip information Use to reset trip information Storage Access to the file management system Use to browse and manage the contents of the unit s internal memory and storage devices connected to the unit Copying files to a storage device You can copy user data such as screen captures logs etc to a storage device connected to the unit You can also expo...

Page 70: ... damp cloth Use a light fresh water spray then wipe the unit dry with a micro fiber or a soft cotton cloth Do not apply pressure with the cloth To clean the housing Use warm water with a dash of liquid dish soap or detergent Avoid using abrasive cleaning products or products containing solvents acetone mineral turpentine etc acid ammonia or alcohol as they can damage the display and plastic housin...

Page 71: ...r data Refer to Backingupyoursystemdata on page 71 Update software Ú Note Do not download software updates to mapping cards Use a non mapping memory card with sufficient storage for software updates or saving reports or files to it Ú Note Do not turn off the unit until the update is completed 1 Download the software update from www lowrance com to a memory card inserted in a smart device or PC con...

Page 72: ... box corner to expand the box 4 Press the Menu Entry key to place the corner 5 If needed repeat steps 2 4 to the other boundary box corner 6 Press the Exit X key to indicate that the box covers the region you want to export The Export Region dialog opens 7 Select the export option 8 Select the appropriate file format 9 Select Export and follow the prompts for specifying the destination folder and ...

Page 73: ... User data file version 2 no depth Can be used when transferring user data from one system to a legacy product GPX GPS Exchange no depth This is the format most used on the web that shares among most GPS systems Use this format if you are taking data to a competitor s unit Purging user data Deleted user data are stored in the unit s memory until the data is purged If you have numerous deleted unpu...

Page 74: ...r 2 Open the Storage dialog from the tool panel and select the memory card 3 Browse to the file you want to import and select it This opens the details dialog 4 Select the import option and follow the prompts A message advises when the import is completed 74 Maintenance Hook Reveal X Series Operator Manual ...

Page 75: ...retail mode is running the demonstration pauses After a time out period retail mode resumes Ú Note Retail mode is designed for retail showroom demonstrations Simulator source files You can select which sonar data files are used by the simulator A set of source files is included in your system and you can import files by using a card inserted into the card reader You can also use your own recorded ...

Page 76: ... Used for manually entering values when GPS source is set to Simulated course Otherwise GPS data including speed and course come from the selected source file Set start position Sets your simulated vessel position to the current cursor position Ú Note This option is only available when the GPS source is set to simulated course 76 Simulator Hook Reveal X Series Operator Manual ...

Page 77: ......

Page 78: ... 988 12692 001 ...

Reviews: