background image


Starting Dobby Web Interface (all sessions after the first session) 

1.  Turn on the dobby computer: Switch to 1 (=ON) 

If you use the Louët WiFi connection without an Internet connection (IP address 

10.42.0.1 on the dobby display): 

1. 

Use the network settings for your device’s WiFi to connect to  Louëtwifi (See 

the instructions for the 'first session'). 

2. 

You can set the network settings on your device to automatically restore the 

connection if both devices are turned on. 

If you have set up the connection to the Internet (IP address 192. xx. xx. xx or 172. 

xx. xx. xx), the Dobby will automatically contact the network. If the network is not 

available, the text "No Connection" will appear on the Dobby display. In that case, 

check that the router or mobile hotspot is online. Turn off the Dobby computer and 

then turn it on again. 

1. 

Open the Internet browser on the device. 

2. 

If the web interface screen is still open 

from the previous session, refresh the 

screen. 

3. 

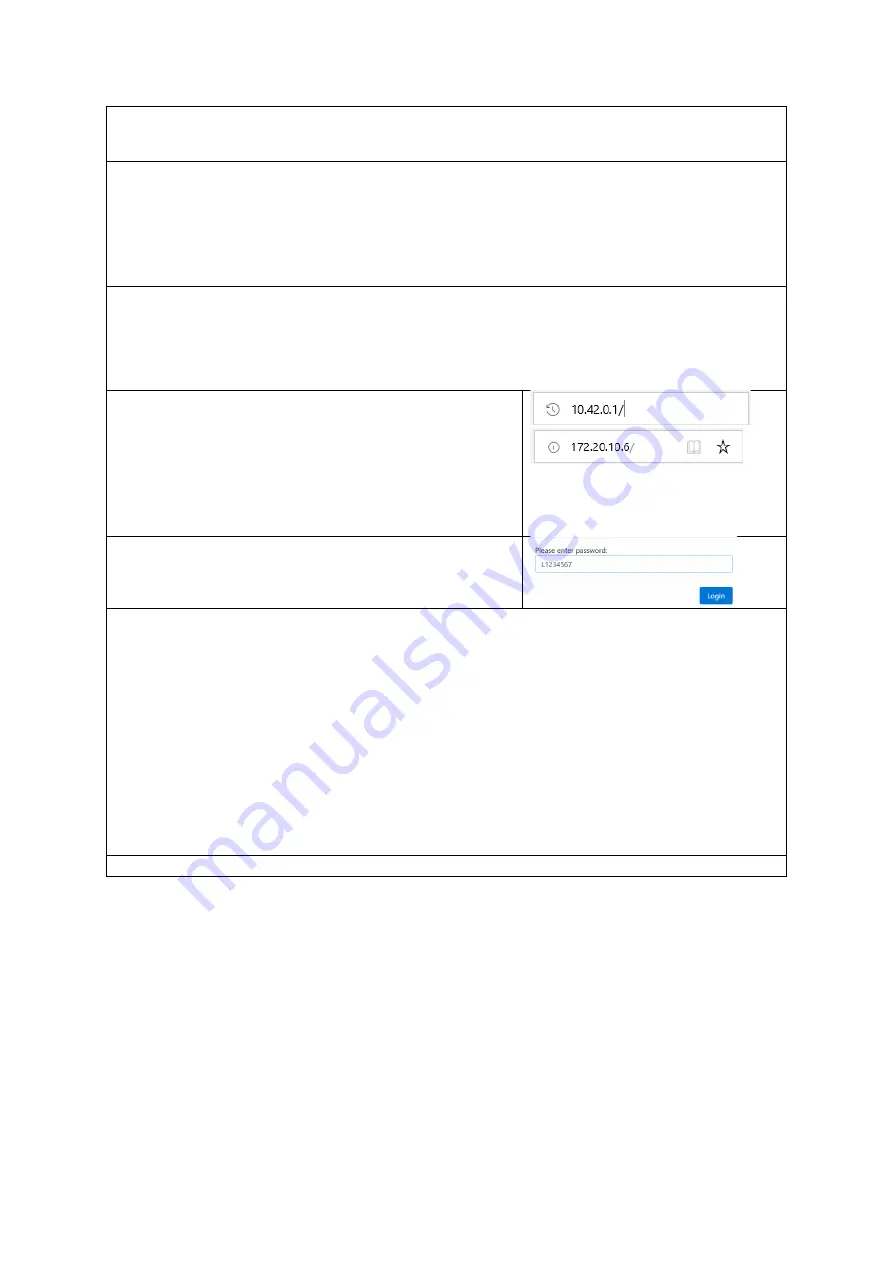
Enter the IP address on the address line of 

the browser. (The IP address is on the 

display of the Dobby.) 

 or 


If the device has not previously been connected 

via WiFi, the Dobby password will be asked for.  

This password is displayed on the Dobby display. 


If the network connection is dropped, the text "No connection" will be displayed. 

Once the network is available again, the connection will be automatically restored. 

You may need to refresh the weaving screen by tapping the address line again. 

Next, you will need to reopen the weave file. The last woven pick is always 

remembered by the Dobby. 
If the Dobby fails to reconnect, turn off the Dobby and turn it back on again after 

about a minute. If there is no connection to the home network, check whether other 

devices in your home also have a network problem. 
 

In exceptional cases, it may be necessary to do a factory reset on the Dobby (refer 

to the Dobby 2.0 Installation Manual) to rebuild the network connection. 

Next step: 

Lift Plan


(page 8) 

Summary of Contents for Megado Computer Dobby 2.0

Page 1: ...Dobby 2 0 Web Interface Manual Version 2 2 ...

Page 2: ...pen Lift Plan from USB Stick or Dobby 2 0 Internal Storage 10 Edit Lift Plan 11 Edit Display Overview 11 Edit New or Existing Weaving Patterns 11 Save Weaving Pattern Save File 13 Weft Color 13 Weaving with the Dobby 14 Enable weaving mode 16 Navigate 16 Plain Weave 17 Sound Signal Chimes During Weaving 19 Unweave 19 File Manager in Local Folder or on USB 20 Move a File from USB Local Folder 20 Se...

Page 3: ...each pick of the weaving pattern These instructions are indicated by the English term lift plan The web interface software allows you to enter and modify a lift plan but you can also import a lift plan that you have created using weaving software One of the great advantages of the web interface software is that it is independent of the computer or operating system If new software versions are avai...

Page 4: ... you can find tips free Dobby patterns information about software updates and ask questions When registering you will need the serial number of the Dobby This is on the label under the solenoid NOTE Write down your serial number as you will need it in any software upgrade process and its not visible when the dobby is mounted on the loom How to Use this Manual Step by Step Learning In this manual y...

Page 5: ...Overview of Features of the Dobby Web Interface Version 2 2 Weave Dobby 2 0 reads the lift plan of the weaving pattern Change the direction of the active pattern Go to a specific pick A solenoid power activation on off slide Unweave history file A sound signal at a specific interval and or at the end of a pattern repetition and or at a color change Toggle between pattern and plain weave weaving Th...

Page 6: ...n weave files from internal storage or from USB stick Store weaving files on internal storage or on USB stick Copy rename and delete files from internal storage Settings Find available WiFi network Connect to WiFi Network Change Dobby 2 0 Password Set the number of shafts in use Plain weave setting Set color palette Setting sound signals Software update from a USB stick ...

Page 7: ...rsion 2018 Dobby display after update software version 2 2 New LouetWifi Wirelessly connected to iPhone hotspot or any other local wifi Make the connection to LouëtWifi At first usage the IP address 10 42 0 1 will be displayed on the Dobby display 1 Go to your tablet or computer s wireless Network Settings 2 Select from the list of available networks Louetwifi 3 Enter the Dobby password 4 Select C...

Page 8: ...web interface screen is still open from the previous session refresh the screen 3 Enter the IP address on the address line of the browser The IP address is on the display of the Dobby or If the device has not previously been connected via WiFi the Dobby password will be asked for This password is displayed on the Dobby display If the network connection is dropped the text No connection will be dis...

Page 9: ...5 Power slide green on solenoids active 6 Previous and Next buttons 7 Unweave slide Lift plan in edit mode function editing weaving pattern 1 Button Edit green 2 All programmed picks boxes are black for shafts that rise With the web interface software you can import weaving patterns lift plans from a pre made pattern file without commercial weaving software There are also websites where you can do...

Page 10: ...ere are any changes made to the open weaving file that have not yet been saved you will receive the notification Current file not saved a Select New if you want to ignore the changes An empty lift plan will open b If you want to save the changes to the open file select Save The main screen will be active again 4 Follow the instructions on page 13 Empty lift plan There are three ways to open a file...

Page 11: ...s for the Dobby from a USB stick onto the Dobby computer s internal storage or you can open the file directly from the USB stick The advantage of using a USB stick for the weaving files is that you can better organize your files with folders The internal storage in the Dobby computer is labeled Local It is not possible to create your own folders to organize the files We do not recommend using the ...

Page 12: ...tern black is selected will be raised i Active pick j Change active pick up or down k Insert new line before the active line l Delete active line m Color bar indicator weft color Editing a pattern is easier on a computer with a mouse than on a touchscreen tablet You can simultaneously connect your computer s web browser and your tablet to the Dobby Follow the instructions on page 7 to add an addit...

Page 13: ...t on or off This is a pattern editing rule The shaft numbers are displayed at the top of the screen A black box marks a shaft to be lifted In this example pick 10 is displayed shafts that will be lifted are 3 5 7 8 11 15 19 23 27 31 Navigation There are always only 20 lines of pattern on the screen You can navigate through the pattern in different ways Select button Up or Down Select the box with ...

Page 14: ...he weaving pattern the box changes to red If you just started with a new weave pattern the text is unnamed File 1 Select 2 Select Save 3 Select Internal or USB for USB you need to put a USB stick in one of the USB ports 4 Optionally select the folder where you want to save the pattern only applicable when using a USB stick 5 Type the file name 6 Select the Save button Weft Color You can change the...

Page 15: ...ting 6 Select choose 7 Select close settings 1 open settings 2 3 4 close settings Weaving with the Dobby The main function of the Dobby web interface is to weave a pattern with the Dobby This section explains all the features 1 The weaving process is in an endless repetition of the weave pattern It is possible to get a sound signal at the end of every repeat 2 You can change the active pick by Jum...

Page 16: ...that have been woven weaving history of this session software will remember the last 1000 woven picks d Change the direction reverse e Switch to Plain or Pattern mode f Access to File Management Open Save g File name of open weave pattern h Open Settings screen plain weave definition set sound signals number of shafts ...

Page 17: ...t If the Dobby has not been active for a minute it goes into idle mode where the solenoids go into the off position This is to protect the Dobby from overheating Either slide the power button or depress the treadle again the active pick which is next pick after the last woven pick becomes active again Navigate Next and Previous These buttons are used to navigate to a specific pick You can use it t...

Page 18: ...direction woven picks 1 2 3 4 The last woven pick is 4 On the active line pick number 5 is ready 2 Select the Direction button The direction changes from forward to backward You can see the order of the picks above the active line if you are weaving in forward or backward direction The active weaving line will now display pick number 3 Contrast this operation with the Unweave function where the la...

Page 19: ...pen settings 2 Edit the plain weave definition by selecting the boxes in the two pick lines 3 Select close settings 1 open settings 2 Edit 3 close settings Save a plain weave definition 1 Start with a new lift plan see page 9 Enter the two plain weave pick definitions in Summer and Winter Save this pattern Tip Give a name starting with plain for example Plain 16s summer winter Plain weave definiti...

Page 20: ...nge to a specific color 1 open settings 1 Select one or more of the signal options 1 Click the options you want to switch to 2 close settings Unweave When starting a new weaving session when opening an existing or new weaving file the weaving history is still empty As soon as you weave the lines under the active weaving area are filled with the history The last 1000 woven picks are retained Once t...

Page 21: ... the Local folder File Manager in Local Folder or on USB 1 Select 2 Select File 3 Select either Delete Copy Rename 4 Depending on what you select you ll get another follow up screen to enter the file name 5 Select Close to exit the file management screen Move a File from USB Local Folder 1 Open the source file from USB stick Select Select Open Select USB Select File the weaving pattern will open o...

Page 22: ... yet been discussed are explained more extensively below Settings Overview 1 WiFi Connection 2 Current software version 3 Close screen settings back to main screen 4 Dobby via WiFi connection with home network Scan Network Wireless Password Connect 5 Dobby change password Dobby 2 0 Password Change Password 6 Shafts Number of shafts visible in the main screen 7 Plain open and change Setting plain w...

Page 23: ...et adapter supplied with your dobby 1 Plug one end of your ethernet cable into a port in your router 2 Plug ther other end of your ethernet cable into the USB ethernet adapter 3 Plug the USB end of your the USB ethernet adapter into one of the Dobby s USB ports 4 If your ethernet cable is too short move your Dobby to your router Remember to bring the power cables for the Dobby plug the cables in a...

Page 24: ...Dictionary The functionality of the Dobby is described in the installation manual You can download a current and comprehensive version from the Dobby 2 0 user page on www louetdobby nl Here is a glossary for the terms we use to describe the Louet Dobby functionality Dobby Device PC or tablet iPad or Android that you use to connect to the Dobby IP Address The address of the device on the network Th...

Page 25: ... format is supported by all third party weaving software ProWeave Fiberworks PixeLoom etc and is also used by Dobby 2 0 enabling you to exchange drafts between weaving software programs and the Dobby Each weave pattern file with the lift plan for the Dobby are stored in a WIF file This is a computer file type that can be created and read by all weaving software The weave pattern in the WIF file mu...

Page 26: ... as a WIF and in lift plan format Most weaving software automatically converts a pattern file into lift plan when the user asks to weave You need to specifically select Lift plan mode When you save the file be sure to go Save As and then change the file type to WIF as the default format is that of your weaving software 4 Patterns you download from the internet may be WIF files but may not be in li...

Reviews: