


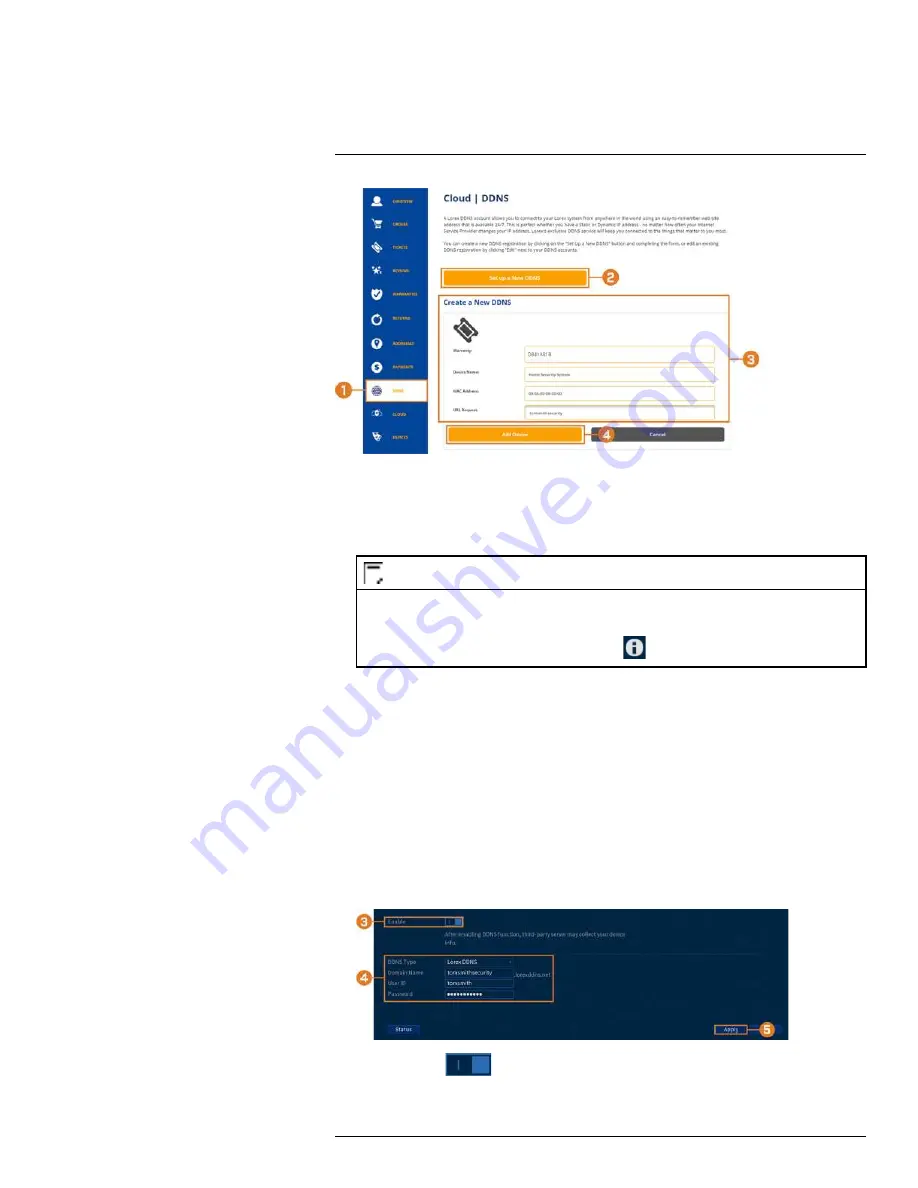
1. From your Lorex account, click the
DDNS
tab.
2. Click
Set up a New DDNS
.
3. Select your recorder warranty from the dropdown next to
Warranty
. Enter the rest of your
product information.
NOTE
• The
Device Name
can be any name of your choice (for example, “Store Security System”).
• You can find your recorder’s
MAC Address
in the system information window on the recorder. From the
Live View display, right-click and click
Info
, or click
on the Navigation Bar.
4. Click
Add Device
.
Once submitted, your DDNS account information will be summarized under
My DDNS Devi-
ces
. Make a note of your DDNS
URL
,
Username
and
Password
, as they will be needed to
complete DDNS setup.
20.5 STEP 5: Enable DDNS on the Recorder
Enter your DDNS information into the menu of your recorder. You can find the information refer-
enced below on your My Lorex account, or on the confirmation email sent to you after registering
for DDNS service.
To configure DDNS in the recorder:
1. From the Live View display, right-click to open the Quick Menu, then click
Main Menu
.
2. Click
NETWORK
, then click the
DDNS
tab.
3. Click to enable (
) DDNS connectivity.
#LX400111; r. 2.0/56089/56100; en-US
98


