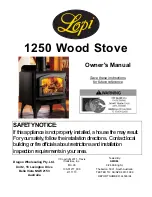
Lopi 1250 Republic Owner'S Manual Download Page 1


1250 Wood Stove 


Owner's Manual 


Save these instructions  

for future reference 


SAFETY NOTICE:  

If this appliance is not properly installed, a house fire may result.  
For your safety, follow the installation directions.  Contact local 
building or fire officials about restrictions and installation 
inspection requirements in your area. 


Dragon Wholesaling Pty. Ltd. 

Unit 2, 16 Lexington Drive 

Bella Vista NSW 2153 

Australia


 Copyright 2011, Travis 

Industries, Inc. 

$10.00 

100-01277_000 

4111110 

Tested By: 

AMDEL 


8/26 Stirling St. 

Thebarton, 5031, South Australia 

TESTED TO: AS/NZS 4013:1999 

REPORT NUMBER: L4506/94 

Summary of Contents for 1250 Republic

Page 1: ...iondirections Contactlocal buildingorfireofficialsaboutrestrictionsandinstallation inspectionrequirementsinyourarea Dragon Wholesaling Pty Ltd Unit 2 16 Lexington Drive Bella Vista NSW 2153 Australia...

Page 2: ...operation of your new appliance an easier and more enjoyable experience We offer our continual support and guidance to help you achieve the maximum benefit and enjoyment from your appliance Important...

Page 3: ...te Air Control Settings 17 Ash Removal 17 Optional Blower Operation 18 Re Loading the Stove 18 Overnight Burn 18 Normal Operating Sounds 18 Hints for Burning 19 Selecting Wood 19 Why Dry Wood is Key 1...

Page 4: ...perature appliance Young children should be supervised when they are in the same room as the appliance Keep furniture drapes curtains wood paper and other combustibles a minimum of 36 914mm away from...

Page 5: ...ges to the appliance to increase combustion air Maintain the door and glass seal and keep them in good condition Avoid placing wood against the glass when loading Do not slam the door or strike the gl...

Page 6: ...ating Capacity Up to 160 sq meters Maximum Burn Time Up to 8 Hours Heating capacity will vary depending on the home s floor plan degree of insulation and the outside temperature It is also affected by...

Page 7: ...install your stove If you install the stove yourself your authorized dealer should review your installation plans Check with local building officials for any permits required for installation of this...

Page 8: ...officials Stove must be placed so that no combustibles are within or can swing within e g drapes doors 36 914mm of the front of the stove If the stove is placed in a location where the ceiling height...

Page 9: ...c roof closet or any other concealed space use listed UL 103 HT chimney see Chimney Requirements for details DO NOT USE CONNECTOR PIPE AS CHIMNEY The chimney connector should be as short and direct as...

Page 10: ...sed the draft is adversely affected Additional chimney height may be required to boost draft Figure 5 Drafting Performance This appliance relies upon natural draft to operate External forces such as w...

Page 11: ...rage unventilated crawl space Requires the optional outside air connector or pedestal Air duct maximum length is 15 4 57M with a minimum cross section of 16 square inches 10404mm or 6 1 82M with a min...

Page 12: ...chimney manufacturer s instructions and clearances for floor penetrations A ceiling support is required an attic insulation shield is required where insulation is present Insulation Minimum 15 4 57M M...

Page 13: ...uctions and clearances for roof penetrations A storm collar and flashing are required some require a radiation shield Must Maintain Stove and Connector Clearances Follow the chimney manufacturer s ins...

Page 14: ...Liner This type of installation requires a UBC approved masonry connector or a factory built U L Listed wall thimble Chimney connector sections NOTE The chimney must have a clay tile liner If it does...

Page 15: ...tice oil burning off of the interior of the heater This rust stopping agent will soon dissipate Door Gasket The door gasket might adhere to the paint on the front of the heater Leave the door slightly...

Page 16: ...y products specifically designed for stoves follow the manufacturer s instructions carefully If the smoke does not pass up the chimney ball up one sheet of newspaper place it in the center of the fire...

Page 17: ...ral minutes to influence the burn rate When making adjustments you may wish to let the stove burn for 10 minutes to gauge performance Ash Removal Ashes should be placed in a metal container with a tig...

Page 18: ...burn 1 Move the air control to high burn and let the stove become hot burn for approximately 15 minutes 2 Load as much wood as possible Use large pieces if possible 3 Let the stove burn on high for 1...

Page 19: ...less creosote Testing Wood Moisture Split wood stored in a dry area will be fully dry within a year This insures dry wood If purchasing wood for immediate use test the wood with a moisture meter Some...

Page 20: ...ases a small amount of smoke may enter the home Adding more pipe or a draft inducing cap may help Stove Does Not Burn Hot Enough Wood is Wet see the section Selecting Wood on page 19 for details on wo...

Page 21: ...ector over the hearth to catch ash and protect against scratching 3 Open the doors and scoop the ash into a metal container with a tight fitting lid The closed container of ashes should be placed on a...

Page 22: ...ult creosote residue accumulates on the flue lining When ignited this creosote makes an extremely hot fire The chimney and chimney connector should be inspected at least once every two months during t...

Page 23: ...creating odors The optional blower should be vacuumed every year to remove any buildup of dust lint etc Firebrick and Baffle Inspection Use the illustration on page 25 as a reference for checking the...

Page 24: ...s directly The glass gasket and glass clip gaskets insulate the glass to prevent cracking Do not over tighten the glass clips Place the door front side down Insert the glass gasket into the groove alo...

Page 25: ...r Tube Roll Pins 6 98900357 4 Air Tube Retainer Sleeve 3 250 00042 5 Brick 9 x 4 5 un cut 16 251 00000 6 Brick Cut 9 x 2 25 3 251 00001 7 Brick Cut 9 x 1 375 2 251 00018 Floor and Side Firebrick Remov...

Page 26: ...front air tube Make sure to support the baffle after removing the air tubes Lift the four baffle firebricks then lift the baffle deflector up and over its resting position Slide the bricks forward and...

Page 27: ...es Air Channels Convection Chamber Door Assembly Cast Door Latch Assembly Glass Retainers Slider Plate Pressure Plate Ceramic Glass Glass breakage from thermal shock Firebrick Breakage from thermal sh...

Page 28: ...leaners is not covered in this warranty Damage to the surfaces from over firing operation where the steel may glow red is not covered in this warranty 14 TRAVIS INDUSTRIES INC is free of liability for...

Page 29: ...Listing Label 29 Travis Industries 100 01277 4111111 Listing Label The listing label safety label is attached to the back of the stove A copy is shown below...

Page 30: ...99200127 Lopi 99200122 See the instructions included with the pedestal Outside Air Connector Part number 99200139 See the instructions included with the kit Attach each leg to the stove by inserting...

Page 31: ...h the blower Position the blower near the rear of the stove Tuck all excess wire into the blower box making sure it does not contact any moving parts Make sure when installing the blower these wires d...

Page 32: ...rotection Requirements 8 Hearth Stove Positive Connection 13 Heating Specifications 6 Hints for Burning 19 Installation Options 6 Interior or Exterior Masonry Chimney 14 Listing Label 29 Monthly Maint...

Reviews: