Summary of Contents for Compact Elite 350-1

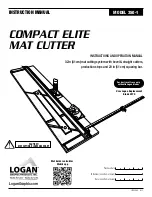
Page 1: ...Compact Elite 32 Mat Cutter from Logan Graphics 350 1 Instruction Manual ...

Page 2: ...D OPERATION MANUAL 32in 81cm mat cutting system with bevel straight cutters production stops and 20 in 51 cm squaring bar Uses Logan Replacement Blade 270 L1992DN2 6 12 Purchase Date ID Number on bottom of board Date on bottom of board LoganGraphic com CAUTION MAT CUTTING BLADES ARE SHARP Mat border calculator Mobile app ...

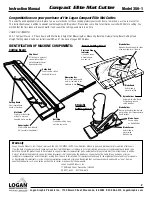
Page 3: ... borne by the purchaser Logan shall not be liable for any damages or losses incidental or consequential direct or indirect arising from the use of this product This warranty extends only to the original purchaser and is not assignable or transferable This warranty is in lieu of all other warranties expressed or implied Be advised that any Logan products purchased as new from an unauthorized dealer...

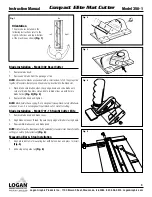
Page 4: ...eplace blade knob and tighten NOTE Blade holder has a spring that is designed to keep blade safely withdrawn when not in use It is not designed to pull blade out of mat after cutting Blade Installation Model 701 1 Straight Cutter Elite 1 Remove blade knob and blade cover 2 Align blade hole over thread Be sure sharp edge of blade is facing down 3 Reassemble blade cover and blade knob NOTE Adjust bl...

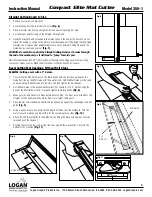
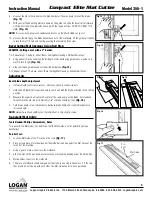
Page 5: ... Without Rail Stops EXAMPLE Cutting a mat with a 2 border 1 To re install the Mat Guide loosen the Black Knobs with the raised edge towards the Guide Rail line up the Mat Guide with the parallel slots Hold the Mat Guide at either end and evenly drop the Mat Guide into the slots and then tighten the black knobs 2 Set the Mat Guide to the desired border width For example for a 2 border align the bac...

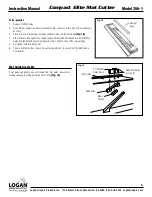
Page 6: ...out Rail Stops Adjustments Bevel blade depth adjustment Increase depth to increase overcuts Decrease depth to reduce overcuts 1 Hold the 302 Bevel Cutter upside down in your hand with the blade activated in the cutting position 2 Measure the exposed amount with a ruler at the same angle as the blade For standard thickness mat board 4 ply 1 4mm only 1 8 of blade should be seen Fig 16 3 Turn blade d...

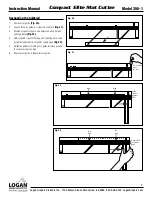
Page 7: ...Rail Fig 18 4 Slide the Mat Guide against the straight edge and the Guide Rail Make sure both the Mat Guide and the Guide Rail are making solid contact on both sides of the straight edge 5 Re tighten the Black Knobs first 6 Then re tighten the four screws Do another parallel test to ensure that the Mat Guide is now parallel Fig 18 Straight Edge Mat Guide 602 Slide 603 Wedge 604 Mat Guide Screws 2 ...

Page 8: ...1 3 Position carpenter square up against squaring bar and under guiderail Fig 22 4 Hold carpenter square firmly against squaring bar read just guiderail parallel to carpenter square edge Fig 23 5 Retighten guiderail making sure guiderail stays parallel to carpenter square edge 6 Replace mat guide reparallel mat guide Fig 20 1 2 3 Loosen three screws one turn Fig 21 Slide Square against Rail Gap Ga...

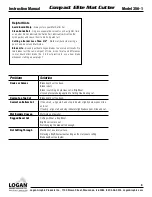
Page 9: ...ting without a Slip Sheet Slip Sheet is worn out Not changing the blade often enough Not Cutting Through Machine not on a level surface Not using a Slip Sheet as least as long as the mat you are cutting Blade depth set too shallow Helpful Hints Avoid Board Warp Always store your Mat Cutter flat Clean Guide Rail Only use evaporative solvents such as lighter fluid or alcohol Do not lubricate the Gui...

Reviews: