Quick Installation Guide
© LINDY ELECTRONICS LIMITED & LINDY-ELEKTRONIK GMBH - FIRST EDITION (Oct 2000)
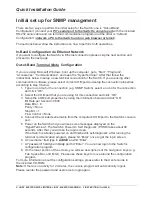
Initial set up for SNMP management
There are two ways to perform the initial setup for the Switch; one is “Out-of-Band
Configuration” (connect your PC’s serial port to the Switch’s console port with the included
RS-232 serial cable and run terminal communication program) and the other is “In-Band
Configuration” (network a PC to the Switch and run web browser or telnet).
The sections below show the instructions on how to perform both operations.
In-Band Configuration via Ethernet Network
If you want to configure the Switch via Ethernet connection please skip the next section and
proceed to the next page.
Out-of-Band Terminal Mode Configuration
If you are using Microsoft Windows, boot up the computer, go to “Start”, “Programs”,
“Accessories”, “Communications”, and open the “HyperTerminal”. After that follow the
instructions below to setup a new terminal connection for the Switch. If you are using other
communication software, please select correct COM port and setup the connection properties
according to step 3 below.
1. Type in a name for the connection (e.g. SNMP Switch), select an icon for the connection,
and click “OK”.
2. Select the COM port that you are using for this connection and click “OK”.
3. Setup the COM port properties by using the information below and click “OK”.
Bit Rate per Second = 9600
Data Bits = 8
Parity = None
Stop Bit = 1
Flow Control = None
4. Connect the included serial cable from the computer’s COM port to the Switch’s console
port.
5. Power on the Switch and you will see some messages displayed on the
“HypertTerminal”. The Switch’s Power On Self Diagnostic (POSD) takes about 90
seconds. After that, you will see the login screen.
If the Switch is already powered on and finished its self-diagnostic, after running the
terminal communication program, please hit “Enter” once to get the login screen.
6. At “username” field type in
admin
and hit “Enter”.
7.
At “password” field type in lindy and hit “Enter”. You are now login to the Switch’s
configuration program.
8. On the lower portion of the screen, you will see descriptions of the navigation keys (e.g.
Tab, Space Bar, and Enter). Please use these keys to move around the configuration
program.
For more information about the configuration settings, please refer to the User’s Guide in
the included CD-ROM.
Note: If there is no activity for 2 minutes, the console program will automatically logout.
Please reenter the password and username to login again.


