background image

P

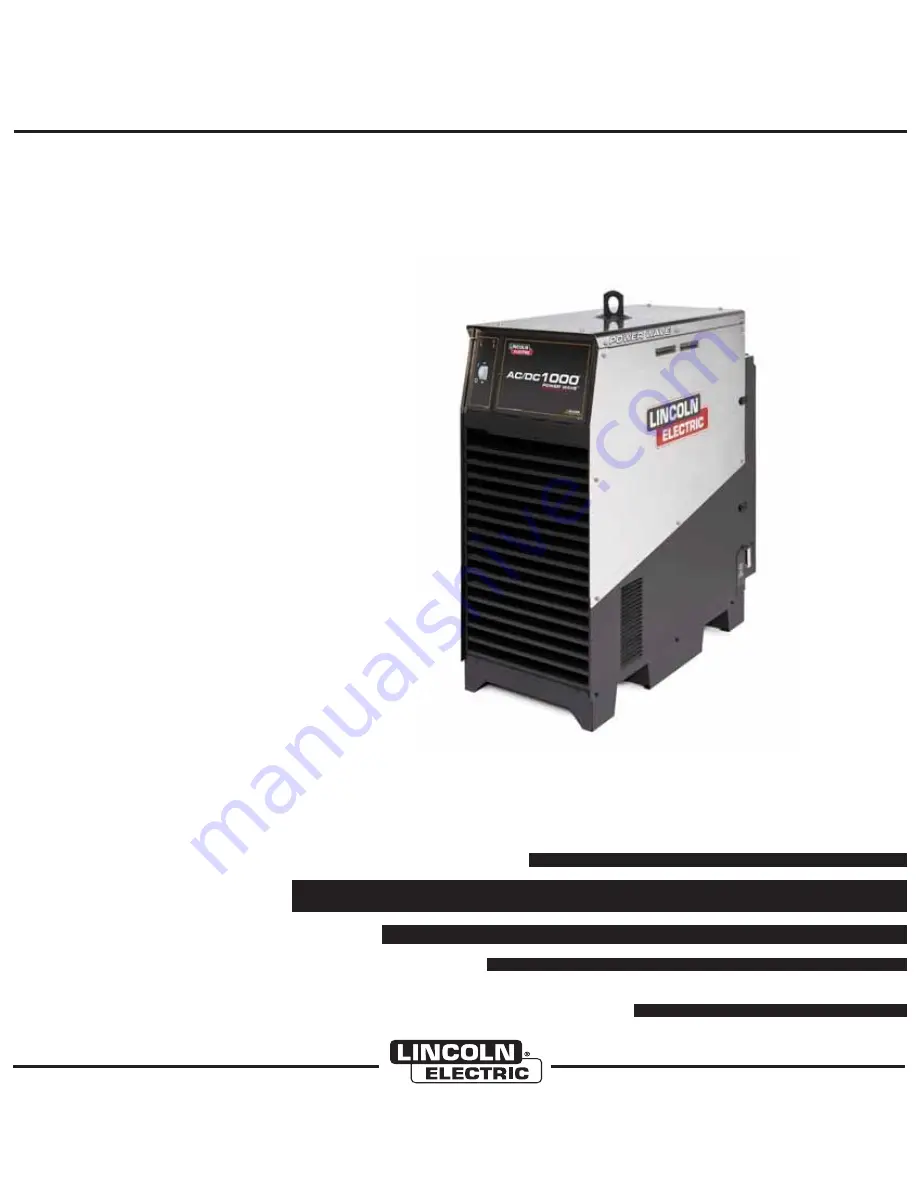
POWER WAVE  AC/DC 1000  SD

OPERATOR

ʼ

S

MANUAL

IM10022-C

November, 2012

For use with machines having Code Numbers:

11592, 11881, 11918

IP 23

Safety Depends on You

Lincoln arc welding and cutting
equipment is designed and built
with safety in mind. However,
your overall safety can be
increased by proper installation
... and thoughtful operation on
your part.

DO NOT INSTALL,

OPERATE OR REPAIR THIS
EQUIPMENT WITHOUT READ-
ING THIS MANUAL AND THE
SAFETY PRECAUTIONS CON-
TAINED THROUGHOUT.

And,

most importantly, think before
you act and be careful.

®

®

Cleveland, Ohio 44117-1199  U.S.A.          TEL: 1.216.481.8100           For Service in U.S. and Canada: Call  1.888.935.3877

FAX: 1.216.486.1751       WEB SITE: lincolnelectric.com       For Non-U.S. Service: Email [email protected]

• World's Leader in Welding and Cutting Products •       • Sales and Service through Subsidiaries and Distributors Worldwide •

Copyright © Lincoln Global Inc.

Summary of Contents for power wave ac/dc 1000 sd

Page 1: ...r part DO NOT INSTALL OPERATE OR REPAIR THIS EQUIPMENT WITHOUT READ ING THIS MANUAL AND THE SAFETY PRECAUTIONS CON TAINED THROUGHOUT And most importantly think before you act and be careful Cleveland...

Page 2: ...KER WEARERS SHOULD CONSULT WITH THEIR DOCTOR BEFORE OPERATING Read and understand the following safety highlights For additional safety information it is strongly recommended that you purchase a copy...

Page 3: ...Never simultaneously touch electrically hot parts of electrode holders connected to two welders because voltage between the two can be the total of the open circuit voltage of both welders 3 i When w...

Page 4: ...eas Avoid welding near hydraulic lines Have a fire extinguisher readily available 6 b Where compressed gases are to be used at the job site special precautions should be used to prevent hazardous situ...

Page 5: ...inflammables 4 Des gouttes de laitier en fusion sont mises de l arc de soudage Se prot ger avec des v tements de protection libres de l huile tels que les gants en cuir chemise paisse pan talons sans...

Page 6: ...ponsibility of the user of the welding equipment to resolve the situation with the technical assistance of the manufacturer In some cases this remedial action may be as simple as earthing grounding th...

Page 7: ...ommendations Welding Cables The welding cables should be kept as short as possible and should be positioned close together running at or close to floor level Equipotential Bonding Bonding of all metal...

Page 8: ...lly important when identifying the correct replacement parts On Line Product Registration Register your machine with Lincoln Electric either via fax or over the Internet For faxing Complete the form o...

Page 9: ...Common Welding Procedures B 7 Overview of the AC DC Submerged Arc Process B 7 Multiple Arc System Considerations B 8 Basic Modes of Operation CC CV B 8 Weld Sequence Start Options End Options Re Strik...

Page 10: ...10 AMPS 115 VAC AT 10 AMPS INPUT CURRENT AMPS 82 79 69 62 55 IDLE POWER WATTS 225 POWER FACTOR RATED OUTPUT 95 EFFICIENCY RATED OUTPUT 86 OUTPUT CONDITIONS 1000A 44V 100 Duty Cycle OPERATING TEMPERAT...

Page 11: ...on this equipment Turn off the input power to any other equipment connected to the welding system at the disconnect switch or fuse box before working on the equipment Do not touch electrically hot par...

Page 12: ...ooling fans slides out for easy access to clean the heat sink fins Removing the four 4 clips and pulling back on the rear portion of the machine will provide access for cleaning the machine and checki...

Page 13: ...line voltage the welder may not come on at all b If the Auxiliary lead is placed in a position lower than the applied line voltage the welder may not come on and fuse in the reconnect area may open I...

Page 14: ...zing connectors for paralleled machines are on the back of the power source The Master controls the AC switching for the arc group and the Slaves respond accordingly See Figure A 3 When employed in a...

Page 15: ...AC DC 1000 SD is backwards compatible with the K2344 2 Power Wave AC DC 1000 in tandem or multi arc systems The K2803 1 and K2344 2 machines cannot be connected in parallel Paralleled machines must be...

Page 16: ...LLATION POWER WAVE AC DC 1000 SD A 7 Work K2683 XX Arclink Cable K2607 1 Cruiser Work Weld Cable Electrode Weld Cable K1811 XX Sense Lead K2803 1 Power Wave AC DC 1000 SD FIGURE A 5 CRUISER CONNECTION...

Page 17: ...r recommended guidelines Connect Install welding cables per recommended Output Cable Guidelines Table A 1 Open the Power Wave AC DC 1000 SD front panel and check the DIP switch settings per the decal...

Page 18: ...K2683 XX Arclink Cable 67 Lead K1785 XX 14 Pin Cable Work K231 XX Contact Nozzle K2803 1 Power Wave AC DC 1000 SD K2814 1 MAXsa 10 K2370 2 MAXsa 22 K1811 XX Sense Lead Electrode Weld Cable Work Weld C...

Page 19: ...at the feeder and the Work Sense Lead 21 from the Power Wave AC DC 1000 SD per recommended guidelines Connect Install welding cables per recommended Output Cable Guidelines Table A 1 Open the Power W...

Page 20: ...814 1 MAXsa 10 K2370 2 MAXsa 22 Electrode Weld Cable K2683 XX Arclink Cable K2683 XX Arclink Cable K1785 XX 14 Pin Cable K2803 1 Power Wave AC DC 1000 SD K1785 XX 14 Pin Cable K1811 XX Sense Lead Elec...

Page 21: ...Install Electrode Sense Lead 67 at each feeder and the Work Sense Lead 21 from the Lead Power Wave AC DC 1000 SD Master per guidelines Connect Install welding cables per recommended Output Cable Guide...

Page 22: ...am Parallel Machines 67 Lead Work Work Weld Cable K2814 1 K2370 2 K2683 XX Arclink Cable K1785 XX 14 Pin Cable K2803 1 AC DC 1000 SD K2803 1 AC DC 1000 SD K1785 XX 14 Pin Cable K1811 XX Sense Lead Ele...

Page 23: ...nstall Electrode Sense Lead 67 at the feeder and the Work Sense Lead 21 from the Lead Power Wave AC DC 1000 SD Master per guidelines Connect Install welding cables to both the master and slave machine...

Page 24: ...CTION DIAGRAM K2683 XX Arclink Cable 67 Lead K1785 XX 14 Pin Cable Work K231 XX Contact Nozzle K2803 1 Power Wave AC DC 1000 SD K2312 2 MAXsa 29 K1811 XX Sense Lead Electrode Weld Cable Work Weld Cabl...

Page 25: ...cables per recommended Output Cable Guidelines Table A 1 Open the Power Wave AC DC 1000 SD front panels and configure DIP switch settings per the decal on the panel Factory setting is Master Lead See...

Page 26: ...minimize the loop area and therefore the inductance of the weld circuit Always weld in a direction away from the work ground connection TABLE A 1 Output Cable Guidelines Electrode Connections Connect...

Page 27: ...configurations that can be used depending on the application In extremely sensitive applications it may be necessary to route cables that contain the sense leads away from the electrode and work weld...

Page 28: ...cent arcs can induce voltage into each others current paths that can be misinterpreted by the power sources and result in arc interference For longitudinal applications connect all work leads at one e...

Page 29: ...A 20 INSTALLATION POWER WAVE AC DC 1000 SD A 20 FIGURE A 13 MULTI ARC CIRCUMFIRENTIAL WELDS POWER SOURCE 2 POWER SOURCE 1 POWER SOURCE 1 POWER SOURCE 2 POWER SOURCE 2 POWER SOURCE 1...

Page 30: ...as the Master for that arc The control cable consists of two power leads one twisted pair for digital communication and one lead for voltage sensing 67 NOTE Connections Between Power Source and Option...

Page 31: ...Do not weld on containers that have held combustibles ARC RAYS can burn Wear eye ear and body protection Observe additional guidelines detailed in the beginning of this manual DEFINITIONS OF WELDING M...

Page 32: ...POSITIVE OUTPUT NEGATIVE OUTPUT 3 PHASE INVERTER INPUT POWER THREE PHASE DIRECT CURRENT OPEN CIRCUIT VOLTAGE INPUT VOLTAGE OUTPUT VOLTAGE INPUT CURRENT OUTPUT CURRENT PROTECTIVE GROUND WARNING or CAUT...

Page 33: ...ory preprogrammed with multiple welding procedures to support all types of submerged arc welding The Power Wave AC DC 1000 SD carries an output rating of 1000 amps 44 volts at 100 duty cycle If higher...

Page 34: ...the machine cools down and the thermal light goes OFF NOTE The Thermal Light may also indicate a problem with the AC Switch portion of the power source See the Troubleshooting Section INPUT POWER SEC...

Page 35: ...emote equipment 6 Output Studs 2 WORK Connection point for welding cable s to the work piece 7 Output Studs 2 ELECTRODE Connection point for welding cables to the Wire Drive 8 Auxiliary Output Recepta...

Page 36: ...BACK COMPONENTS 1 2 3 4 9 5 6 7 8 10 11 12 13 Stud Cover Doors Removed for Clarity COMMUNICATIONS PROTOCOL 115V AC 10 A 10 A 4 0V L15129 1 Device 1 2 3 4 5 8 9 10 11 12 13 B 6 OPERATION B 6 POWER WAV...

Page 37: ...etc First consider the desired welding procedures and the part to be welded Choose an electrode material diameter and flux Second find the program in the welding software that best matches the desired...

Page 38: ...ent and desired Voltage The Power Source Goal is to maintain a constant arc length Drives a constant Current Synergically Controls WFS to Maintain Voltage at the desired Set point Arc Length is propor...

Page 39: ...een the Start and Weld settings END OPTIONS The Downslope Crater Burnback and Restrike Timer parameters are used to define the end of the weld sequence Downslope determines the amount of time it takes...

Page 40: ...ess See Figure B 10 DC OFFSET Refers to shift of the current waveform with respect to the zero crossing Use Offset to control the penetration and deposition of a given process See Figure B 11 FREQUENC...

Page 41: ...ship of 90 should be maintained between adjacent arcs For unbalanced waveforms Avoid switching at same time Break up long periods of unchanged polarity relative to adjacent arcs 500 500 0 Use Phase Re...

Page 42: ...y settings Utility to diagnose Power Wave problems read system information calibrate output voltage and current test sense leads and diagnose feed head issues Can also setup and verify DeviceNet opera...

Page 43: ...ration of the Power Wave AC DC 1000 SD is critical to its operation Generally speaking the calibration will not need adjustment However neglected or improperly calibrated machines may not yield satisf...

Page 44: ...obvious external possibilities that may contribute to the machine symptom Step 3 RECOMMENDED COURSE OF ACTION This column provides a course of action for the Possible Cause generally it states to cont...

Page 45: ...ommunicating normally with all healthy peripheral equipment connected to its ArcLink network Occurs during power up or a system reset and indicates the POWER WAVE is mapping identifying each component...

Page 46: ...o a switch board or output rectifier failure Low voltage on the main capacitors May be caused by improper input configuration or an open short circuit in the primary side of the machine Excess voltage...

Page 47: ...ical or electrical damage is evident when the sheet metal covers are removed 1 No Input Power 2 Fuse F1 in reconnect area may have blown 3 Circuit breaker CB1 on the control panel may have tripped 4 I...

Page 48: ...nly It may not be accurate for all machines covered by this manual The specific diagram for a particular code is pasted inside the machine on one of the enclosure panels If the diagram is illegible wr...

Page 49: ...nly It may not be accurate for all machines covered by this manual The specific diagram for a particular code is pasted inside the machine on one of the enclosure panels If the diagram is illegible wr...

Page 50: ...DIMENSION PRINT F 3 POWER WAVE AC DC 1000 SD L15150 A 19 12 19 71 9 56 9 56 46 60 19 47 7 94 45 75 49 13 61 30 22 63 33 00 WIDTH NEEDED FOR FILTER MAINTENANCE ACCESS FILTER REMOVAL FROM SIDE OF MACHI...

Page 51: ...NOTES POWER WAVE AC DC 1000 SD...

Page 52: ...electrically live parts or electrode with skin or wet clothing Insulate yourself from work and ground No toque las partes o los electrodos bajo carga con la piel o ropa moja da Aislese del trabajo y...

Page 53: ...e Be und Entl ftung des Arbeitsplatzes Mantenha seu rosto da fuma a Use ventila o e exhaust o para remover fumo da zona respirat ria Turn power off before servicing Desconectar el cable de ali mentaci...

Page 54: ...ill contact you by the next business day For Non U S Service Email globalservice lincolnelectric com Cleveland Ohio 44117 1199 U S A TEL 1 216 481 8100 For Service in U S and Canada Call 1 888 935 387...

Reviews: