


6. Software Control - Lightware Device Controller
UCX series – User's Manual
56
Applied firmware package: v1.1.0b7 | LDC software: v2.5.4b3
6.11.3.
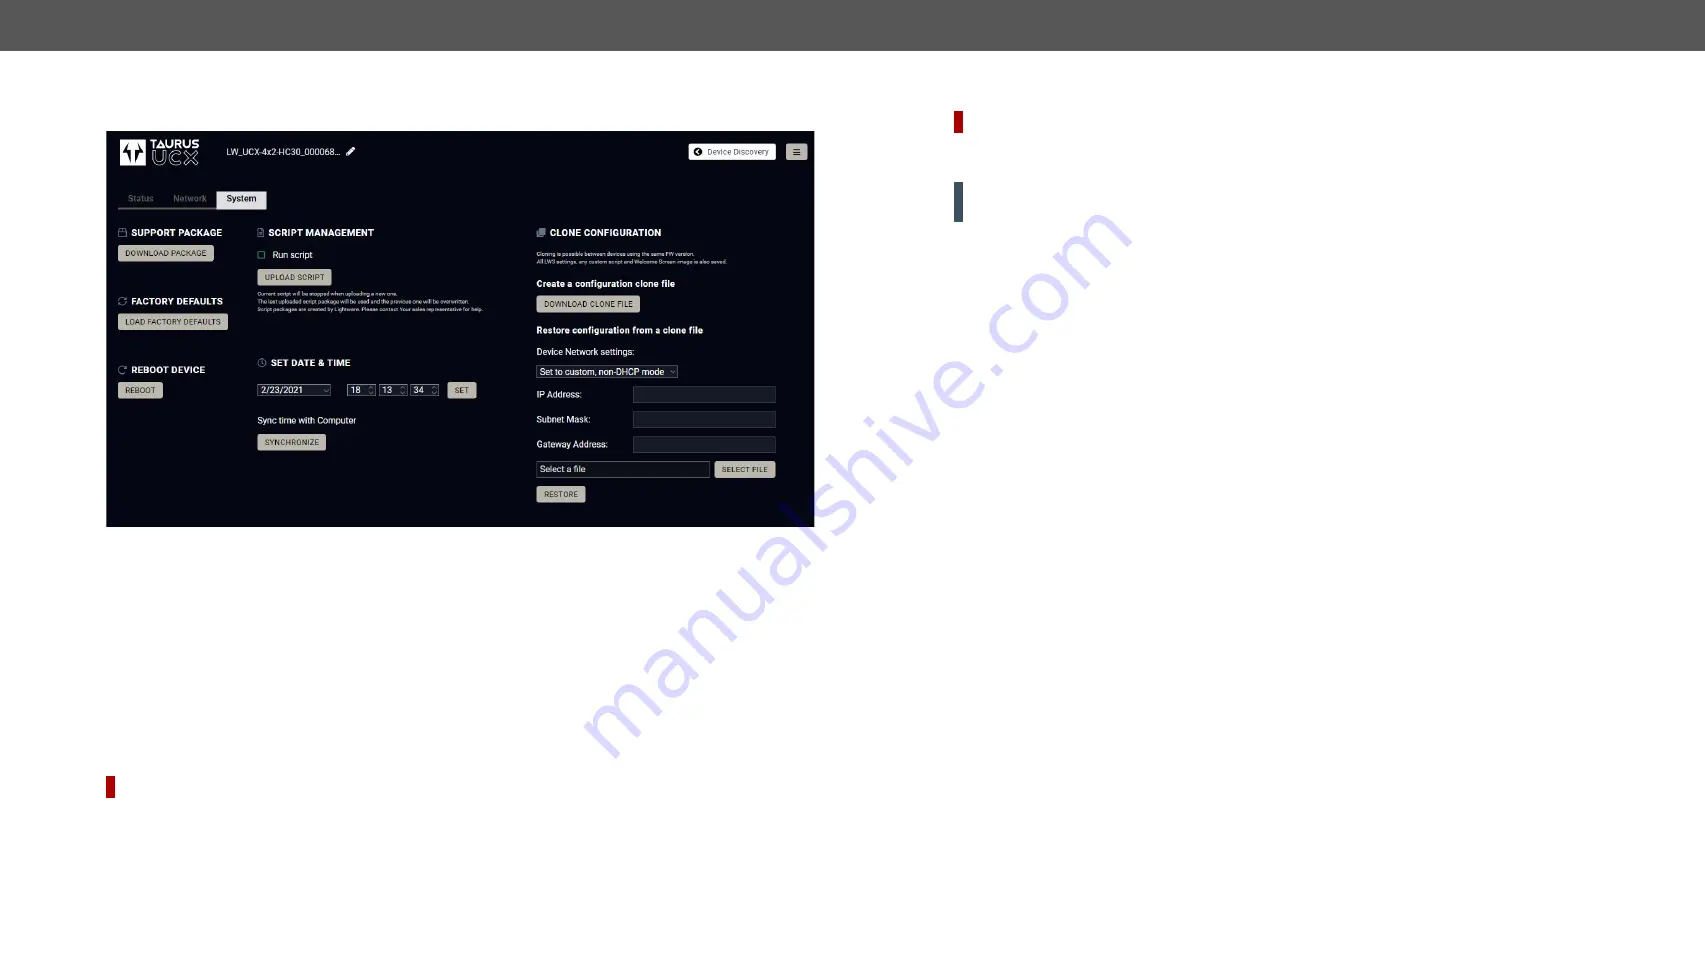
System
System tab in Settings menu
The following functions are available under System tab:
▪
Support package
- saving a log file of the device, helps during the troubleshooting process
▪
Load factory defaults
- recalling factory defaults settings and values. All factory default settings are
section.
▪
Reboot
- rebooting the system.
▪
Set time
- (internal clock) of the switcher which is used for logging events.
▪
Pressing
Sync with Computer
button is a quick and easy way to set the time.
#factory #log
#systemlog
#reboot #restart
Script management
DIFFERENCE:
This feature is available only from FW package 1.0.1b1.
This interface is for running custom zipped file which is made by Lighware for special request.
Put a tick to enable the
Run script
. It means, that the script runs until the uploading another script or disable
this function.
Click
Upload File
to browse a zipped file. It will replace the previous one.
Clone configuration
#new
DIFFERENCE:
This feature is available only from FW package 1.1.0b7.
Clone configuration makes possible saving all the LW3 settings, custom scripts and welcome screen image
and upload to another device.
ATTENTION!
Please note that clone configuration function operates properly when the same firmware
version is installed on the devices.
Create a configuration clone file
Click on the
Download Clone File
button to save the setting to the computer.
Restore a configuration from a clone file
Step 1.
Choose the desired network setting from the drop down menu: Keep unchanged / Restore from
clone file / Set to DHCP mode / Set to custom non-DHCP mode (in this case additional settings
required: IP Address, Subnet Mask, Gateway Address)
Step 2.
Click on the
Select file
button to browse a clone file from the PC.
Step 3.
The clone process will start by clicking on
Restore
button.


