


3. Front Panel Control
Hybrid Modular Matrix Switcher series – User's Manual
26
Applied firmware package: v1.0.0 | LDC software: v2.4.0b3
3.2.2.
System Settings Menu
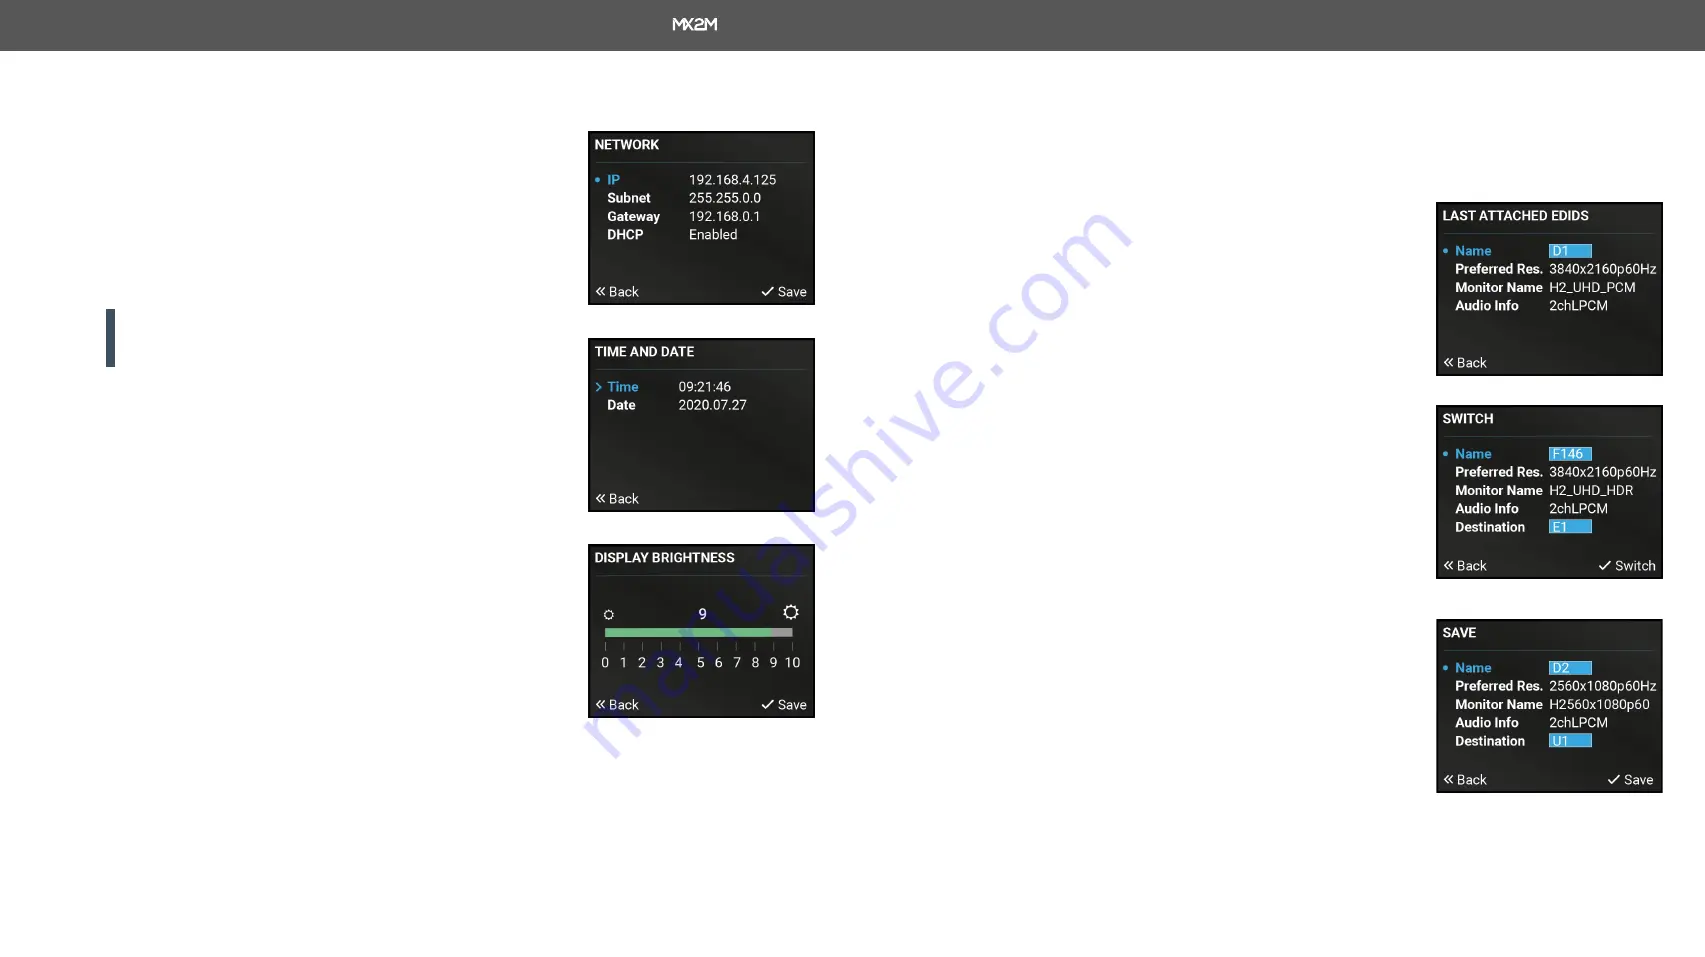
Network
The parameters of the network connection can be set in this submenu.
The first three lines (IP, Subnet, and Gateway parameters) show the
current settings. If the DHCP option is disabled, three more parameters
are listed which can be set for a static IP address:
#network #ipaddress
#dhcp
▪
Static IP
,
▪
Static subnet
,
▪
Static gateway
.
ATTENTION!
If you change the network settings, always press the
Save option under Network menu (not only in the submenu of the
parameter) to apply the new settings.
Time and Date
The internal clock and date can be set in this submenu which is used
for logging events.
#time #date
Restore Factory Defaults
The default settings can be reloaded in this submenu, for details see
#factory
Display Brightness
The brightness of the LCD can be set from 1 to 10 on a scale.
3.2.3.
EDID Menu
Advanced EDID Management is available in the front panel LCD menu which allows to view an EDID, switch,
or save it to the User EDID memory. See more information about EDID technology in
section. The EDID memory structure of the device can be found in
#edid
View
Select the desired EDID memory block:
Factory EDIDs
,
Last attached
EDIDs
,
User EDIDs
, or
Emulated EDIDs
. Select the Name item and press
the knob. Use the jog dial to step between the EDIDs. The following
information can be checked:
▪
Preferred Resolution
▪
Monitor Name
▪
Audio Info
Switch
The submenu looks similar as the View submenu but in this case, the
Destination is also listed. To change an EDID do the following steps:
Step 1.
Navigate to the
EDID / Switch
submenu.
Step 2.
Select the
Source
EDID item and press the knob. Use the jog dial
to select the desired EDID (F1-F148, U1-U100, or D1-D24) and
press the knob.
Step 3.
Select the
Destination
item and press the knob. Use the jog dial
to select the desired EDID memory (E1-E2, All) and press the
knob.
Step 4.
Navigate to the
Switch
option and press the knob.
Save
The EDID of a connected sink can be saved to the User EDID memory
as follows:
Step 1.
Navigate to the
EDID / Save
submenu.
Step 2.
Select the
Source
EDID item and press the knob. Use the jog dial
to select the desired EDID (D1-D4) and press the knob.
Step 3.
Select the
Destination
item and press the knob. Use the jog dial to
select the desired EDID memory (U1-U12) and press the knob.
Step 4.
Navigate to the
Save
option and press the knob.


