5. Software Control – Lightware Device Controller
DA2DVI-HDCP-Pro – User's Manual
13
5.2. Establishing the Connection
Step 1.
Connect the device to a computer via USB.
Step 2.
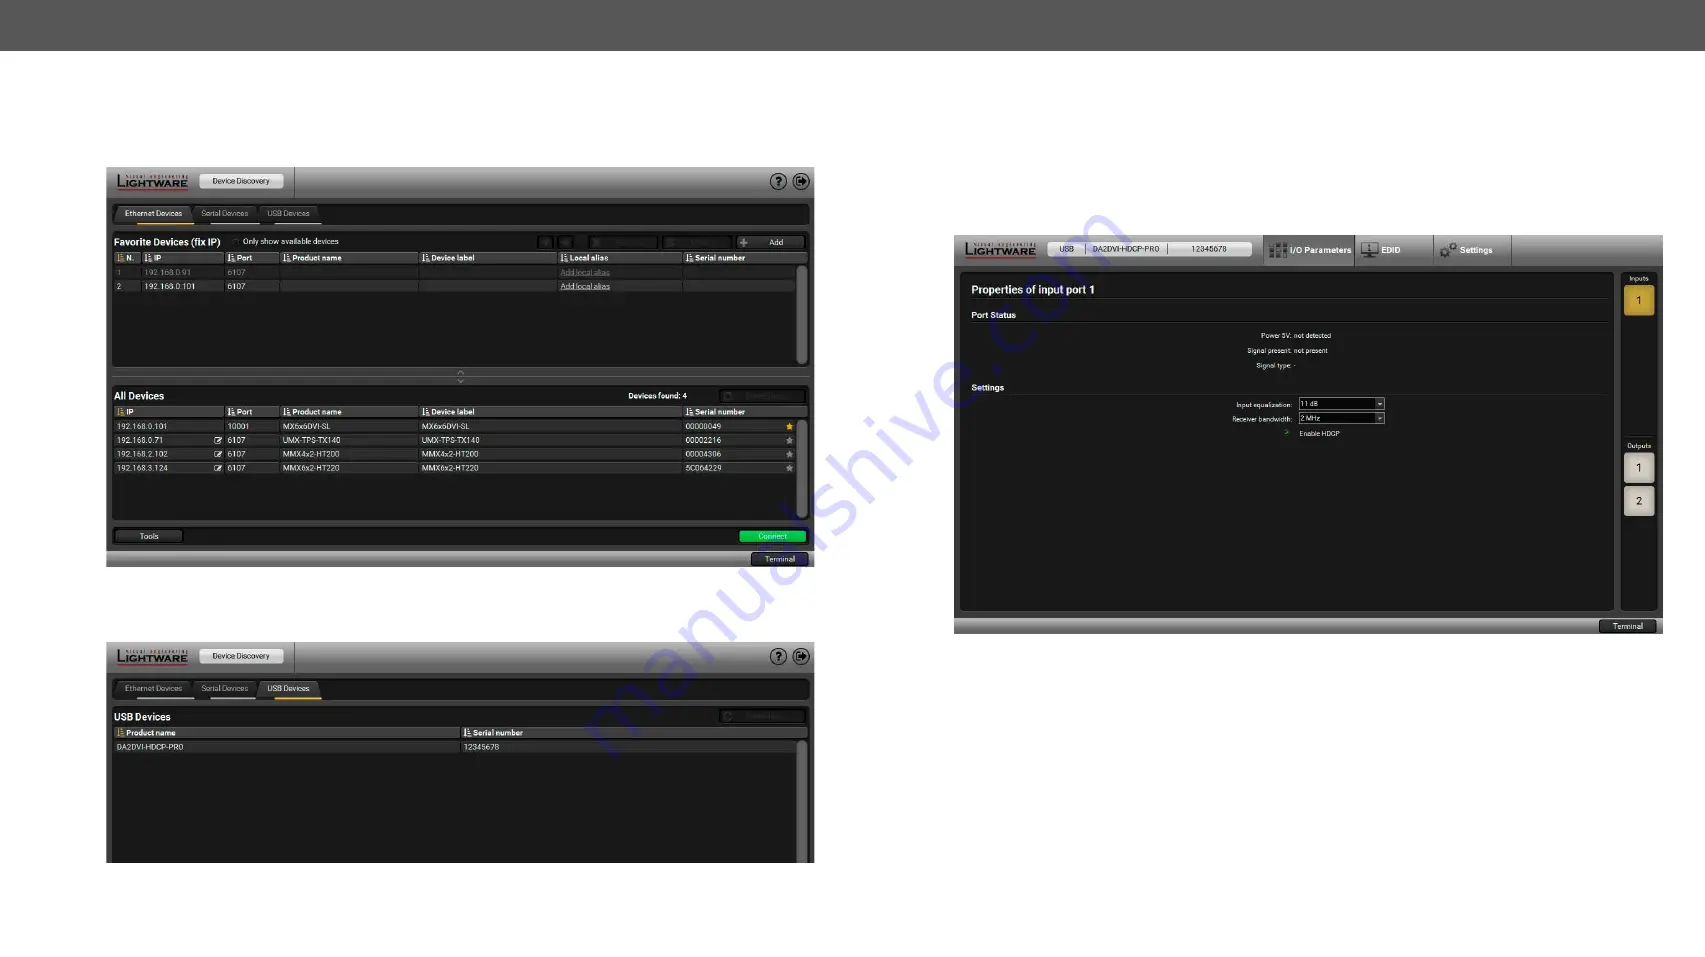
Run the controller software; device discovery window appears automatically.
Device Discovery Window in LDC
Step 3.
Select the USB Devices tab and pick the unit from the discovered USB devices. Double click on the
name of the device or select it and click on the
Connect
button.
The USB Devices Tab in the Device Discovery Window
5.3. I/O Parameters Menu
The most important information and settings are available in the menu. There are three buttons on the right
side of the panel: the input port and the two output ports properties window can be accessed by selecting
them.
5.3.1. Input Port Properties
The state of the incoming signal is displayed.
Input Port Properties Tab
The Port Status parameters (Power 5V, Signal Present, Signal Type) are shown in the panel.
The following settings are available for the input port:
▪
Input equalization
: The device has an built-in automatic cable equalization between 0 and 40 db. User is
able to choose an additional equalization applying 5 db (this is the factory default value) or 11 db for
longer input DVI cables.
▪
Receiver bandwidth
: The factory default setting (2 MHz) gives good results in most cases. Modify only
if encountering problems with input signal.
▪
HDCP enable:
HDCP enable function turns on/off HDCP capability on the input port. For more information
section.


