


19.6 Custom channels
When connected to an
External Traditional
sonar
module such as the CP300 or an
External CHIRP
sonar module such as the CP450C, custom channels
can be created from the sonar module’s default
channels; excluding Auto channels. This enables
some settings to be customized and saved as a
separate channel. These channels can then be
assigned to individual Fishfinder application panes.
Up to 10 custom channels can be created for each
compatible sonar module.
When changed the following settings are saved to
the channel that is currently displayed:
• Sensitivity settings
• Range settings
• Frequency tuning — Only 2 frequency settings
can be saved per transducer / sonar module
combination.
Note:
Performing a Sonar Reset will erase all
custom channels for the current sonar module.
Creating a custom channel
To create a custom channel follow the steps below.
From the Fishfinder application menu:
1. Select
Channel
.
The Channel selection page is displayed.
2. Select the tab for the sonar module you want to
create a custom channel for.
3. Select the
Channel options
icon located next to
the channel that you want to use, or
4. using non–touch controls, select the channel
and then press and hold the
Ok
button until the
options screen is displayed.
5. Select
Copy Channel
.
The on-screen keyboard is displayed.
6. Enter the name you want to assign to your new
channel.
7. Select
SAVE
.
The new channel is now available in the channel
list for the relevant sonar module.
8. Select the new channel to display it in the
Fishfinder application pane.
Changes made to the Sensitivity, Range or
Frequency tuning settings are automatically
saved to the channel displayed.
You can now assign the new channel to a Fishfinder
application pane.
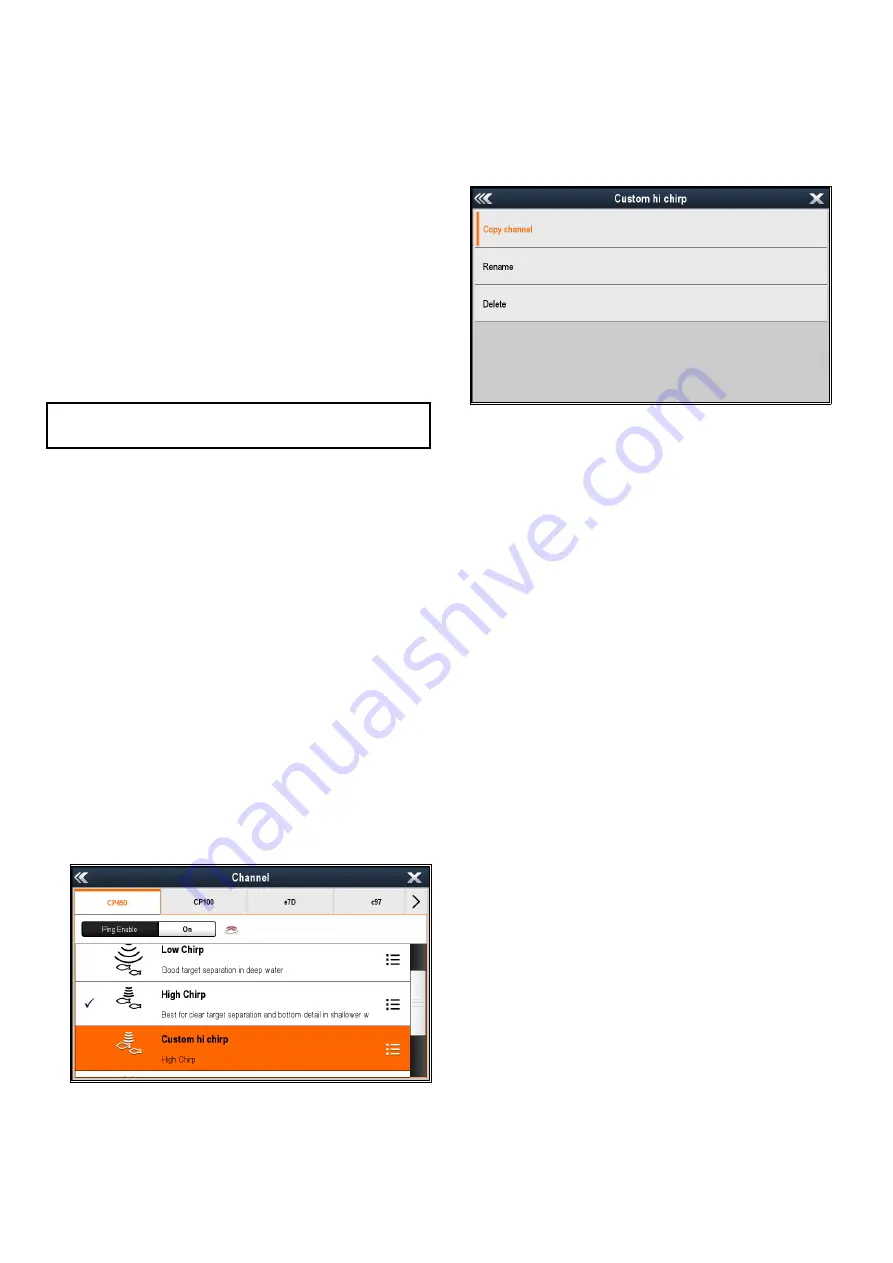
Renaming custom channels
With the Channel selection page displayed:
1. Select the tab for the sonar module that contains
the channel you want to rename.
2. Select the
Channel options
icon next to the
custom channel.
The custom channel options page is displayed
3. Select
Rename
.
The on-screen keyboard is displayed.
4. Enter the new name for the channel.
5. Select
SAVE
.
Deleting custom channels
With the Channel selection page displayed:
1. Select the tab for the sonar module that contains
the channel you want to delete.
2. Select the
Channel options
icon next to the
custom channel.
3. Select
Delete
.
A confirmation dialog is displayed.
4. Select
Yes
.
The custom channel has now been removed from
your system.
272
a Series / c Series / e Series
Summary of Contents for a125
Page 2: ......
Page 6: ......
Page 16: ...16 a Series c Series e Series ...
Page 43: ...13 GPS receiver 14 Thermal camera 15 Wireless connection Planning the installation 43 ...
Page 50: ...50 a Series c Series e Series ...
Page 82: ...82 a Series c Series e Series ...
Page 114: ...114 a Series c Series e Series ...
Page 120: ...120 a Series c Series e Series ...
Page 186: ...186 a Series c Series e Series ...
Page 190: ...190 a Series c Series e Series ...
Page 208: ...208 a Series c Series e Series ...
Page 230: ...230 a Series c Series e Series ...
Page 320: ...320 a Series c Series e Series ...
Page 340: ...340 a Series c Series e Series ...
Page 364: ...364 a Series c Series e Series ...
Page 420: ...420 a Series c Series e Series ...
Page 424: ...424 a Series c Series e Series ...
Page 434: ...434 a Series c Series e Series ...
Page 459: ......
Page 460: ...www raymarine com ...


