LIGHT MY BRICKS 31120, Installation Manual
Introducing the LIGHT MY BRICKS 31120! Enhance your LEGO® sets with stunning lighting effects. For hassle-free installation, refer to the comprehensive Installation Manual available for free download at manualshive.com. Unlock a whole new level of creativity as you bring your LEGO® creations to life with this user-friendly manual.
Share
Download


Reviews:
No comments
Related manuals for 31120

A series
Brand: Raymarine Pages: 464

701
Brand: 3M Pages: 8

M Series
Brand: ZOLL Pages: 3

Mini
Brand: Parata Pages: 40

564
Brand: Haki Pages: 24

VHX-66F-BRO
Brand: Dakota Digital Pages: 5

9010
Brand: KaVo Pages: 49

EX-100
Brand: Easson Pages: 33

Crouse-hinds series
Brand: Eaton Pages: 32
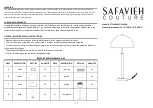
Harvey
Brand: SAFAVIEH COUTURE Pages: 2

SafeLite
Brand: Eaton Pages: 16

EMS-2
Brand: Eaton Pages: 6

21 Series
Brand: Ecco Pages: 17

MKHF
Brand: Vahle Pages: 36

KBH
Brand: Vahle Pages: 20

NXP series
Brand: Vacon Pages: 102

A98
Brand: Ultraflex Pages: 52

80421
Brand: Palmgren Pages: 12


