background image

NOTE: This manual may be subject to updates or changes. Up to date manuals are available through our website at www.lifespanonline.com.au 


Product may vary slightly from the item pictured due to model upgrades


Read all instructions carefully before using this product. Retain this owner’s manual for 
future reference. 

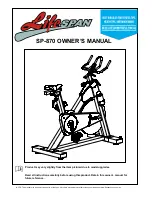
SP-870 OWNER’S MANUAL 

Summary of Contents for SP-460

Page 1: ...nuals are available through our website at www lifespanonline com au Product may vary slightly from the item pictured due to model upgrades Read all instructions carefully before using this product Re...

Page 2: ...2 SP 870 TABLE OF CONTENTS 1 IMPORTANT SAFETY INSTRUCTIONS 3 2 EXPLODED DIAGRAM 5 3 COMPUTER OPERATION 6 4 ASSEMBLY INSTRUCTION 7 5 COMPUTER OPERATION 12 6 EXERCISE GUIDE 18 7 WARRANTY REGISTRATION 20...

Page 3: ...ing remove all within a radius of 2 meters from the machine DO NOT place any sharp objects around the Spinning Bike 5 Position the machine on a clear level surface away from water and moisture Place m...

Page 4: ...use abrasive cleaning articles to clean the machine Remove drops of sweat from the machine immediately after finishing training 13 Always wear appropriate workout clothing when exercising Running or...

Page 5: ...5 SP 870 2 EXPLODED DIAGRAM...

Page 6: ...2 31 Washer d6 12 1 2 9 Screw M8 65 4 32 Computer 1 10 Washer d8 16 1 5 4 33 Computer support join 1 11 Square end cap J100 50 25 4 34 L knob M10 18 2 12 Foot pad join 4 35 Washer d10 40 4 1 13 Rear...

Page 7: ...7 SP 870 4 ASSEMBLY INSTRUCTIONS STEP 1 Secure the front stabilizer 14 and rear stabilizer 13 onto the main frame 26 with the screw 9 and washer 10...

Page 8: ...0 STEP 2 1 Secure the saddle join 3 on the main frame 26 using the L knob 36 2 Secure the saddle tube post 2 on the saddle join 3 using the nut 5 and washer 4 3 Secure the saddle 1 on the saddle tube...

Page 9: ...9 SP 870 STEP 3 1 Secure the up right post 23 on the main frame 26 using the L knob 34 2 Secure the handlebar post 24 on the up right post 23 using the L knob 36 and washer 35...

Page 10: ...SP 870 STEP 4 1 Secure the pedal 7L R on each crank 8L R of the main frame 2 Secure the bottle holder 21 on the main frame 26 with the screw 19 and washer 20 Place the bottle 22 into the bottle holder...

Page 11: ...ort join 39 on the handlebar post 24 by the screw 39 2 Connect the computer wire 38 to the sensor wire 25 and then secure the computer 32 onto the handlebar post 24 using the screw 40 3 Insert the pul...

Page 12: ...r total reset If batteries are replaces all values will reset to ZERO automatically RECOVERY Enable the heart rate recovery function after training FUNCTIONS SCAN Cycles through all functions from TIM...

Page 13: ...to 9999 calories when no value is preset Count down Press the SET button to set a preset calorie goal between 0 and 9990 Calories will count down from the preset value to 0 This data is a rough guide...

Page 14: ...rs the value for a specific category MODE confirms a set value 3 The values RPM SPEED TIME DISTANCE CALORIES PULSE will start increasing as soon as the sensor receives a signal that you are pedalling...

Page 15: ...EED TIME DISTANCE CALORIES PULSE will alternate every 6 seconds 5 The MODE button may also be used to select a single function to be displayed on the main display excluding RPM and SPEED These two fun...

Page 16: ...s will be inactive The Sensor Input will not be available TIME will start to count down from 00 60 The Pulse signal will blink according to the user s pulse When countdown reaches 0 it will show F1 F6...

Page 17: ...utton prior to the countdown reaching 00 00 this will end the function and no result will show NOTE 1 After being inactive for 4 minutes the main screen will turn off and will display the clock automa...

Page 18: ...ess is to make exercise a regular and enjoyable part of your everyday life The condition of your heart and lungs and how efficient they are in delivering oxygen via your blood to your muscles is an im...

Page 19: ...5 to 10 minutes of stretching to cool down This will increase the flexibility of your muscles and will help prevent post exercise problems Workout Guidelines TARGET ZONE THIS IS HOW YOUR PULSE SHOULD...

Page 20: ...tion for any other reasonably foreseeable loss or damage You are entitled to have the goods repaired or replaced if the goods fail to be of acceptable quality and the failure does not amount to a majo...

Page 21: ...t may affect the reading This will cause the pulse reading to be delayed and will take longer to update the display as the heart rate changes Too much noise will create an incorrect reading Medical co...

Reviews: