Smart Parking node
possibility to successfully change the operation mode step-by-step would be to: power down the device
(O
ff
switch),
change the App/Boot switch, press the reset button and then power on the device.
Important
:
Never leave the device set to On and Boot for more time than needed. The bootloader does not provide any sleep
mode and it will waste the battery of the device. So when you finish reconfiguring the device, please set the node
in off state.
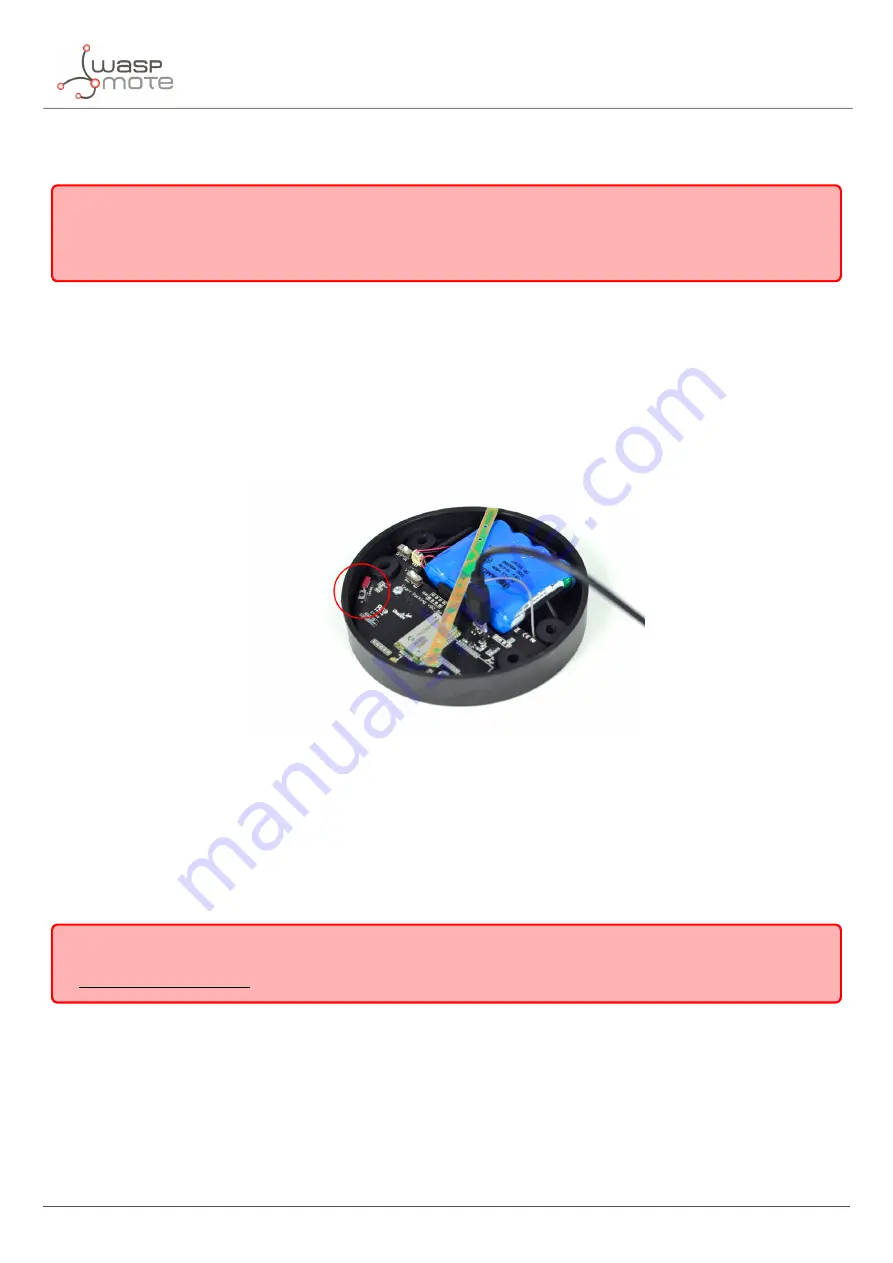
3.4. Reset button
The reset button can be used to re-start the node in the corresponding operation mode (App or Boot).
I
f the node
is set up to "App" (normal operation mode), pressing the reset button will re-start the program execution. On the
other hand, if the node is set up to Boot (con
fi
guration mode), pressing the reset button will re-start the MCU
bootloader for recon
fi
guration or
fi
rmware update.
Figure : Reset button
3.5. Node setup
3.5.1. "Ready to install" state
Important
:
Libelium provides the nodes "ready to install" so the user only needs to install the nodes and follow the
“
”.
The Smart Parking node has a power-on process in order to put the device into a "ready-to-install" state:
‚
Step 1: The switches are set to "App" and "O
ff
" (press the reset button to make sure you discharge capacitors)
‚
Step 2: You power the device on by sliding the switch from "O
ff
" to "On"
‚
Step 3: Both LEDs (red and green) blink rapidly for 5 times
‚
Step 4: Red LED blinks once for 1 second to indicate that the device enters sleep mode for the 1st time. Now
the node is in a "ready to install" state. The customer should install the node on the real scenario and perform
the "Magnet start-up" process.
- 16 -
v7.5
Summary of Contents for Waspmote Smart Parking v2
Page 1: ......
Page 92: ...LoRaWAN Network Server setup Figure Check In to DeviceHQ 91 v7 5 ...
Page 135: ...Deployment and installation Figure Final section of the anchor and screw 134 v7 5 ...
Page 143: ...Safety Guides 11 Safety Guides 11 1 Smart Parking Chemical Fixing Cartridge 142 v7 5 ...
Page 144: ...Safety Guides 143 v7 5 ...
Page 145: ...Safety Guides 144 v7 5 ...
Page 146: ...Safety Guides 145 v7 5 ...
Page 147: ...Safety Guides 146 v7 5 ...
Page 148: ...Safety Guides 147 v7 5 ...
Page 149: ...Safety Guides 148 v7 5 ...
Page 150: ...Safety Guides 149 v7 5 ...
Page 151: ...Safety Guides 150 v7 5 ...
Page 152: ...Safety Guides 151 v7 5 ...
Page 153: ...Safety Guides 152 v7 5 ...
Page 154: ...Safety Guides 153 v7 5 ...


