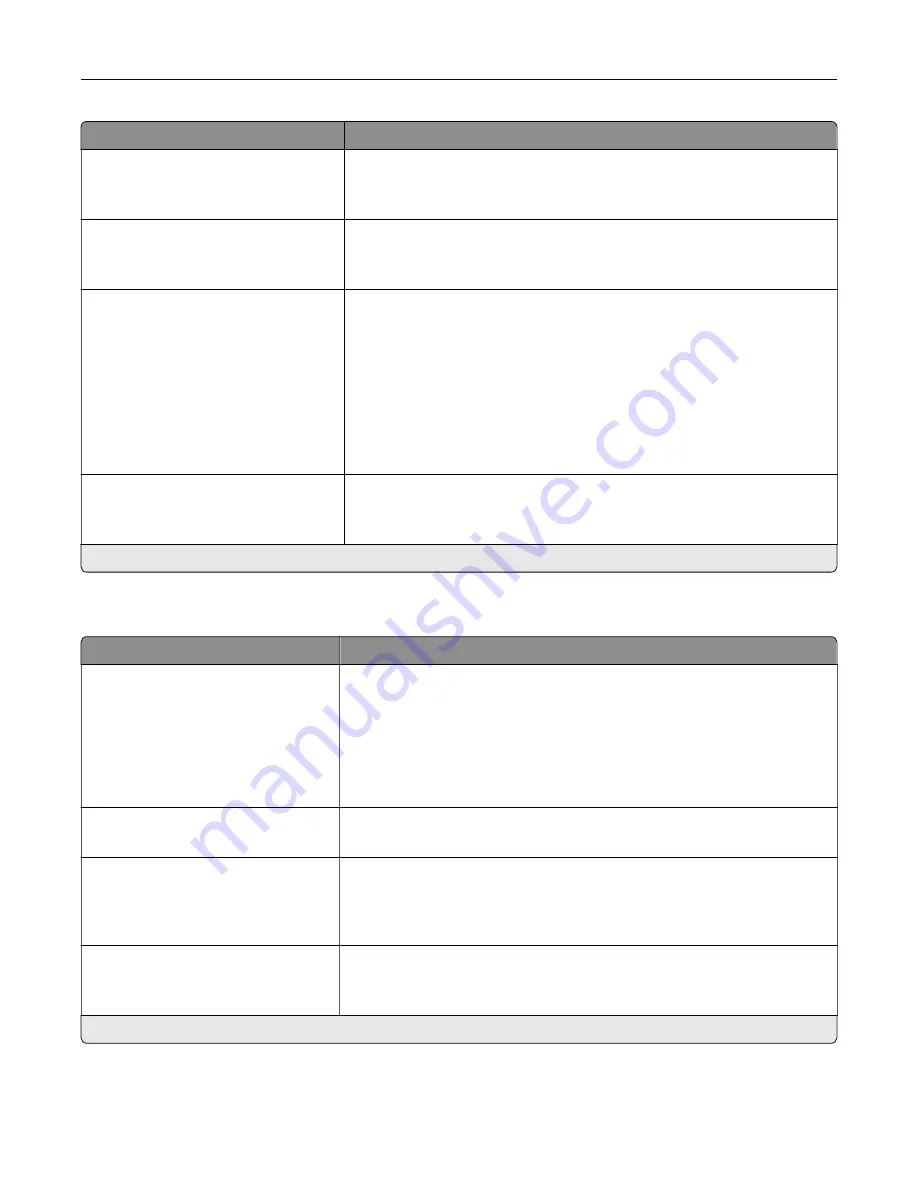
Menu item
Description
Lock PS Startup Mode
Off
On*
Disable the SysStart file.
Image Smoothing
Off*
On
Enhance the contrast and sharpness of low
‑
resolution images.
Note:
This setting has no effect on images with a resolution of 300 dpi or
higher.
Font Priority
Resident*
Flash/Disk
Establish the font search order.
Notes:
•
Resident sets the printer to search its memory for the requested font
before searching the flash memory or printer hard disk.
•
Flash/Disk sets the printer to search the flash memory or printer hard
disk for the requested font before searching the printer memory.
•
This menu item appears only when a flash memory or hard disk is
installed.
Wait Timeout
Off
On* (40 seconds)
Enable the printer to wait for more data before canceling a print job.
Note:
An asterisk (*) next to a value indicates the factory default setting.
PCL
Menu item
Description
Font Source
Resident*
Disk
Download
Flash
All
Select the source which contains the default font selection.
Notes:
•
Disk and Flash appear only when a non
‑
defective, non
‑
protected
hard disk or flash memory that contains fonts is installed.
•
Download appears only if downloaded fonts exist in the printer
memory.
Font Name
[List of available fonts] (Courier*)
Select a font from the specified font source.
Symbol Set
[List of available symbol set] (10U
PC
‑
8*)
Specify the symbol set for each font name.
Note:
A symbol set is a set of alphabetic and numeric characters,
punctuation, and special symbols. Symbol sets support the different
languages or specific programs such as math symbols for scientific text.
Pitch
0.08–100.00 (10.00*)
Specify the pitch for fixed or monospaced fonts.
Note:
Pitch refers to the number of fixed
‑
space characters in a horizontal
inch of type.
Note:
An asterisk (*) next to a value indicates the factory default setting.
Use printer menus
199
Summary of Contents for XC9325
Page 86: ...Set up install and configure 86 ...
Page 87: ...6 Remove the standard tray Set up install and configure 87 ...
Page 90: ...11 Secure the rear part of the optional tray to the printer Set up install and configure 90 ...
Page 94: ...Set up install and configure 94 ...
Page 95: ...6 Remove the standard tray Set up install and configure 95 ...
Page 98: ...11 Secure the rear part of the optional tray to the printer Set up install and configure 98 ...
Page 102: ...Set up install and configure 102 ...
Page 103: ...6 Remove the standard tray Set up install and configure 103 ...
Page 106: ...11 Secure the rear part of the optional tray to the printer Set up install and configure 106 ...
Page 110: ...6 Install the optional tray Set up install and configure 110 ...
Page 111: ...7 Connect the tray connector to the printer Set up install and configure 111 ...
Page 125: ...Installing the working shelf 1 Turn off the printer Set up install and configure 125 ...
Page 134: ...Set up install and configure 134 ...
Page 142: ...12 Close the front door 13 Attach the finisher to the printer Set up install and configure 142 ...
Page 270: ...10 Insert the waste toner bottle until it clicks into place Maintain the printer 270 ...
Page 274: ...7 Insert the new waste toner bottle until it clicks into place Maintain the printer 274 ...
Page 278: ...Maintain the printer 278 ...
Page 282: ...11 Insert the waste toner bottle until it clicks into place Maintain the printer 282 ...
Page 283: ...12 Lock the waste toner bottle 13 Close the door Maintain the printer 283 ...
Page 285: ...3 Insert the new tray insert Maintain the printer 285 ...
Page 287: ...3 Unlock the used fuser Maintain the printer 287 ...
Page 289: ...7 Lock the new fuser 8 Close the door 9 Turn on the printer Maintain the printer 289 ...
Page 291: ...3 Remove the used transfer roller 4 Unpack the new transfer roller Maintain the printer 291 ...
Page 293: ...Replacing the transfer module 1 Turn off the printer Maintain the printer 293 ...
Page 296: ...5 Unlock and then pull out the used transfer module Maintain the printer 296 ...
Page 299: ...10 Insert the waste toner bottle until it clicks into place Maintain the printer 299 ...
Page 300: ...11 Lock the waste toner bottle 12 Turn on the printer Maintain the printer 300 ...
Page 301: ...Replacing the tray roller kit 1 Turn off the printer Maintain the printer 301 ...
Page 303: ...4 Unpack the new tray roller kit Maintain the printer 303 ...
Page 306: ...s 3 Remove the separator roller cover Maintain the printer 306 ...
Page 311: ...4 Insert the new printhead wiper 5 Close the door Maintain the printer 311 ...
Page 312: ...Replacing the 2000 sheet tray roller kit 1 Turn off the printer Maintain the printer 312 ...
Page 314: ...4 Locate and remove the used roller kit 5 Unpack the new roller kit Maintain the printer 314 ...
Page 328: ... ADF glass Scanner glass 3 Close the scanner cover Maintain the printer 328 ...
Page 329: ...Cleaning the tray roller kit 1 Turn off the printer Maintain the printer 329 ...
Page 333: ...Cleaning the ADF roller kit 1 Turn off the printer Maintain the printer 333 ...
Page 334: ...2 Open the ADF top cover 3 Remove the separator roller cover Maintain the printer 334 ...
Page 338: ...Cleaning the 2000 sheet tray roller kit 1 Turn off the printer Maintain the printer 338 ...
Page 379: ...Troubleshoot a problem 379 ...


