


9
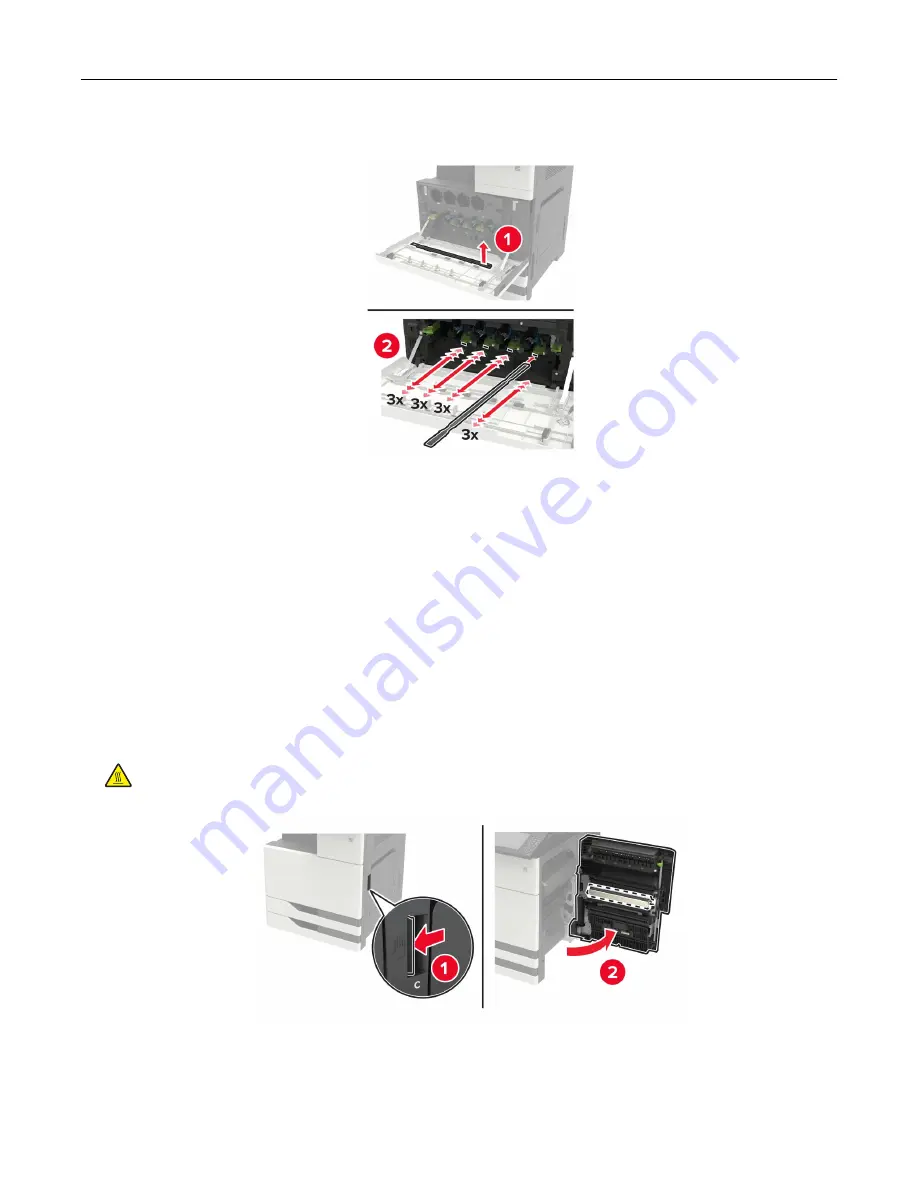
Using the printhead wiper, clean the printhead lens.
10
Insert the paper guide.
11
Secure the transfer belt.
12
Reattach the door stopper.
13
Close the door, and then turn on the printer.
Replacing the transfer roller
1
Open door C.
Notes:
•
Make sure that the door does not hit any cable attached to the printer.
•
If a 3000
‑
sheet tray is installed, then slide the tray to the right to open the door.
CAUTION—HOT SURFACE:
The inside of the printer might be hot. To reduce the risk of injury from a
hot component, allow the surface to cool before touching it.
Maintaining the printer
191
Summary of Contents for XC9225
Page 168: ... Scanner glass Scanner glass pad 3 Close the scanner cover Maintaining the printer 168 ...
Page 176: ...5 Insert the new toner cartridge 6 Remove the waste toner bottle Maintaining the printer 176 ...
Page 181: ...8 Insert the waste toner bottle and then close the door Maintaining the printer 181 ...
Page 211: ... Below the fuser area Duplex area Clearing jams 211 ...
Page 216: ...2 Open door J Clearing jams 216 ...
Page 218: ... Areas H1 and H2 Area H6 Clearing jams 218 ...
Page 222: ...2 Remove the staple cartridge holder 3 Remove the loose staples Clearing jams 222 ...
Page 224: ...2 Remove the staple cartridge holder 3 Remove the loose staples Clearing jams 224 ...
Page 226: ...2 Remove the staple cartridge holder 3 Remove the loose staples Clearing jams 226 ...
Page 280: ...6 Remove the controller board shield Upgrading and migrating 280 ...
Page 283: ...4 Remove the controller board shield Upgrading and migrating 283 ...
Page 289: ...7 Connect the tray connector to the printer 8 Open trays 2 and 3 Upgrading and migrating 289 ...
Page 294: ...9 Remove the stabilizing feet from the tray Upgrading and migrating 294 ...
Page 298: ...17 Secure the tray cable with the clamp Upgrading and migrating 298 ...
Page 305: ...7 Remove the paper guides 8 Attach the sensor cover Upgrading and migrating 305 ...
Page 311: ...8 Attach the finisher to the printer Upgrading and migrating 311 ...


