


Securing the printer
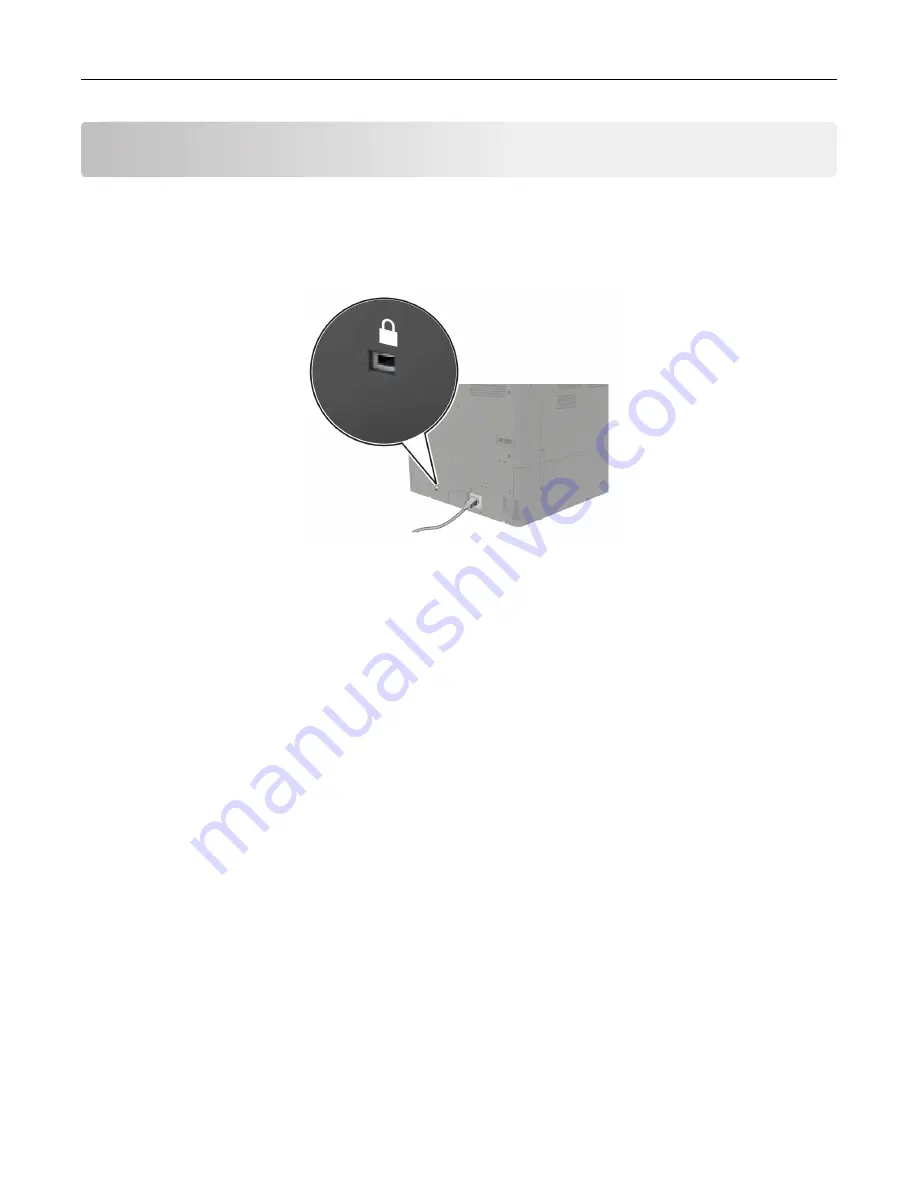
Locating the security slot
The printer is equipped with a security lock feature. Attach a security lock compatible with most laptop
computers in the location shown to secure the printer in place.
Erasing printer memory
To erase volatile memory or buffered data in your printer, turn off the printer.
To erase nonvolatile memory or individual settings, device and network settings, security settings, and
embedded solutions, do the following:
1
From the home screen, touch
Settings
>
Device
>
Maintenance
>
Out of Service Erase
.
2
Select the
Sanitize all information on nonvolatile memory
check box, and then touch
ERASE
.
3
Select
Start initial setup wizard
or
Leave printer offline
, and then touch
Next
.
4
Start the operation.
Erasing printer hard disk memory
1
From the home screen, touch
Settings
>
Device
>
Maintenance
>
Out of Service Erase
.
2
Select the
Sanitize all information on hard disk
check box, and then touch
ERASE
.
3
Select a method to erase data.
4
Start the operation.
Note:
This process can take from several minutes to more than an hour, making the printer unavailable for
other tasks.
Securing the printer
160
Summary of Contents for XC9225
Page 168: ... Scanner glass Scanner glass pad 3 Close the scanner cover Maintaining the printer 168 ...
Page 176: ...5 Insert the new toner cartridge 6 Remove the waste toner bottle Maintaining the printer 176 ...
Page 181: ...8 Insert the waste toner bottle and then close the door Maintaining the printer 181 ...
Page 211: ... Below the fuser area Duplex area Clearing jams 211 ...
Page 216: ...2 Open door J Clearing jams 216 ...
Page 218: ... Areas H1 and H2 Area H6 Clearing jams 218 ...
Page 222: ...2 Remove the staple cartridge holder 3 Remove the loose staples Clearing jams 222 ...
Page 224: ...2 Remove the staple cartridge holder 3 Remove the loose staples Clearing jams 224 ...
Page 226: ...2 Remove the staple cartridge holder 3 Remove the loose staples Clearing jams 226 ...
Page 280: ...6 Remove the controller board shield Upgrading and migrating 280 ...
Page 283: ...4 Remove the controller board shield Upgrading and migrating 283 ...
Page 289: ...7 Connect the tray connector to the printer 8 Open trays 2 and 3 Upgrading and migrating 289 ...
Page 294: ...9 Remove the stabilizing feet from the tray Upgrading and migrating 294 ...
Page 298: ...17 Secure the tray cable with the clamp Upgrading and migrating 298 ...
Page 305: ...7 Remove the paper guides 8 Attach the sensor cover Upgrading and migrating 305 ...
Page 311: ...8 Attach the finisher to the printer Upgrading and migrating 311 ...


