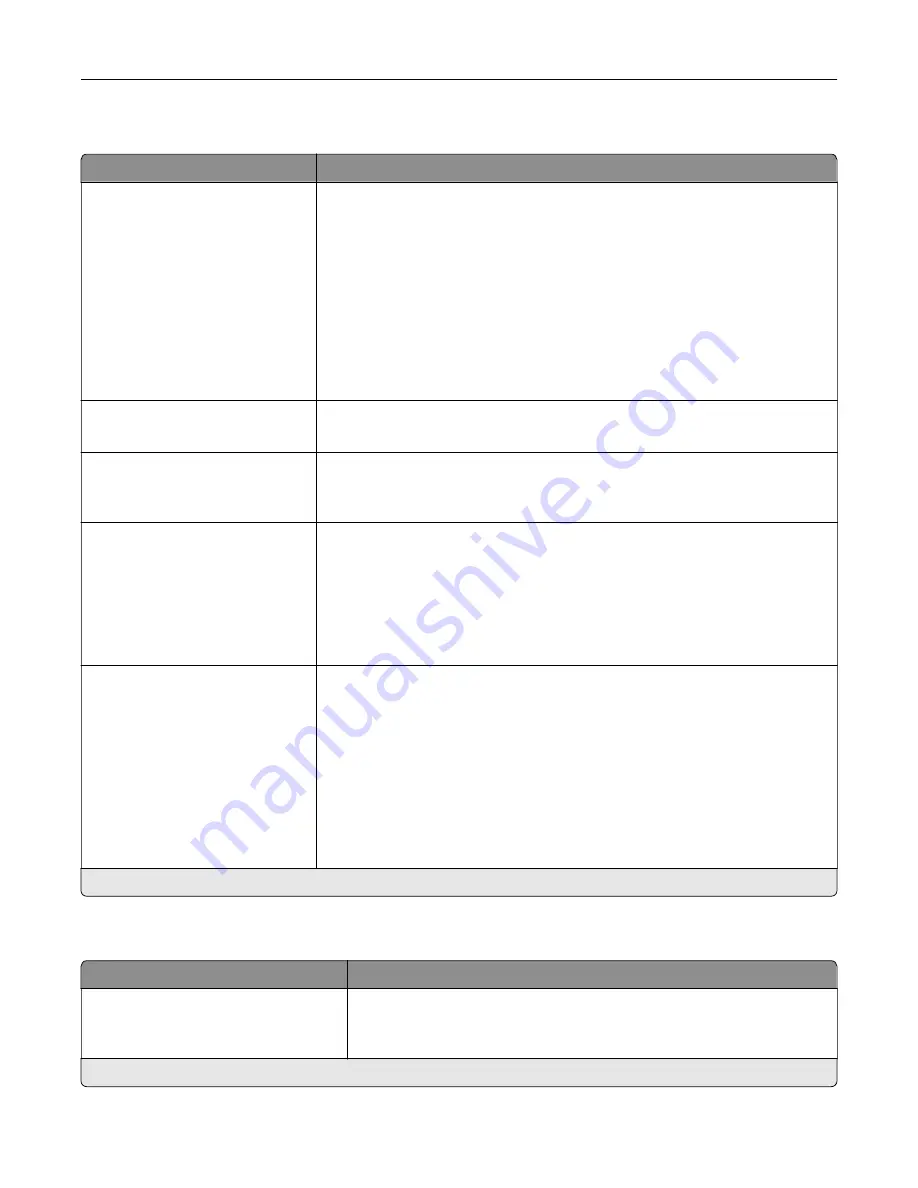
Finishing
Menu item
Description
Staple Job
Off*
1 staple, top left corner
2 staples, left
1 staple, top right corner
2 staples, top
1 staple, bottom left corner
2 staples, bottom
1 staple, bottom right corner
2 staples, right
Specify the staple position for all print jobs.
Note:
This menu item appears only when a finisher is installed.
Staple Test
Start
Determine whether the staple finisher is functioning properly.
Note:
This menu item appears only when a finisher is installed.
Hole Punch
Off*
On
Punch holes along the edge of the printed output.
Note:
This menu item appears only when a multiposition staple, hole punch
finisher is installed.
Hole Punch Mode
2 holes
3 holes
4 holes
Set the hole punch mode for the printed output.
Notes:
•
3 holes is the U.S. factory default setting. 4 holes is the international
factory default setting.
•
This menu item appears only when a multiposition staple, hole punch
finisher is installed.
Offset Pages
None*
Between Copies
Between Jobs
Offset the output of each print job or each copy of a print job.
Notes:
•
Between Copies offsets each copy of a print job if Collate is set to On
[1,2,1,2,1,2]. If Collate is set to Off [1,1,1,2,2,2], then each set of printed
pages is offset, such as all page 1s and all page 2s.
•
Between Jobs sets the same offset position for the entire print job
regardless of the number of copies printed.
•
This menu item appears only when a multiposition staple, hole punch
finisher is installed.
Note:
An asterisk (*) next to a value indicates the factory default setting.
Setup
Menu item
Description
Printer Language
PCL Emulation
PS Emulation*
Set the printer language.
Note:
Setting a printer language default does not prevent a software
program from sending print jobs that use another printer language.
Note:
An asterisk (*) next to a value indicates the factory default setting.
Understanding the printer menus
85
Summary of Contents for XC6152
Page 65: ...5 Touch Scan Here If necessary change the scan settings 6 Scan the document Scanning 65 ...
Page 161: ... Scanner glass pad 3 Open door E Maintaining the printer 161 ...
Page 162: ...4 Wipe the following areas ADF glass in door E Maintaining the printer 162 ...
Page 179: ...3 Remove the pick roller 4 Unpack the new pick roller Maintaining the printer 179 ...
Page 198: ...2 Open door G 3 Pull out the staple cartridge holder Maintaining the printer 198 ...
Page 216: ...2 Open door G 3 Pull out the staple cartridge holder Clearing jams 216 ...
Page 274: ...4 Remove the paper bail 5 Remove the standard bin insert Upgrading and migrating 274 ...


