4
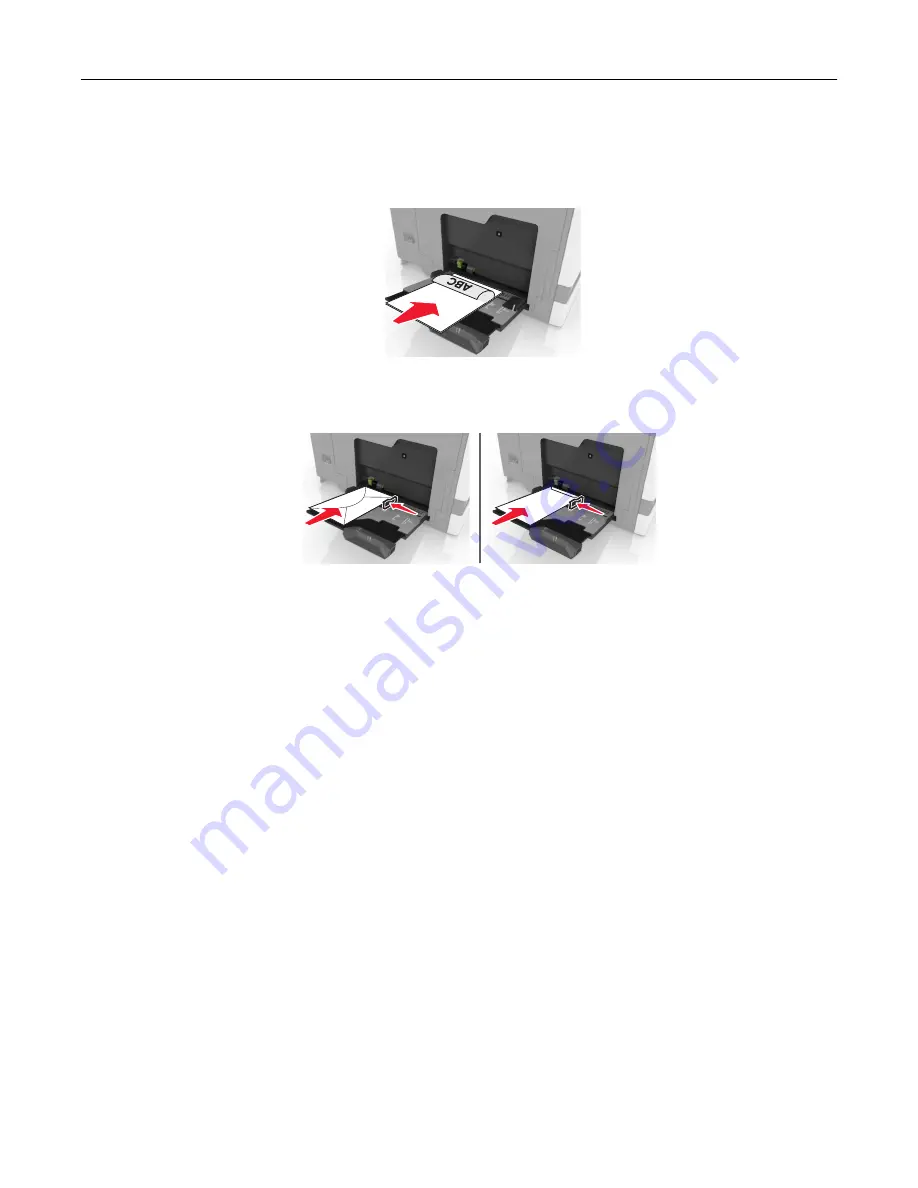
Load the paper.
•
Load paper, card stock, and transparencies with the printable side facedown and the top edge entering
the printer first.
•
Load envelopes with the flap side up and against the left side of the paper guide. Load European
envelopes with the flap side up and entering the printer first.
Warning—Potential Damage:
Do not use envelopes with stamps, clasps, snaps, windows, coated
linings, or self
‑
stick adhesives.
5
From the control panel, set the paper size and type to match the paper loaded in the tray.
Linking trays
1
From the home screen, touch
Settings
>
Paper
>
Tray Configuration
> select a paper source.
2
Set the same paper size and paper type for the trays that you are linking.
3
From the home screen, touch
Settings
>
Device
>
Maintenance
>
Configuration Menu
>
Tray Configuration
>
Tray Linking
.
4
Touch
Automatic
.
To unlink trays, make sure that no trays have the same paper size and paper type settings.
Warning—Potential Damage:
The temperature of the fuser varies according to the specified paper type. To
avoid printing issues, match the paper type setting in the printer with the paper loaded in the tray.
Loading paper and specialty media
30
Summary of Contents for XC6152
Page 65: ...5 Touch Scan Here If necessary change the scan settings 6 Scan the document Scanning 65 ...
Page 161: ... Scanner glass pad 3 Open door E Maintaining the printer 161 ...
Page 162: ...4 Wipe the following areas ADF glass in door E Maintaining the printer 162 ...
Page 179: ...3 Remove the pick roller 4 Unpack the new pick roller Maintaining the printer 179 ...
Page 198: ...2 Open door G 3 Pull out the staple cartridge holder Maintaining the printer 198 ...
Page 216: ...2 Open door G 3 Pull out the staple cartridge holder Clearing jams 216 ...
Page 274: ...4 Remove the paper bail 5 Remove the standard bin insert Upgrading and migrating 274 ...


