Secure the printer
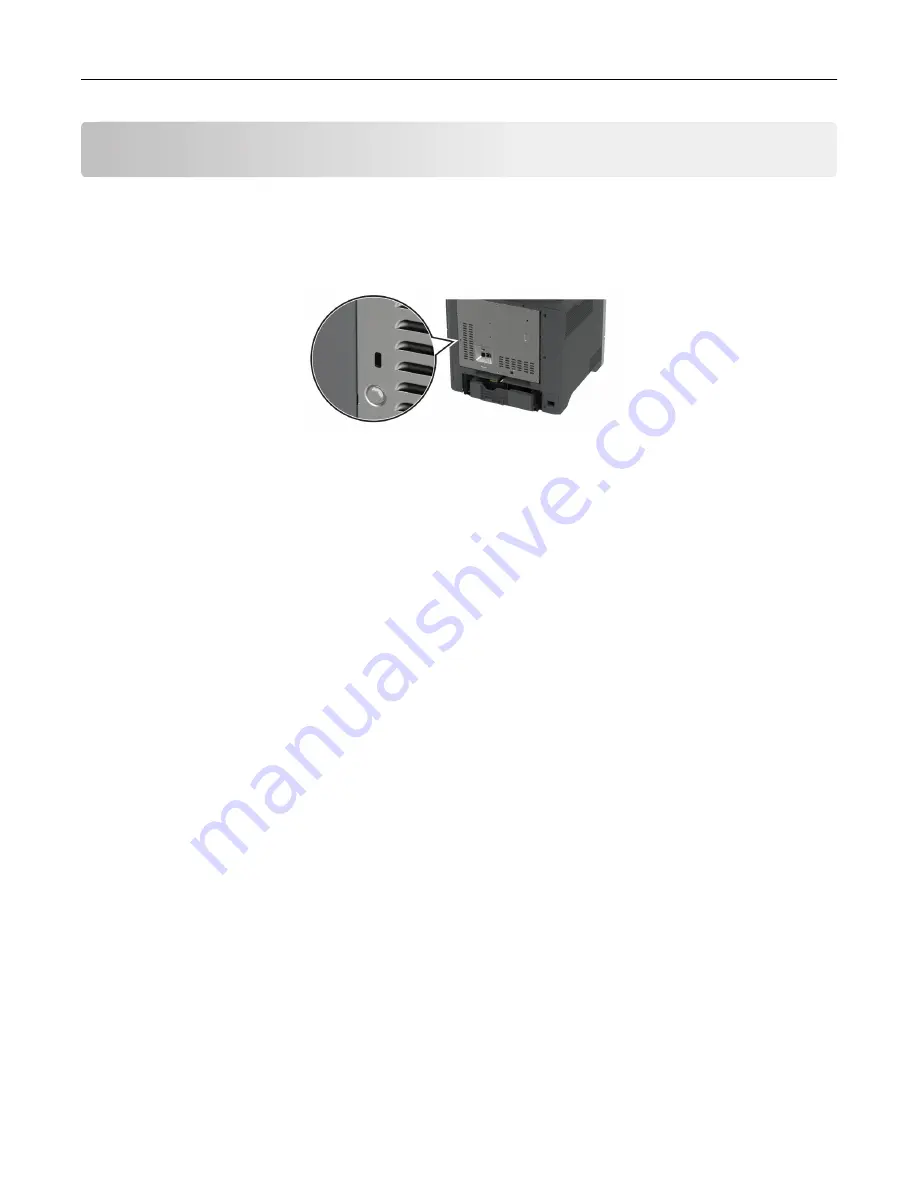
Locating the security slot
The printer is equipped with a security lock feature. Attach a security lock compatible with most laptop
computers in the location shown to secure the printer in place.
Erasing printer memory
To erase volatile memory or buffered data in your printer, turn off the printer.
To erase nonvolatile memory, device and network settings, security settings, and embedded solutions, do the
following:
1
From the home screen, touch
Settings
>
Device
>
Maintenance
>
Out of Service Erase
.
2
Touch the
Sanitize all information on nonvolatile memory
check box, and then touch
ERASE
.
3
Touch
Start initial setup wizard
or
Leave printer offline
, and then touch
Next
.
4
Start the operation.
Note:
This process also destroys the encryption key that is used to protect user data. Destroying the
encryption key makes the data irrecoverable.
Erasing printer storage drive
1
From the home screen, touch
Settings
>
Device
>
Maintenance
>
Out of Service Erase
.
2
Touch the
Sanitize all information on hard disk
check box, and then touch
ERASE
.
3
Depending on the storage drive that is installed on your printer, do either of the following:
•
For hard disk, select a method to erase data.
•
For intelligent storage drive (ISD), select a method.
Note:
The ISD is cryptographically erased.
4
Start the operation.
Note:
The process to sanitize the hard disk can take from several minutes to more than an hour, making the
printer unavailable for other tasks.
Secure the printer
96
Summary of Contents for XC4342
Page 64: ...3 Remove the fax cover 4 Remove the fax bracket Set up install and configure 64 ...
Page 65: ...5 Install the fax card to the bracket Set up install and configure 65 ...
Page 70: ...4 Install the ISP into its housing Set up install and configure 70 ...
Page 71: ...5 Attach the housing to the controller board shield Set up install and configure 71 ...
Page 76: ...Set up install and configure 76 ...
Page 84: ...Set up install and configure 84 ...
Page 85: ...3 Install the wireless module into its housing Set up install and configure 85 ...
Page 86: ...4 Attach the wireless module to the controller board shield Set up install and configure 86 ...
Page 88: ...6 Attach the controller board shield Set up install and configure 88 ...
Page 205: ...2 Remove the used toner cartridge 3 Unpack the new toner cartridge Maintain the printer 205 ...
Page 206: ...4 Insert the new toner cartridge 5 Close door B Maintain the printer 206 ...
Page 207: ...Replacing the black imaging unit 1 Open door B Maintain the printer 207 ...
Page 209: ...3 Remove the toner cartridges Maintain the printer 209 ...
Page 210: ...4 Disconnect the imaging kit cable Maintain the printer 210 ...
Page 214: ...9 Insert the imaging kit Maintain the printer 214 ...
Page 216: ...Replacing the color imaging kit 1 Open door B Maintain the printer 216 ...
Page 218: ...3 Remove the toner cartridges Maintain the printer 218 ...
Page 219: ...4 Disconnect the imaging kit cable Maintain the printer 219 ...
Page 220: ...5 Remove the used imaging kit Maintain the printer 220 ...
Page 222: ...8 Insert the black imaging unit into the new imaging kit Maintain the printer 222 ...
Page 223: ...9 Insert the new imaging kit Maintain the printer 223 ...
Page 225: ...Replacing the waste toner bottle 1 Open door B Maintain the printer 225 ...
Page 238: ...2 Remove the used ADF pick roller Maintain the printer 238 ...
Page 240: ...5 Insert the new ADF separator roller until it clicks into place Maintain the printer 240 ...
Page 250: ...2 Remove the ADF pick roller Maintain the printer 250 ...
Page 252: ...5 Insert the ADF separator roller until it clicks into place Maintain the printer 252 ...


