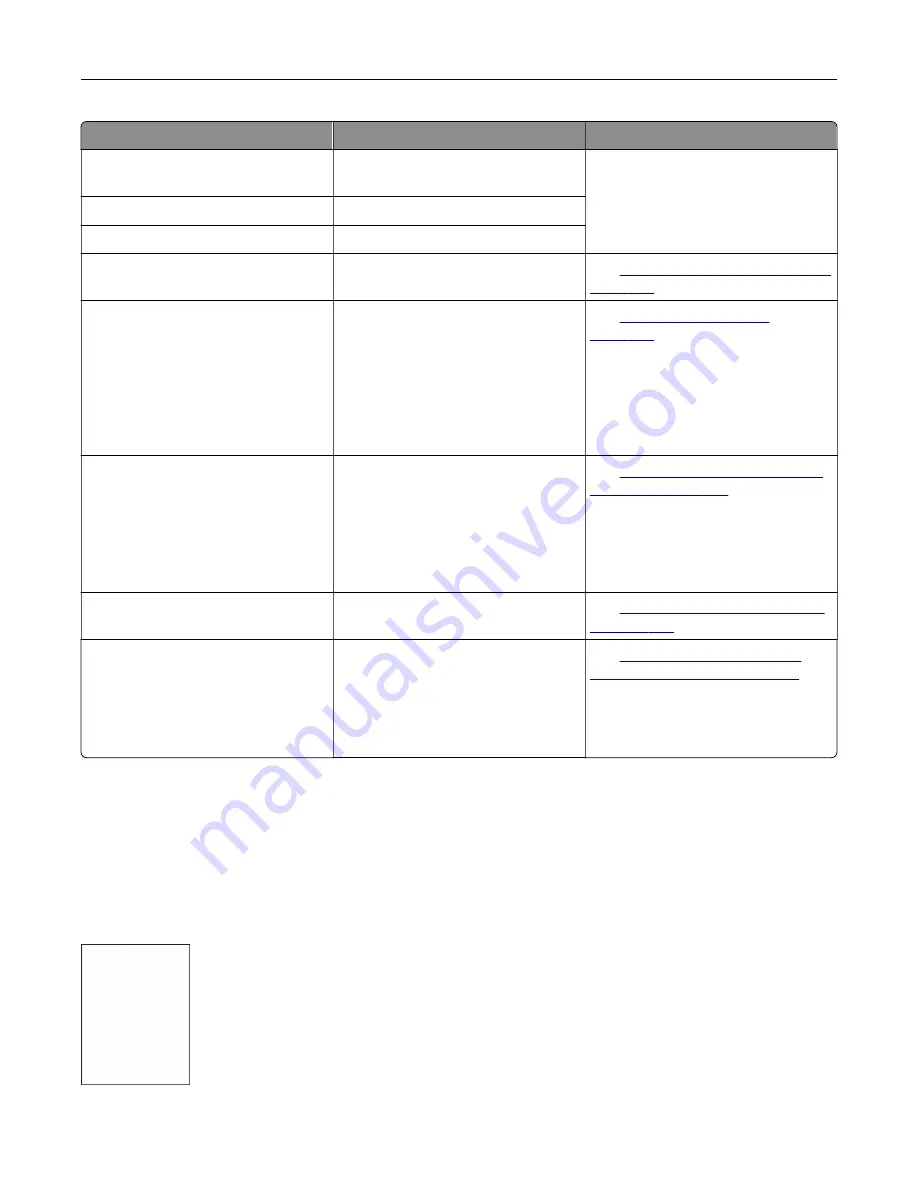
Error codes
Error message
Solution
88.00, 88.08, 88.09
[Color] cartridge nearly
low.
Touch
Continue
to clear the
message.
88.10, 88.18, 88.19
[Color] cartridge low.
88.20, 88.28, 88.29
[Color] cartridge very low.
88.30, 88.37, 88.38, 88.40, 88.47,
88.48
Replace the [color]
cartridge.
See
“Replacing a toner cartridge” on
.
200.23, 200.33, 200.43, 200.53,
232.23, 232.33, 232.43, 232.53,
240.23, 240.33, 240.43, 240.53,
242.33, 242.35, 242.43, 242.45,
242.53, 242.55, 243.43, 243.45,
243.53, 243.55, 244.53, 244.54,
244.55, 245.56, 662.23, 663.33,
664.43, 665.53
Paper jam, [jam header].
[xxx.yy]
See
.
200.03, 240.05, 240.06, 240.82,
240.83, 240.84, 647.82, 647.83,
647.84, 647.85, 648.82, 648.83,
648.84, 648.85, 649.82, 649.83,
649.84, 649.85, 650.82, 650.83,
650.84, 650.85, 660.81, 660.82,
660.83, 660.84, 660.85, 660.86
Paper jam, [jam header].
[xxx.yy]
See
“Paper jam in the multipurpose
230.03, 230.13, 230.23, 230.33,
230.43, 230.53
Paper jam, [jam header].
[xxx.yy]
See
“Paper jam in the standard bin”
.
280.11, 280.13, 280.15, 280.91, 280.93,
280.95, 281.11, 281.15, 281.16, 281.91,
281.95, 281.96, 284.11, 284.13, 284.15,
284.91, 284.93, 284.95, 288.10,
288.90, 295.01, 680.10, 680.20,
680.40
Scanner jam. [xxx.yy]
See
Printing problems
Print quality is poor
Blank or white pages
Troubleshoot a problem
264
Summary of Contents for XC4342
Page 64: ...3 Remove the fax cover 4 Remove the fax bracket Set up install and configure 64 ...
Page 65: ...5 Install the fax card to the bracket Set up install and configure 65 ...
Page 70: ...4 Install the ISP into its housing Set up install and configure 70 ...
Page 71: ...5 Attach the housing to the controller board shield Set up install and configure 71 ...
Page 76: ...Set up install and configure 76 ...
Page 84: ...Set up install and configure 84 ...
Page 85: ...3 Install the wireless module into its housing Set up install and configure 85 ...
Page 86: ...4 Attach the wireless module to the controller board shield Set up install and configure 86 ...
Page 88: ...6 Attach the controller board shield Set up install and configure 88 ...
Page 205: ...2 Remove the used toner cartridge 3 Unpack the new toner cartridge Maintain the printer 205 ...
Page 206: ...4 Insert the new toner cartridge 5 Close door B Maintain the printer 206 ...
Page 207: ...Replacing the black imaging unit 1 Open door B Maintain the printer 207 ...
Page 209: ...3 Remove the toner cartridges Maintain the printer 209 ...
Page 210: ...4 Disconnect the imaging kit cable Maintain the printer 210 ...
Page 214: ...9 Insert the imaging kit Maintain the printer 214 ...
Page 216: ...Replacing the color imaging kit 1 Open door B Maintain the printer 216 ...
Page 218: ...3 Remove the toner cartridges Maintain the printer 218 ...
Page 219: ...4 Disconnect the imaging kit cable Maintain the printer 219 ...
Page 220: ...5 Remove the used imaging kit Maintain the printer 220 ...
Page 222: ...8 Insert the black imaging unit into the new imaging kit Maintain the printer 222 ...
Page 223: ...9 Insert the new imaging kit Maintain the printer 223 ...
Page 225: ...Replacing the waste toner bottle 1 Open door B Maintain the printer 225 ...
Page 238: ...2 Remove the used ADF pick roller Maintain the printer 238 ...
Page 240: ...5 Insert the new ADF separator roller until it clicks into place Maintain the printer 240 ...
Page 250: ...2 Remove the ADF pick roller Maintain the printer 250 ...
Page 252: ...5 Insert the ADF separator roller until it clicks into place Maintain the printer 252 ...


