background image

#

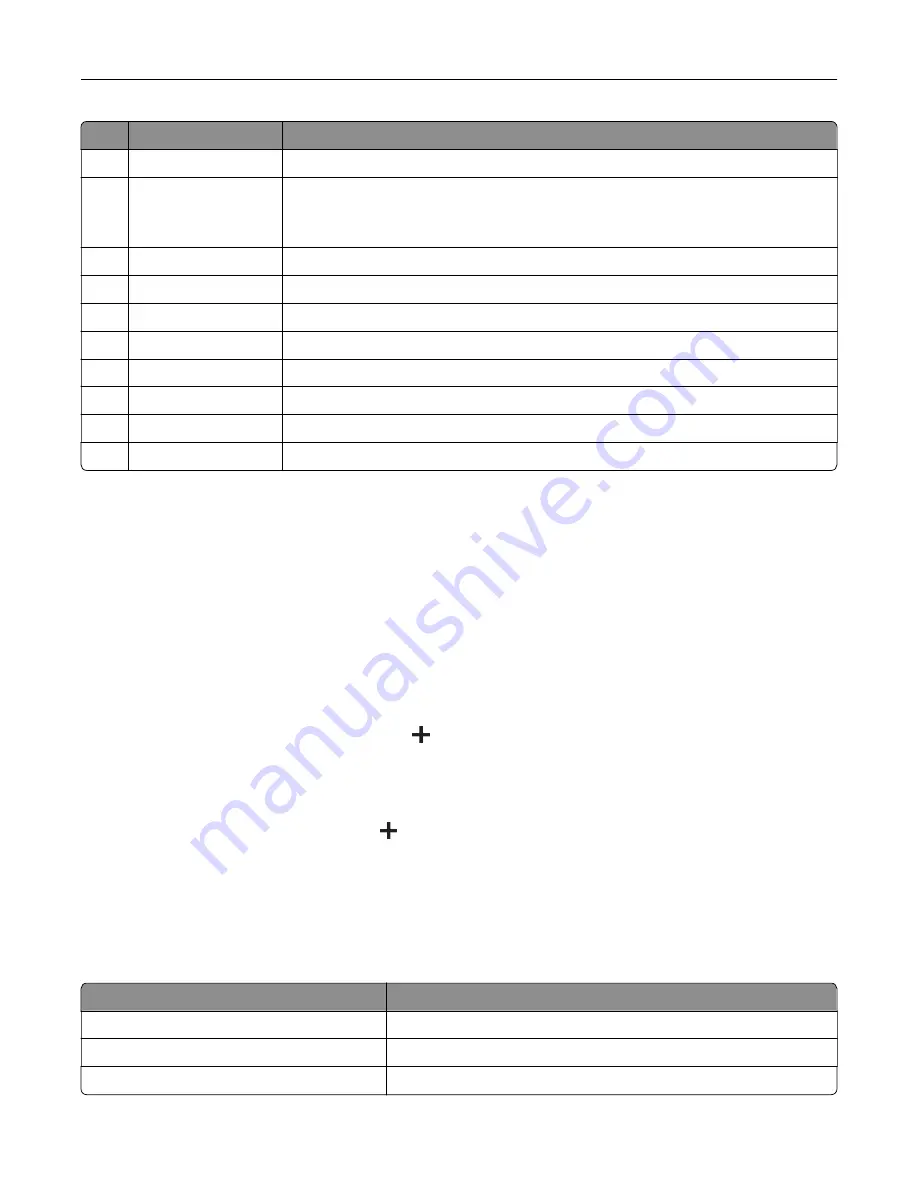
Icon

Function

9

Held Jobs

Show all the current held print jobs

10

Job Queue

Show all the current print jobs.

Note: 

You can also access this setting by touching the top section of the home

screen.

11

USB Drive

View, select, or print photos and documents from a flash drive.

12

Scan Profiles

Scan and save documents directly to the computer.

13

FTP

Scan and save documents directly to an FTP server.

14

Bookmarks

Organize all bookmarks.

15

Hard  Disk

View, select, and manage documents from a hard drive or an intelligent storage drive.

16

Network Folder

Scan to a network folder or network location.

17

Start button

Start a job, depending on which mode is selected.

18

On

screen keypad

Enter numbers or symbols in an input field.

Customizing the home screen

1

Open a web browser, and then type the printer IP address in the address field.

Notes:

View the printer IP address on the printer home screen. The IP address appears as four sets of
numbers separated by periods, such as 123.123.123.123.

If you are using a proxy server, then temporarily disable it to load the web page correctly.

2

Click 

Settings

 > 

Device

 > 

Home Screen Customization

.

3

Do one or more of the following:

To add an icon to the home screen, click 

, select the app name, and then click 

Add

.

To remove a home screen icon, select the app name, and then click 

Remove

.

To customize an app name, select the app name, click 

Edit

, and then assign a name.

To restore the name of an app, select the app name, click 

Edit

, and then select 

Restore app label

.

To add a space between apps, click 

, select 

BLANK SPACE

, and then click 

Add

.

To arrange the apps, drag the app names in the order that you want.

To restore the default home screen, click 

Restore home screen

.

4

Apply the changes.

Supported applications

Application

Printer models

Scan Center

CX730, CX735, XC4342, XC4352

Shortcut Center

CX730, CX735, XC4342, XC4352

Card Copy

CX730, CX735, XC4342, XC4352

Set up, install, and configure

23

Summary of Contents for XC4342

Page 1: ...CX730 CX735 XC4342 XC4352 MFPs User s Guide February 2022 www lexmark com Machine type 7530 Models 236 239 678 679 ...

Page 2: ...using the home screen applications 22 Setting up and using the accessibility features 28 Setting up the printer to fax 31 Configuring the e mail SMTP settings 38 Loading paper and specialty media 45 Installing and updating software drivers and firmware 51 Installing hardware options 54 Networking 91 Setting up serial printing Windows only 94 Secure the printer 96 Locating the security slot 96 Erasin...

Page 3: ...erhead 105 Copying on both sides of the paper 105 Reducing or enlarging copies 105 Collating copies 105 Placing separator sheets between copies 105 Copying multiple pages onto a single sheet 106 Copying cards 106 Creating a copy shortcut 106 E mail 107 Using the automatic document feeder and scanner glass 107 Sending an e mail 107 Creating an e mail shortcut 107 Fax 108 Using the automatic documen...

Page 4: ...5 Use printer menus 116 Menu map 116 Device 117 Print 132 Paper 141 Copy 143 Fax 147 E mail 162 FTP 168 USB Drive 172 Network Ports 177 Security 190 Cloud Services 197 Reports 198 Troubleshooting 199 Printing the Menu Settings Page 199 Maintain the printer 200 Checking the status of parts and supplies 200 Configuring supply notifications 200 Setting up e mail alerts 200 Viewing reports 201 Ordering ...

Page 5: ...0 Unable to read flash drive 291 Enabling the USB port 292 Clearing jams 292 Network connection problems 302 Hardware options problems 304 Issues with supplies 307 Paper feed problems 308 E mailing problems 311 Faxing problems 312 Scanning problems 317 Color quality problems 324 Contacting customer support 326 Recycle and dispose 327 Recycling Lexmark products 327 Recycling Lexmark packaging 327 No...

Page 6: ...Y Do not use this product with extension cords multioutlet power strips multioutlet extenders or UPS devices The power capacity of these types of accessories can be easily overloaded by a laser printer and may result in a risk of fire property damage or poor printer performance CAUTION POTENTIAL INJURY Only a Lexmark Inline Surge Protector that is properly connected between the printer and the powe...

Page 7: ...20 kg 44 lb then it may require two or more people to lift it safely CAUTION POTENTIAL INJURY When moving the printer follow these guidelines to avoid personal injury or printer damage Make sure that all doors and trays are closed Turn off the printer and then unplug the power cord from the electrical outlet Disconnect all cords and cables from the printer If the printer has separate floor standing...

Page 8: ...adiation exposure CAUTION POTENTIAL INJURY The lithium battery in this product is not intended to be replaced There is a danger of explosion if a lithium battery is incorrectly replaced Do not recharge disassemble or incinerate a lithium battery Discard used lithium batteries according to the manufacturer s instructions and local regulations This equipment is not suitable for use in locations wher...

Page 9: ...d maintaining the printer Troubleshooting and solving problems Information Center Go to https infoserve lexmark com How to videos Go to https infoserve lexmark com idv Touch Screen Guide Go to http support lexmark com Setting up and configuring the accessibility features of your printer Lexmark Accessibility Guide Go to http support lexmark com Help information for using the printer software Help f...

Page 10: ...he U S See the Statement of Limited Warranty included with the printer or go to http support lexmark com In other countries and regions See the printed warranty that came with the printer Product Information Guide See the documentation that came with the printer or go to http support lexmark com Information on Lexmark digital passport Go to https csr lexmark com digital passport php Finding the pr...

Page 11: ...ays 1 ADF tray 2 ADF bin 3 Control panel 4 650 sheet duo tray Note The tray is composed of a 550 sheet tray and a 100 sheet multipurpose feeder 5 Optional 550 sheet trays 6 Standard bin 7 Automatic document feeder ADF Using the control panel Learn about the printer 11 ...

Page 12: ...he printer is in Sleep mode Blinking amber The printer is in Deep Sleep or Hibernate mode Selecting paper Paper guidelines Use the appropriate paper to prevent jams and help ensure trouble free printing Always use new undamaged paper Before loading paper know the recommended printable side of the paper This information is usually indicated on the paper package Do not use paper that has been cut or...

Page 13: ...nment is very different from the printer environment Thick paper may also require a longer conditioning period Grain direction Grain refers to the alignment of the paper fibers in a sheet of paper Grain is either grain long which runs the length of the paper or grain short which runs the width of the paper For recommended grain direction see the Supported paper weights topic Fiber content Most high...

Page 14: ...elf rather than on the floor Store individual packages on a flat surface Do not store anything on top of individual paper packages Take paper out of the carton or wrapper only when you are ready to load it in the printer The carton and wrapper help keep the paper clean dry and flat Selecting preprinted forms and letterhead Use grain long paper Use only forms and letterhead printed using an offset lit...

Page 15: ...ki 100 x 148 mm 3 94 x 5 83 in X X X X JIS B5 182 x 257 mm 7 17 x 10 1 in 1 Supported in both the portrait and landscape orientations When fed in the portrait orientation A5 is treated as narrow paper When fed in landscape orientation it is treated as a regular width paper 2 When Universal is selected the page is formatted for 215 9 x 355 6 mm 8 5 x 14 in unless the size is specified by the softwar...

Page 16: ... 3 875 x 7 5 in X X X X 9 Envelope 98 4 x 225 4 mm 3 875 x 8 9 in X X X X 10 Envelope 104 8 x 241 3 mm 4 12 x 9 5 in X X 1 Supported in both the portrait and landscape orientations When fed in the portrait orientation A5 is treated as narrow paper When fed in landscape orientation it is treated as a regular width paper 2 When Universal is selected the page is formatted for 215 9 x 355 6 mm 8 5 x 1...

Page 17: ...5 mm 3 875 x 7 5 in X X X X Other Envelope4 98 4 x 162 mm to 176 x 250 mm 3 87 x 6 38 in to 6 93 x 9 84 in X X X X 1 Supported in both the portrait and landscape orientations When fed in the portrait orientation A5 is treated as narrow paper When fed in landscape orientation it is treated as a regular width paper 2 When Universal is selected the page is formatted for 215 9 x 355 6 mm 8 5 x 14 in u...

Page 18: ...printed Colored Paper Light Heavy Rough Cotton X Custom Type x Notes Labels envelopes and card stock always print at reduced speed Card stock is supported in two sided printing only up to 163 g m2 90 lb bond Anything heavier is supported only in one sided printing Vinyl labels are supported for occasional use only and must be tested for acceptability Some vinyl labels may feed more reliably from t...

Page 19: ... 14 32 lb bond Notes For 60 to 176 g m2 16 47 lb bond paper grain long fibers are recommended Paper less than 75 g m2 20 lb bond must be printed with Paper Type set to Light Paper Failure to do so may cause excessive curl which can lead to feeding errors especially in more humid environments Two sided printing supports paper weight from 60 162 g m2 16 43 lb bond paper 100 cotton content maximum wei...

Page 20: ...s product near water or wet locations Make sure that airflow in the room meets the latest revision of the ASHRAE 62 standard or the CEN Technical Committee 156 standard Provide a flat sturdy and stable surface Keep the printer Clean dry and free of dust Away from stray staples and paper clips Away from the direct airflow of air conditioners heaters or ventilators Free from direct sunlight and humidit...

Page 21: ...s authorized replacement CAUTION POTENTIAL INJURY To reduce the risk of fire use only a 26 AWG or larger telecommunications RJ 11 cord when connecting this product to the public switched telephone network For users in Australia the cord must be approved by the Australian Communications and Media Authority Warning Potential Damage To avoid loss of data or printer malfunction do not touch the USB cab...

Page 22: ...ns Icon Function 1 Stop or Cancel button Stop the current job 2 Copy Make copies 3 Change Language Change the language on the printer display 4 E mail Send e mails 5 Settings Access the printer menus 6 Fax Send fax 7 Address Book Access create and organize contacts 8 Status Supplies Show a printer warning or error message whenever the printer requires intervention to continue processing View more ...

Page 23: ... address on the printer home screen The IP address appears as four sets of numbers separated by periods such as 123 123 123 123 If you are using a proxy server then temporarily disable it to load the web page correctly 2 Click Settings Device Home Screen Customization 3 Do one or more of the following To add an icon to the home screen click select the app name and then click Add To remove a home s...

Page 24: ...formation contact your administrator 2 Select a printer function and then touch Create Shortcut Note The Secure E mail function is not supported 3 Configure the settings and then touch Save 4 Type a unique shortcut name Note To avoid clipped names on the home screen type only up to 25 characters 5 Touch OK The application automatically generates a unique shortcut number Note To launch the shortcut ...

Page 25: ...en saver and slide show images 1 From the Screen Saver and Slideshow Images section add edit or delete an image Notes You can add up to 10 images When enabled the status icons appear on the screen saver only when there are errors warnings or cloud based notifications 2 Apply the changes Changing the wallpaper image 1 From the home screen touch Change Wallpaper 2 Select an image to use 3 Apply the c...

Page 26: ... Use bookmarks to print frequently accessed documents that are stored in servers or on the web 1 Open a web browser and then type the printer IP address in the address field Notes View the printer IP address on the printer home screen The IP address appears as four sets of numbers separated by periods such as 123 123 123 123 If you are using a proxy server then temporarily disable it to load the we...

Page 27: ... then type a folder name Note To limit access to the folder enter a PIN 3 Click Save Note You can create folders or bookmarks inside a folder To create a bookmark see Creating bookmarks on page 26 Managing contacts 1 From the home screen touch Address Book 2 Do one or more of the following To add a contact touch on top of the screen and then touch Create Contact If necessary specify a login method...

Page 28: ...tem on the display Voice Guidance has limited language support Deactivating Voice Guidance 1 In one motion and using one finger slowly swipe left then up on the display until you hear a voice message Note For printer models without built in speakers use headphones to hear the message 2 Using two fingers do either of the following Touch Voice Guidance then touch OK Touch Cancel Note If the gesture do...

Page 29: ...the printer is in normal mode Swipe down then right using one finger Decrease the volume Note This gesture is also applicable when the printer is in normal mode Swipe up then left using one finger Exit an application and return to the home screen Swipe down then left using one finger Go back to the previous setting Using the on screen keyboard When the on screen keyboard appears do one or more of the...

Page 30: ...he user exits Accessibility mode or when the printer wakes from Sleep or Hibernate mode Adjusting the default internal speaker volume 1 From the home screen touch 2 Adjust the volume Notes If Quiet Mode is enabled then audible alerts are turned off This setting also slows the printer performance The volume resets to the default value after the user exits Accessibility mode or when the printer wake...

Page 31: ... contact the place where you purchased the printer Setting up the fax function using analog fax Notes For some printer models a fax card must be installed for the printer to use analog fax Some connection methods are applicable only in some countries or regions If the fax function is enabled and not fully set up then the indicator light may blink red If you do not have a TCP IP environment then us...

Page 32: ...ake sure that you have registered your printer to the etherFAX portal For more information go to https www etherfax net lexmark The printer serial number is required on registration To locate the serial number see Finding the printer serial number on page 10 1 Open a web browser and then type the printer IP address in the address field Notes View the printer IP address on the home screen The IP add...

Page 33: ...r domain Notes If necessary configure the Reply Address Subject or Message fields To let the printer receive fax messages enable the device based fax receive setting Make sure that you have a device based fax configured 6 Click Save 7 Click Fax Server E mail Settings and then do either of the following Enable Use E mail SMTP Server Note If the E mail SMTP settings are not configured then see Configurin...

Page 34: ...er 2 Connect the other end of the cable to an active analog wall jack Notes You can set the printer to receive faxes automatically set Auto Answer to On or manually set Auto Answer to Off If you want to receive faxes automatically then set the printer to pick up on a specified number of rings Setup 2 Printer is sharing the line with an answering machine Note If you subscribe to a distinctive ring s...

Page 35: ...four rings then set the printer Rings to Answer setting to 6 Setting up fax in countries or regions with different telephone wall jacks and plugs Note These instructions apply only to printers that support analog fax For more information see Supported fax on page 31 CAUTION SHOCK HAZARD To avoid the risk of electrical shock do not set up this product or make any electrical or cabling connections s...

Page 36: ... jack or equipment in your facility is not compatible with this type of connection then use a telephone adapter An adapter for your country or region may not come with your printer and you may need to purchase it separately There may be an adapter plug installed in the telephone port of the printer Do not remove the adapter plug from the telephone port of the printer if you are connecting to a ser...

Page 37: ...er On 2 Select a ring pattern Setting the fax date and time Note Make sure that fax is configured For more information see the Setting up the printer to fax section 1 From the home screen touch Settings Device Preferences Date and Time Configure 2 Configure the settings Configuring daylight saving time Note Make sure that fax is configured For more information see the Setting up the printer to fax sect...

Page 38: ... the web page correctly 2 Click Settings E mail 3 From the E mail Setup section configure the settings Notes For more information on the password see the list of e mail service providers For e mail service providers that are not on the list contact your provider and ask for the settings 4 Click Save Using the Settings menu in the printer 1 From the home screen touch Settings E mail E mail Setup 2 C...

Page 39: ... e mail address Device Password App password Note To create an app password go to the AOL Account Security page log in to your account and then click Generate app password Comcast Mail Setting Value Primary SMTP Gateway smtp comcast net Primary SMTP Gateway Port 587 Use SSL TLS Required Require Trusted Certificate Disabled Reply Address Your e mail address SMTP Server Authentication Login Plain Dev...

Page 40: ...app password go to the Google Account Security page log in to your account and then from the Signing in to Google section click App passwords App passwords shows only if two step verification is enabled iCloud Mail Note Make sure that two step verification is enabled on your account Setting Value Primary SMTP Gateway smtp mail me com Primary SMTP Gateway Port 587 Use SSL TLS Required Require Trusted...

Page 41: ...ue Primary SMTP Gateway smtp 126 com Primary SMTP Gateway Port 465 Use SSL TLS Required Require Trusted Certificate Disabled Reply Address Your e mail address SMTP Server Authentication Login Plain Device Initiated E mail Use Device SMTP Credentials Device UserID Your e mail address Device Password Authorization password Note The authorization password is provided when IMAP SMTP service or POP3 SMT...

Page 42: ... smtp yeah net Primary SMTP Gateway Port 465 Use SSL TLS Required Require Trusted Certificate Disabled Reply Address Your e mail address SMTP Server Authentication Login Plain Device Initiated E mail Use Device SMTP Credentials Device UserID Your e mail address Device Password Authorization password Note The authorization password is provided when IMAP SMTP service or POP3 SMTP service is enabled O...

Page 43: ... SMTP service or IMAP SMTP service Setting Value Primary SMTP Gateway smtp qq com Primary SMTP Gateway Port 587 Use SSL TLS Required Require Trusted Certificate Disabled Reply Address Your e mail address SMTP Server Authentication Login Plain Device Initiated E mail Use Device SMTP Credentials Device UserID Your e mail address Device Password Authorization code Note To generate an authorization cod...

Page 44: ...ervice or POP3 SMTP service Setting Value Primary SMTP Gateway smtp sohu com Primary SMTP Gateway Port 465 Use SSL TLS Required Require Trusted Certificate Disabled Reply Address Your e mail address SMTP Server Authentication Login Plain Device Initiated E mail Use Device SMTP Credentials Device UserID Your e mail address Device Password Independent password Note The independent password is provide...

Page 45: ...r account password For accounts with two step verification enabled use an app password To create an app password go to the Zoho Mail Account Security page log in to your account and then from the Application Specific Passwords section click Generate New Password Loading paper and specialty media Setting the size and type of the specialty media The trays automatically detect the size of plain paper F...

Page 46: ...tely Keep all other trays closed until needed 1 Remove the tray Note To avoid jams do not remove trays while the printer is busy 2 Adjust the guides to match the size of the paper that you are loading Note Use the indicators on the bottom of the tray to position the guides Set up install and configure 46 ...

Page 47: ...with the printable side faceup For one sided printing load letterhead faceup with the header toward the front of the tray For two sided printing load letterhead facedown with the header toward the back of the tray Do not slide paper into the tray Set up install and configure 47 ...

Page 48: ...r Overfilling may cause paper jams For envelopes and other specialty media make sure that the stack height is below the dashed line Overfilling may cause paper jams 5 Insert the tray If necessary set the paper size and type to match the paper loaded in the tray Set up install and configure 48 ...

Page 49: ... the multipurpose feeder 1 Open the multipurpose feeder 2 Adjust the guide to match the size of the paper that you are loading 3 Flex fan and align the paper edges before loading Set up install and configure 49 ...

Page 50: ... side of the paper guide Load European envelopes with the flap entering the printer first Warning Potential Damage Do not use envelopes with stamps clasps snaps windows coated linings or self stick adhesives Note To avoid paper pick problems make sure that the leading edge of the paper or specialty media is properly aligned with the separator dam Set up install and configure 50 ...

Page 51: ...f the fuser varies according to the specified paper type To avoid printing issues match the paper type setting in the printer with the paper loaded in the tray Installing and updating software drivers and firmware Installing the printer software Notes The print driver is included in the software installer package For Macintosh computers with macOS version 10 7 or later you do not need to install the...

Page 52: ... Add a printer or scanner 3 Depending on your printer connection do one of the following Select a printer from the list and then click Add device Click Show Wi Fi Direct printers select a printer and then click Add device Click The printer that I want isn t listed and then from the Add Printer window do the following a Select Add a printer using a TCP IP address or hostname and then click Next b I...

Page 53: ... correctly 2 Click Settings Device Update Firmware 3 Do either of the following Click Check for updates I agree start update Upload the flash file a Browse to the flash file Note Make sure that you have extracted the firmware zip file b Click Upload Start Exporting or importing a configuration file You can export the configuration settings of your printer into a text file and then import the file to apply th...

Page 54: ...ystem Preferences in the Apple menu navigate to your printer and then select Options Supplies 2 Navigate to the list of hardware options and then add any installed options 3 Apply the changes Installing hardware options Available internal options Intelligent storage drive ISD Fonts Simplified Chinese Traditional Chinese Japanese Korean Arabic Mass storage Printer hard disk Licensed features IPDS Ba...

Page 55: ...ces attached to the printer then turn them off as well and unplug any cables going into the printer 1 Turn off the printer 2 Unplug the power cord from the electrical outlet and then from the printer 3 Unpack the optional tray and then remove all the packing material Note If optional trays are already installed then unlock them from the printer before lifting the printer Do not try to lift the pri...

Page 56: ...cal shock if you are accessing the controller board or installing optional hardware or memory devices sometime after setting up the printer then turn the printer off and unplug the power cord from the electrical outlet before continuing If you have any other devices attached to the printer then turn them off as well and unplug any cables going into the printer 1 Turn off the printer and then unplu...

Page 57: ...3 Unpack the intelligent storage drive ISD Warning Potential Damage Avoid touching the connection points along the edge of the card Set up install and configure 57 ...

Page 58: ...4 Locate the ISD connector 5 Insert the card to the ISD connector Set up install and configure 58 ...

Page 59: ...ical outlet and then turn on the printer CAUTION POTENTIAL INJURY To avoid the risk of fire or electrical shock connect the power cord to an appropriately rated and properly grounded electrical outlet that is near the product and easily accessible Set up install and configure 59 ...

Page 60: ...ontinuing If you have any other devices attached to the printer then turn them off as well and unplug any cables going into the printer 1 Turn off the printer and then unplug the power cord from the electrical outlet 2 Using a flat head screwdriver remove the controller board shield Warning Potential Damage Controller board electronic components are easily damaged by static electricity Touch a meta...

Page 61: ...e Trusted Platform Module Warning Potential Damage Avoid touching the connection points along the edge of the card 4 Locate the TPM connector 5 Attach the module to the TPM connector Set up install and configure 61 ...

Page 62: ...ical outlet and then turn on the printer CAUTION POTENTIAL INJURY To avoid the risk of fire or electrical shock connect the power cord to an appropriately rated and properly grounded electrical outlet that is near the product and easily accessible Set up install and configure 62 ...

Page 63: ...g If you have any other devices attached to the printer then turn them off as well and unplug any cables going into the printer 1 Turn off the printer and then unplug the power cord from the electrical outlet 2 Using a flat head screwdriver remove the controller board shield Warning Potential Damage Controller board electronic components are easily damaged by static electricity Touch a metal surfac...

Page 64: ...3 Remove the fax cover 4 Remove the fax bracket Set up install and configure 64 ...

Page 65: ...5 Install the fax card to the bracket Set up install and configure 65 ...

Page 66: ...6 Install the fax card and attach the connector to the controller board Set up install and configure 66 ...

Page 67: ...ical outlet and then turn on the printer CAUTION POTENTIAL INJURY To avoid the risk of fire or electrical shock connect the power cord to an appropriately rated and properly grounded electrical outlet that is near the product and easily accessible Set up install and configure 67 ...

Page 68: ...ing If you have any other devices attached to the printer then turn them off as well and unplug any cables going into the printer 1 Turn off the printer and then unplug the power cord from the electrical outlet 2 Using a flat head screwdriver remove the controller board shield Warning Potential Damage Controller board electronic components are easily damaged by static electricity Touch a metal surf...

Page 69: ...3 Unpack the internal solutions port ISP kit 1 ISP 2 Mounting bracket 3 Thumbscrews 4 Housing 5 ISP extended cable Set up install and configure 69 ...

Page 70: ...4 Install the ISP into its housing Set up install and configure 70 ...

Page 71: ...5 Attach the housing to the controller board shield Set up install and configure 71 ...

Page 72: ...6 Connect the ISP extended cable to the ISP connector in the controller board Set up install and configure 72 ...

Page 73: ...tes If the printer has a static IP address then do not change the configuration If the computers are configured to use the network name instead of an IP address then do not change the configuration If you are adding a wireless internal solutions port ISP to a printer previously configured for an Ethernet connection then disconnect the printer from the Ethernet network For Windows users 1 Open the prin...

Page 74: ...n the printer off and unplug the power cord from the electrical outlet before continuing If you have any other devices attached to the printer then turn them off as well and unplug any cables going into the printer 1 Turn off the printer and then unplug the power cord from the electrical outlet 2 Using a flat head screwdriver remove the controller board shield Warning Potential Damage Controller bo...

Page 75: ...3 Unpack the hard disk 4 Attach the hard disk to the controller board Warning Potential Damage Do not touch or press the center of the hard disk Set up install and configure 75 ...

Page 76: ...Set up install and configure 76 ...

Page 77: ...lectrical shock connect the power cord to an appropriately rated and properly grounded electrical outlet that is near the product and easily accessible Installing the convenience stapler 1 Turn off the printer and then unplug the power cord from the electrical outlet 2 Unpack the convenience stapler and then remove all the packing material Set up install and configure 77 ...

Page 78: ...Connect the power supply to the convenience stapler Note Use only the power supply that came with the convenience stapler Using any other power supply can damage the product Set up install and configure 78 ...

Page 79: ...4 Attach the cover of the power supply until it clicks into place Set up install and configure 79 ...

Page 80: ...5 Install the thumb screw into the cover of the power supply 6 Remove the column cover above the standard bin Note Make sure that the column cover is disposed properly Set up install and configure 80 ...

Page 81: ...7 Insert the power supply through the printer 8 Install the convenience stapler Set up install and configure 81 ...

Page 82: ...11 Connect the stapler and the printer power cords to the electrical outlet and then turn on the printer CAUTION POTENTIAL INJURY To avoid the risk of fire or electrical shock connect the power cord to an appropriately rated and properly grounded electrical outlet that is near the product and easily accessible Set up install and configure 82 ...

Page 83: ...let before continuing If you have any other devices attached to the printer then turn them off as well and unplug any cables going into the printer 1 Turn off the printer and then unplug the power cord from the electrical outlet 2 Using a flat head screwdriver remove the controller board shield Warning Potential Damage Controller board electronic components are easily damaged by static electricity ...

Page 84: ...Set up install and configure 84 ...

Page 85: ...3 Install the wireless module into its housing Set up install and configure 85 ...

Page 86: ...4 Attach the wireless module to the controller board shield Set up install and configure 86 ...

Page 87: ...5 Connect the wireless assembly to the ISP connector in the controller board Set up install and configure 87 ...

Page 88: ...6 Attach the controller board shield Set up install and configure 88 ...

Page 89: ...electrical shock connect the power cord to an appropriately rated and properly grounded electrical outlet that is near the product and easily accessible Installing MarkNet N8372 Wireless Print Server 1 Turn off the printer 2 Apply isopropyl alcohol to a damp soft lint free cloth and then wipe the surface around the USB port Set up install and configure 89 ...

Page 90: ...ks to the surface of the printer Make sure that the printer surface is dry and free of condensed moisture The module is best bonded to the printer after 72 hours 4 Check for a gap between the module and the printer then attach the spacer module if necessary Set up install and configure 90 ...

Page 91: ...n Active Adapter is set to Auto From the home screen touch Settings Network Ports Network Overview Active Adapter Using the control panel 1 From the home screen touch Settings Network Ports Wireless Setup On Printer Panel Choose Network 2 Select a Wi Fi network and then type the network password Note For printers that are Wi Fi network ready a prompt to set up the Wi Fi network appears during init...

Page 92: ... your access point A wireless module is installed in your printer For more information see the Installing wireless modules section Active Adapter is set to Auto From the home screen touch Settings Network Ports Network Overview Active Adapter Using the Push Button method 1 From the home screen touch Settings Network Ports Wireless Wi Fi Protected Setup Start Push Button Method 2 Follow the instruc...

Page 93: ...ect network password is not visible on the printer display To show the password enable the password peek icon From the home screen touch Settings Security Miscellaneous Enable Password PIN Reveal You can see the password of the Wi Fi Direct network without showing it on the printer display From the home screen touch Settings Reports Network Network Setup Page Connecting a mobile device to the prin...

Page 94: ...rk after disconnecting from the Wi Fi Direct network Deactivating the Wi Fi network 1 From the home screen touch Settings Network Ports Network Overview Active Adapter Standard Network 2 Follow the instructions on the display Checking the printer connectivity 1 From the home screen touch Settings Reports Network Network Setup Page 2 Check the first section of the network setup page and confirm that ...

Page 95: ...n select the COM port from the list 4 Set the COM port parameters in Device Manager Notes Serial printing reduces printing speed Make sure that the serial cable is connected to the serial port on your printer Set up install and configure 95 ...

Page 96: ...up wizard or Leave printer offline and then touch Next 4 Start the operation Note This process also destroys the encryption key that is used to protect user data Destroying the encryption key makes the data irrecoverable Erasing printer storage drive 1 From the home screen touch Settings Device Maintenance Out of Service Erase 2 Touch the Sanitize all information on hard disk check box and then to...

Page 97: ...nters may have a hard disk drive installed The printer hard disk is designed for printer specific functionality The hard disk lets the printer retain buffered user data from complex print jobs form data and font data Intelligent storage drive ISD Some printers may have an ISD installed ISD uses non volatile flash memory to store user data from complex print jobs form data and font data Erase the con...

Page 98: ...th the application 2 Select a printer 3 Print the document Printing from a mobile device using Lexmark Print Lexmark Print is a mobile printing solution for mobile devices running on AndroidTM version 6 0 or later It lets you send documents and images to network connected printers and print management servers Notes Make sure that you download the Lexmark Print application from the Google Play stor...

Page 99: ...the printer are connected to the same network If the network has multiple wireless hubs then make sure that both devices are connected to the same subnet This application is supported only in some Apple devices 1 From your mobile device select a document from your file manager or launch a compatible application 2 Tap Print 3 Select a printer and then adjust the settings if necessary 4 Print the doc...

Page 100: ...ther print jobs then Busy appears on the display 2 From the display touch the document that you want to print If necessary configure the print settings 3 Print the document To print another document touch USB Drive Warning Potential Damage To avoid loss of data or printer malfunction do not touch the flash drive or the printer in the area shown while actively printing reading or writing from the mem...

Page 101: ...d flash drives with full speed standard Flash drives must support the File Allocation Table FAT system File types Documents Images PDF version 1 7 or earlier Microsoft file formats DOC DOCX XLS XLSX PPT PPTX JPEG or JPG TIFF or TIF GIF BMP PNG PCX DCX Configuring confidential jobs 1 From the home screen touch Settings Security Confidential Print Setup 2 Configure the settings Print 101 ...

Page 102: ...the printer to keep all documents with the same file name Printing confidential and other held jobs For Windows users 1 With a document open click File Print 2 Select a printer and then click Properties Preferences Options or Setup 3 Click Print and Hold 4 Select Use Print and Hold and then assign a user name 5 Select the print job type Confidential Repeat Reserve or Verify If you select Confidential ...

Page 103: ...mputer name Confidential select the print job enter the PIN Print Printing a font sample list 1 From the home screen touch Settings Reports Print Print Fonts 2 Touch PCL Fonts or PS Fonts Printing a directory list From the home screen touch Settings Reports Print Print Directory Placing separator sheets between copies 1 From the home screen touch Settings Print Layout Separator Sheets Between Copie...

Page 104: ...in media such as magazine clippings Place the document facedown in the corner with the arrow Making copies 1 Load an original document into the ADF tray or on the scanner glass Note To avoid a cropped image make sure that the original document and output have the same paper size 2 From the home screen touch Copy and then specify the number of copies If necessary adjust the copy settings 3 Copy the...

Page 105: ... Sides 3 Touch 1 sided to 2 sided or 2 sided to 2 sided 4 Copy the document Reducing or enlarging copies 1 Load an original document into the ADF tray or on the scanner glass 2 From the home screen touch Copy Scale select a scale value Note Changing the size of the original document or output after setting Scale restores the scale value to Auto 3 Copy the document Collating copies 1 Load an origin...

Page 106: ...e screen touch Copy Pages per Side 3 Adjust the settings 4 Copy the document Copying cards 1 Load a card on the scanner glass 2 From the home screen touch Copy Copy From 3 Touch ID Card 4 Copy the card Creating a copy shortcut 1 From the home screen touch Copy 2 Configure the settings and then touch 3 Create a shortcut Copy 106 ...

Page 107: ... postcards or photos transparencies photo paper or thin media such as magazine clippings Place the document facedown in the corner with the arrow Sending an e mail Before you begin make sure that the SMTP settings are configured For more information see Configuring the e mail SMTP settings on page 38 1 Load an original document into the ADF tray or on the scanner glass 2 From the home screen touch E...

Page 108: ...a fax Note Make sure that fax is configured For more information see the Setting up the printer to fax section Using the control panel 1 Load an original document into the ADF tray or on the scanner glass 2 From the home screen touch Fax and then enter the needed information If necessary adjust the settings 3 Send the fax Using the computer Before you begin make sure that the fax driver is installe...

Page 109: ...or more information see the Setting up the printer to fax section 1 From the home screen touch Fax To 2 Enter the recipient number and then touch Done 3 Configure the settings and then touch 4 Create a shortcut Changing the fax resolution Note Make sure that fax is configured For more information see the Setting up the printer to fax section 1 Load an original document into the ADF tray or on the sc...

Page 110: ...e Setting up the printer to fax section 1 From the home screen touch Settings Fax Fax Setup Fax Receive Settings Holding Faxes 2 Select a mode Forwarding a fax Note Make sure that analog fax or etherFAX is configured For more information see the Setting up the printer to fax section 1 Create a destination shortcut a Open a web browser and then type the printer IP address in the address field Notes V...

Page 111: ...3 In the Fax Forwarding menu select Forward or Print and Forward 4 In the Forward to menu select the destination type and then type the shortcut number 5 Apply the changes Fax 111 ...

Page 112: ...er and the printer are connected to the same network For Windows users Using Lexmark ScanBack Utility 1 From the computer run Lexmark ScanBack Utility and then click Next Note To download the utility go to www lexmark com downloads 2 Click Setup and then add the printer IP address Note View the printer IP address on the printer home screen The IP address appears as four sets of numbers separated b...

Page 113: ...mputer on page 52 1 Load an original document into the automatic document feeder or on the scanner glass 2 From the computer do either of the following Open Image Capture Open Printers Scanners and then select a printer Click Scan Open Scanner 3 From the Scanner window do one or more of the following Select where you want to save the scanned document Select the size of the original document To sca...

Page 114: ...lecting the shortcut from the list 4 Scan the document Creating a network folder shortcut 1 Open a web browser and then type the printer IP address in the address field Notes View the printer IP address on the printer home screen The IP address appears as four sets of numbers separated by periods such as 123 123 123 123 If you are using a proxy server then temporarily disable it to load the web pag...

Page 115: ...e scanned document to a folder touch Scan to select a folder and then touch Scan Here If the USB Drive screen does not appear then touch USB Drive on the control panel 4 Scan the document Warning Potential Damage To avoid loss of data or printer malfunction do not touch the flash drive or the printer in the area shown while actively printing reading or writing from the memory device Scan 115 ...

Page 116: ... Link Setup FTP FTP Defaults USB Drive Flash Drive Scan Flash Drive Print Network Ports Network Overview Wireless Wi Fi Direct Ethernet TCP IP SNMP IPSec 802 1x LPD Configuration HTTP FTP Settings ThinPrint USB Restrict external network access Security Login Methods Schedule USB Devices Security Audit Log Login Restrictions Confidential Print Setup Disk Encryption Erase Temporary Data Files Solution...

Page 117: ... 1 Custom Text 2 Specify the information to appear on the home screen Date and Time Configure Current Date and Time Manually Set Date and Time Date Format MM DD YYYY Time Format 12 hour A M P M Time Zone UTC 5 00 Network Time Protocol Enable NTP On NTP Server Enable Authentication None Configure the printer date and time and network time protocol Paper Sizes U S Metric Specify the unit of measuremen...

Page 118: ...scan instead of displaying prompts Device Sounds Mute All Sounds Off Button Feedback On Volume 5 ADF Loaded Beep On Alarm Control Single Cartridge Alarm Single Speaker Mode On until Connected Ringer Volume On Configure the sound settings of the printer Screen Timeout 5 300 seconds 60 Set the idle time in seconds before the display shows the home screen or before the printer logs out a user account ...

Page 119: ...to 1 sided 2 sided to 2 sided Specify the scanning behavior based on the original document Copy Pages per Side Off 2 Portrait pages 4 Portrait pages 2 Landscape pages 4 Landscape pages Specify the scanning behavior based on the original document Copy Darkness 1 9 5 Determine the darkness of the scanned text images Note An asterisk next to a value indicates the factory default setting Remote Operat...

Page 120: ...of times that the alarm sounds when the printer requires user intervention Supplies Show Supply Estimates Show estimates Do not show estimates Show the estimated status of the supplies Supplies Cartridge Alarm Off Single Continuous Set the number of times that the alarm sounds when the cartridge is low Supplies Custom Supply Notifications Configure notification settings when the printer requires user...

Page 121: ...mail using an encrypted link E mail Alerts Setup E mail Setup Require Trusted Certificate On Require a trusted certificate when accessing the SMTP server E mail Alerts Setup E mail Setup SMTP Server Authentication No authentication required Set the authentication type for the SMTP server E mail Alerts Setup E mail Setup Device Initiated E mail None Set whether credentials are required for device ini...

Page 122: ...st Off On Set the printer to check for jammed paper automatically Error Prevention Auto Continue Off On Auto Continue Time 5 Let the printer continue processing or printing a job automatically after clearing certain attendance conditions Error Prevention Auto Reboot Auto Reboot Reboot when idle Reboot always Reboot never Set the printer to restart when an error occurs Error Prevention Auto Reboot ...

Page 123: ...t Recovery Scanner Jam Recovery Job level Page level Specify how to restart a scan job after resolving a paper jam Note An asterisk next to a value indicates the factory default setting Power Management Menu item Description Sleep Mode Profile Print from Sleep Mode Stay awake after printing Enter Sleep Mode after printing Set the printer to stay awake or enter Sleep mode after printing Sleep Mode P...

Page 124: ... setting Anonymous Data Collection Menu item Description Anonymous Data Collection Device Usage and Performance Information None Send printer usage and performance information to Lexmark Note Anonymous Data Send Time appears only when you set Anonymous Data Collection to Device Usage and Performance Information Anonymous Data Send Time Start Time Stop Time Note An asterisk next to a value indicate...

Page 125: ...to the printer Enable Voice Guidance When Headphone Is Attached Off On Enable Voice Guidance when a headphone is attached to the printer Speak Passwords PINs Off On Set the printer to read out loud passwords or personal identification numbers Note This menu item appears only when a headphone or a speaker is attached to the printer Speech Rate Very Slow Slow Normal Fast Faster Very Fast Rapid Very R...

Page 126: ...to it Tray Configuration Tray Linking Automatic Off Set the printer to link the trays that have the same paper type and paper size settings Tray Configuration Show Tray Insert Message Off Only for unknown sizes Always Display a message that lets the user change the paper size and paper type settings after inserting the tray Tray Configuration A5 Loading Short Edge Long Edge Determine the default load...

Page 127: ... the factory shipped level Supply Usage And Counters ITM Reset Reset Black Cartridge Counter Reset Cyan Cartridge Counter Reset Magenta Cartridge Counter Reset Yellow Cartridge Counter Reset Maintenance Counter Reset the counter after installing a new supply item or maintenance kit Supply Usage And Counters Tiered Coverage Ranges Adjust the amount of color coverage for each printing range Printer ...

Page 128: ...rinter message during emulation Fax Configuration Fax Low Power Support Disable Sleep Permit Sleep Auto Set fax to enter Sleep mode whenever the printer determines that it must Fax Configuration Fax Storage Location NAND Disk Set the storage location for all faxes Note This menu item appears only when a hard disk or an ISD is installed Print Configuration Black Only Mode Off On Print non copy jobs in...

Page 129: ...e job is two sided printing Device Operations Minimum Copy Memory 80 MB 100 MB Set the minimum memory allocation for storing copy jobs Device Operations Clear Custom Status Erase user defined strings for the Default or Alternate custom messages Device Operations Clear all remotely installed messages Erase messages that were remotely installed Device Operations Automatically Display Error Screens Of...

Page 130: ...gister the flatbed and ADF after replacing the ADF scanner glass or controller board Scanner Configuration Reset Maintenance Counter Reset the counter after replacing the ADF maintenance kit Scanner Configuration Edge Erase Flatbed Edge Erase 3 ADF Edge Erase 3 Set the size in millimeters of the no print area around an ADF or flatbed scan job Scanner Configuration ADF Deskew ADF Electronic Deskew On Re...

Page 131: ...s Sanitize all information on hard disk Erase downloads Erase all macros fonts PFOs etc Erase buffered jobs Erase Held jobs Clear all information on non volatile memory and on the storage drive Note Sanitize all information on hard disk appears only when a storage drive is installed Home Screen Customization Note This menu appears only in the Embedded Web Server Menu Description Copy E mail Fax He...

Page 132: ...s to USB Export the compressed log files to a flash drive Send Logs Send printer log information to Lexmark Print Layout Menu item Description Sides 1 Sided 2 Sided Specify whether to print on one side or both sides of the paper Flip Style Long Edge Short Edge Determine which side of the paper is bound when performing two sided printing Blank Pages Print Do Not Print Print blank pages that are inclu...

Page 133: ...it Specify the orientation of multiple page images when using the Pages per Side menu Pages per Side Border None Solid Print a border around each page image when using the Pages per Side menu Copies 1 9999 1 Specify the number of copies for each print job Print Area Normal Fit to page Whole Page Set the printable area on a sheet of paper Note An asterisk next to a value indicates the factory defau...

Page 134: ... always runs while printing whether color or black pages are being printed This setting only changes printer behavior when the print engine is running at a 25 pages per minute process speed It has no effect when the print engine is running at faster process speeds Download Target RAM Disk Specify where to save all permanent resources that have been downloaded to the printer Note This menu item app...

Page 135: ...object on the page Note This setting does not affect files where CMYK color specifications are used RGB Contrast 6 to 6 0 Adjust the contrast of every RGB and gray object on a page Note This setting does not affect files where CMYK color specifications are used RGB Saturation 0 to 5 0 Preserve the black and white values while adjusting the color values of every object on the page Note This setting doe...

Page 136: ...cates the factory default setting Job Accounting Menu item Description Job Accounting Off On Set the printer to create a log of the print jobs that it receives Note This menu item appears only when a hard disk or an intelligent storage drive ISD is installed Accounting Log Frequency Daily Weekly Monthly Specify how often the printer creates a log file Log Action at End of Frequency None E mail Curr...

Page 137: ... All Logs Specify how the printer responds when hard disk or ISD usage reaches the maximum limit 100MB URL to Post Log Specify where the printer posts job accounting logs E mail Address to Send Logs Specify the e mail address to which the printer sends job accounting logs Log File Prefix Specify the prefix for the log files Note The current host name defined in the TCP IP menu is used as the default l...

Page 138: ...age drive ISD Flash Disk sets the printer to search the hard disk or ISD for the requested font before searching the printer memory This menu item appears only when a hard disk or an ISD is installed Wait Timeout Off On 40 seconds Enable the printer to wait for more data before canceling a print job Note An asterisk next to a value indicates the factory default setting PCL Menu item Description Fo...

Page 139: ...default setting 64 is the international factory default setting PCL5 Minimum Line Width 1 30 2 Set the initial minimum stroke width PCLXL Minimum Line Width 1 30 2 A4 Width 198 mm 203 mm Set the width of the logical page on A4 size paper Note Logical page is the space on the physical page where data is printed Auto CR after LF On Off Set the printer to perform a carriage return after a line feed c...

Page 140: ... Note When set to On this menu item overrides the scaling and orientation settings for the image Invert Off On Invert bitonal monochrome images Note This menu item does not apply to GIF or JPEG image formats Scaling Anchor Top Left Best Fit Anchor Center Fit Height Width Fit Height Fit Width Adjust the image to fit the printable area Note When Auto Fit is set to On Scaling is automatically set to B...

Page 141: ...First Determine the behavior of the multipurpose feeder Notes Cassette configures the multipurpose feeder as the automatic paper source Manual sets the multipurpose feeder only for manual feed print jobs First configures the multipurpose feeder as the primary paper source Note An asterisk next to a value indicates the factory default setting Media Configuration Universal Setup Menu item Description U...

Page 142: ...e appears only when the longest edge is shorter than the maximum width supported Note An asterisk next to a value indicates the factory default setting Custom Scan Sizes Menu item Description Custom Scan Size x Scan Size Name Width 1 8 5 inches 8 5 25 4 215 9 mm 215 9 Height 1 25 inches 11 25 4 635 mm 279 4 Orientation Portrait Landscape 2 scans per side Off On Assign a scan size name and configure...

Page 143: ...Photo Photo Graphics Improve the output result based on the content of the original document Content Source Black and White Laser Color Laser Inkjet Photo Film Magazine Newspaper Press Other Improve the output result based on the source of the original document Sides 1 sided to 1 sided 1 sided to 2 sided 2 sided to 1 sided 2 sided to 2 sided Specify the scanning behavior based on the original docu...

Page 144: ... On Place a border around each image when printing multiple pages on a single page Collate Off 1 1 1 2 2 2 On 1 2 1 2 1 2 Print multiple copies in sequence Copy from Size List of paper sizes Set the paper size of the original document Note Letter is the U S factory default setting A4 is the international factory default setting Copy to Source Tray x 1 Multipurpose Feeder Auto Size Match Specify th...

Page 145: ...genta and yellow Color Dropout Color Dropout None Default Red Threshold 128 Default Green Threshold 128 Default Blue Threshold 128 Specify which color to drop during scanning and adjust the dropout setting for that color Auto Color Detect Color Sensitivity 5 Area Sensitivity 5 Configure the auto color detection setting Contrast Best for content 0 5 Specify the contrast for the scanned image Backgro...

Page 146: ... Allow Priority Copies Off On Interrupt a print job to make copies Custom Job Scanning Off On Set the printer to scan the first set of original documents using the specified settings and then scan the next set with the same or different settings Note This menu item appears only when a hard disk or an intelligent storage drive ISD is installed Allow Save as Shortcut Off On Save copy settings as a sho...

Page 147: ... requires a line splitter and a telephone handset Use a regular telephone line to answer an incoming fax job and to dial a fax number To go directly to the manual fax function touch and 0 on the keypad Memory Use All receive Mostly receive Equal Mostly send All send Set the amount of internal printer memory allocated for faxing Note This menu item prevents memory buffer conditions and failed faxes...

Page 148: ...r fax machines Fax Transport T 38 Analog G 711 etherFAX Set the fax transport method Note This menu item appears only if an etherFAX or Fax over IP FoIP license bundle is installed in the printer Note An asterisk next to a value indicates the factory default setting HTTPS Fax Settings Note This menu appears only if Fax Transport is set to etherFAX Menu item Description HTTPS service URL Specify th...

Page 149: ...oto Photo Graphics Improve the output result based on the content of the original document Content Source Black and White Laser Color Laser Inkjet Photo Film Magazine Newspaper Press Other Improve the output result based on the source of the original document Darkness 1 9 5 Adjust the darkness of the scanned image Behind a PABX On Off Set the printer to dial a fax number without waiting to recogni...

Page 150: ...output Background Removal Level 4 to 4 0 Adjust the amount of background visible on a scanned image Mirror Image Off On Create a mirror image of the original document Negative Image Off On Create a negative image of the original document Shadow Detail 4 to 4 0 Adjust the amount of shadow detail visible on a scanned image Scan Edge to Edge On Off Allow edge to edge scanning of the original document...

Page 151: ...er to Fax On Off Allow the print driver to send fax Allow Save as Shortcut On Off Save fax numbers as shortcuts on the printer Max Speed 33600 14400 9600 4800 2400 Set the maximum speed for sending fax Custom Job Scanning Off On Turn on scanning of custom jobs by default Note This menu item appears only when a hard disk or an intelligent storage drive ISD is installed Scan Preview Off On Show a pr...

Page 152: ...Answer 1 25 3 Set the number of rings required before the printer answers the incoming calls Auto Reduction On Off Scale incoming fax to fit on the page Paper Source Tray X Auto Set the paper source for printing incoming fax Sides On Off Print on both sides of the paper Separator Sheets None Before Job After Job Specify whether to insert blank separator sheets when printing Separator Sheet Source T...

Page 153: ... On Off Set the printer to receive fax Enable Color Fax Receive On Off Set the printer to receive fax in color Enable Caller ID On Off Show the caller ID information of the incoming call on the printer display Block No Name Fax On Off Block incoming faxes without fax IDs Banned Fax List Add Banned Fax Specify the phone numbers that you want to block Answer On All Rings Single Ring Only Double Ring...

Page 154: ...r to receive fax manually Fax Forwarding Print Print and Forward Forward Specify whether to forward received fax Forward To Destination 1 Destination 2 Specify where to forward received fax Note This menu item appears only when Fax Forwarding is set to Print and Forward or Forward Max Speed 33600 14400 9600 4800 2400 Set the maximum speed for transmitting fax Note An asterisk next to a value indic...

Page 155: ...Footer x Off On Footer x Note An asterisk next to a value indicates the factory default setting Fax Log Settings Menu item Description Transmission Log Frequency Always Never Only for Error Specify how often the printer creates a transmission log Transmission Log Action Print Off On E mail Off On Print or e mail a log for successful fax transmission or transmission error Note An asterisk next to a...

Page 156: ... a summary of all fax jobs Enable Call Log On Off View a summary of the fax call history Log Output Bin Standard Bin Bin x Specify the output bin for printed logs Note An asterisk next to a value indicates the factory default setting Speaker Settings Menu item Description Speaker Mode Always Off Always On On until Connected Set the fax speaker mode Speaker Volume Low High Adjust the fax speaker vo...

Page 157: ...itiation Protocol SIP clients User Specify the name of the user for SIP Password Specify the password that is used in registering with the SIP Registrar Auth ID The user name that is used when registering Note If the Auth ID setting is not set the setting uses the user name of the User field instead Transport For Registration UDP TCP Set the SIP transport type for registration Transport For Incomin...

Page 158: ...sterisk next to a value indicates the factory default setting T 38 Settings Menu item Description Indicator Redundancy 0 5 3 Set the number of times that a fax indicator is repeated in the T 38 communication Low Speed Redundancy 0 5 3 Set the number of times that low speed data is repeated in the T 38 communication High Speed Redundancy 0 5 1 Set the number of times that high speed data is repeate...

Page 159: ...35 25 Enter the port number of the primary SMTP server Secondary SMTP Gateway Type the server IP address or host name of your secondary or backup SMTP server Secondary SMTP Gateway Port 1 65535 25 Enter the server port number of your secondary or backup SMTP server SMTP Timeout 5 30 30 Set the time before the printer times out if the SMTP server does not respond Reply Address Specify a reply addre...

Page 160: ...connect to the SMTP server Device Password Kerberos 5 REALM Specify the realm for the Kerberos 5 authentication protocol NTLM Domain Specify the domain name for the NTLM security protocol Disable SMTP server not set up error Off On Hide the SMTP server not set up error message Note An asterisk next to a value indicates the factory default setting Fax Server Scan Settings Menu item Description Imag...

Page 161: ...both sides of the document Darkness 1 9 5 Set the darkness of the output Orientation Portrait Landscape Specify the orientation of text and graphics on the page Original Size List of paper sizes Set the paper size of the original document Notes Mixed Sizes is the U S factory default setting A4 is the international factory default setting This setting may vary depending on your printer model Use Mu...

Page 162: ...r does not respond Reply Address Specify a reply address in the e mail Always use SMTP default Reply Address On Off Always use the default reply address in the SMTP server Use SSL TLS Disabled Negotiate Required Specify whether to send e mail using an encrypted link Require Trusted Certificate Off On Require a trusted certificate when accessing the SMTP server SMTP Server Authentication No authentic...

Page 163: ...col Disable SMTP server not set up error Off On Hide the SMTP server not set up error message Note An asterisk next to a value indicates the factory default setting E mail Defaults Menu item Description Subject Specify the e mail subject and message Message File Name Specify the filename for the scanned document Format JPEG jpg PDF pdf TIFF tif XPS xps TXT txt RTF rtf DOCX docx XLSX xlsx CSV csv Sp...

Page 164: ...iginal document Content Source Black and White Laser Color Laser Inkjet Photo Film Magazine Newspaper Press Other Improve the output result based on the content source of the original document Color Black and White Gray Color Auto Set the printer to capture file content in color or in mono Resolution 75 dpi 150 dpi 200 dpi 300 dpi 400 dpi 600 dpi Set the resolution of the scanned image Darkness 1 9...

Page 165: ...etect Color Sensitivity 5 Area Sensitivity 5 E mail Bit Depth 1 bit Minimum Scan Resolution 300 dpi Configure the auto color detection setting JPEG Quality Best for content 5 95 Set the JPEG quality of the scanned image Contrast Best for content 0 5 Specify the contrast for the scanned image Background Removal Background Detection Content based Level 0 Remove the background color or image noise fro...

Page 166: ...l Size 0 65535 0 Set the allowable file size for each e mail Size Error Message Specify an error message that the printer sends when an e mail exceeds its allowable file size Note You can type up to 1024 characters Limit Destinations Limit sending of e mail only to the specified list of domain name Note Use a comma to separate each domain Send Me a Copy Never appears On by Default Off by Default Alwa...

Page 167: ... printing e mail logs Custom Job Scanning Off On Set the printer to scan the first set of original documents using the specified settings and then scan the next set with the same or different settings Note This menu item appears only when a hard disk or an ISD is installed Scan Preview Off On Show a scan preview of the original document Note This menu item appears only when a hard disk or an ISD is ...

Page 168: ...f Auto Contrast Enhance Off Configure the settings for optical character recognition OCR Note This menu item appears only if you have purchased and installed an OCR solution PDF Settings PDF Version 1 5 Archival Version A 1a Highly Compressed Off Secure Off Searchable Off Archival PDF A Off Configure the PDF settings for the scanned image Notes Archival Version and Archival PDF A are supported only ...

Page 169: ...ure file content in color or in mono Resolution 75 dpi 150 dpi 200 dpi 300 dpi 400 dpi 600 dpi Set the resolution of the scanned image Darkness 1 9 5 Adjust the darkness of the scanned image Orientation Portrait Landscape Specify the orientation of the original document Original Size Mixed Sizes Set the paper size of the original document Sides Off Long Edge Short Edge Specify the orientation when ...

Page 170: ...ality Best for content 5 95 Set the JPEG quality of the scanned image Contrast Best for content 0 1 2 3 4 5 Specify the contrast for the scanned image Background Removal Background Detection Content based Level 0 Remove the background color or image noise from the original document Notes Content based removes the background color from the original document Fixed removes image noise from a photo Mi...

Page 171: ...et the quality of photo on the scanned image Use Multi Page TIFF On Off Enable scanning of multiple TIFF images in one TIFF file TIFF Compression LZW JPEG Specify the compression type for TIFF files Transmission Log Print Log Do Not Print Log Print Only For Error Print a transmission log for FTP scans Log Paper Source Tray x 1 Multipurpose Feeder Specify the paper source for printing FTP logs Custom...

Page 172: ...rast Enhance Off Configure the settings for optical character recognition OCR Note This menu item appears only if you have purchased and installed an OCR solution PDF Settings PDF Version 1 5 Archival Version A 1a Highly Compressed Off Secure Off Searchable Off Archival PDF A Off Configure the PDF settings of the scanned image Notes Archival Version and Archival PDF A are supported only when PDF Ver...

Page 173: ... dpi 400 dpi 600 dpi Set the resolution of the scanned image Darkness 1 9 5 Adjust the darkness of the scanned image Orientation Portrait Landscape Specify the orientation of the original document Original Size Mixed Sizes Set the paper size of the original document Sides Off Long edge Short edge Specify the orientation of the original document when scanning on both sides of the document File Name...

Page 174: ...nned image Contrast Best for content 0 5 Specify the contrast for the scanned image Background Removal Background Detection Content based Level 0 Remove the background color or image noise from the original document Notes Content based removes the background color from the original document Fixed removes image noise from a photo Mirror Image Off On Create a mirror image of the original document Ne...

Page 175: ...ges in one TIFF file TIFF Compression LZW JPEG Specify the compression type for TIFF files Custom Job Scanning Off On Set the printer to scan the first set of original documents using the specified settings and then scan the next set with the same or different settings Note This menu item appears only when a hard disk or an ISD is installed Scan Preview Off On Show a scan preview of the original docum...

Page 176: ...ided printing Pages per Side Off 2 pages per side 3 pages per side 4 pages per side 6 pages per side 9 pages per side 12 pages per side 16 pages per side Print multiple page images on one side of a sheet of paper Pages per Side Ordering Horizontal Reverse Horizontal Reverse Vertical Vertical Specify the positioning of multiple page images when using Pages per Side menu Pages per Side Orientation A...

Page 177: ...Wireless is available only in printers connected to a wireless network Network Status Show the connectivity status of the printer network Display Network Status on Printer Off On Show the network status on the display Speed Duplex Show the speed of the currently active network card IPv4 Show the IPv4 address All IPv6 Addresses Show all IPv6 addresses Reset Print Server Reset all active network con...

Page 178: ... Choose Network Add Wi Fi Network Network Name Network Mode Infrastructure Wireless Security Mode Disabled WEP WPA2 WPA Personal WPA2 Personal Configure the Wi Fi connection using the control panel Wi Fi Protected Setup WPS Auto Detect Off On Start Push Button Method Start PIN Method Establish a Wi Fi network and enable network security Notes WPS Auto Detect appears only when the Wireless Security ...

Page 179: ... is set to WEP Set WEP Key Specify a WEP password for secure Wi Fi connection WPA2 WPA Personal AES Enable Wi Fi security through Wi Fi Protected Access WPA Note This menu item appears only when the Wireless Security Mode is set to WPA2 WPA Personal Set Pre Shared Key Set the password for secure Wi Fi connection WPA2 Personal AES Enable Wi Fi security through WPA2 Note This menu item appears only ...

Page 180: ... menu PS SmartSwitch Off On Set the printer to switch automatically to PS emulation when a print job requires it regardless of the default printer language Note If PS SmartSwitch is off then the printer does not examine incoming data and uses the default printer language specified in the Setup menu Job Buffering On Off Temporarily store print jobs in the hard disk or intelligent storage drive ISD b...

Page 181: ...Off On Accept requests to connect to the network automatically Note Accepting clients automatically is not secured Note An asterisk next to a value indicates the factory default setting Ethernet Menu item Description Network Speed Show the speed of the active network adapter IPv4 Enable DHCP On Set Static IP Address Configure the IPv4 settings IPv6 Enable IPv6 On Enable DHCPv6 Off Stateless Address...

Page 182: ...stalled Mac Binary PS Auto On Off Set the printer to process Macintosh binary PostScript print jobs Notes Auto processes print jobs from computers using either Windows or Macintosh operating systems Off filters PostScript print jobs using the standard protocol Energy Efficient Ethernet On Off Auto Reduce power consumption when the printer does not receive data from the Ethernet network Note An aste...

Page 183: ...OOTP to assign a printer IP address Restricted Server List Specify the IP addresses that are allowed to communicate with the printer over TCP IP Notes Use a comma to separate each IP address You can add up to 50 IP addresses Restricted Server List Options Block All Ports Block Printing Only Block Printing and HTTP Only Specify the access option for IP addresses that are not in the list MTU 256 150...

Page 184: ...indicates the factory default setting SNMP Note This menu appears only in network printers or printers that are attached to print servers Menu item Description SNMP Versions 1 and 2c Enabled Off On Allow SNMP Set Off On Enable PPM MIB Off On SNMP Community Configure Simple Network Management Protocol SNMP versions 1 and 2c to install print drivers and applications Note An asterisk next to a value i...

Page 185: ...sk next to a value indicates the factory default setting IPSec Note This menu appears only in network printers or printers that are attached to print servers Menu item Description Enable IPSec Off On Enable Internet Protocol Security IPSec Base Configuration Default Compatibility Secure Set the IPSec base configuration Note This menu item appears only when Enable IPSec is set to On DH Diffie Hellman...

Page 186: ...y when Base Configuration is set to Secure IPSec Device Certificate Specify an IPSec certificate Note This menu item appears only when Enable IPSec is set to On Pre Shared Key Authenticated Connections Host x Configure the authenticated connections of the printer Note These menu items appear only when Enable IPSec is set to On Certificate Authenticated Connections Host x Address subnet Note An asterisk...

Page 187: ...t servers Menu item Description LPD Timeout 0 65535 seconds 90 Set the time out value to stop the Line Printer Daemon LPD server from waiting indefinitely for hung or invalid print jobs LPD Banner Page Off On Print a banner page for all LPD print jobs Note A banner page is the first page of a print job used as a separator of print jobs and to identify the originator of the print job request LPD Trai...

Page 188: ...P TFTP Other Settings HTTPS Device Certificate default View the HTTP device certificate used on the printer Other Settings Timeout for HTTP FTP Requests 30 Specify the amount of time before the server connection stops Other Settings Retries for HTTP FTP Requests 3 Set the number of retries to connect to the HTTP FTP server Note An asterisk next to a value indicates the factory default setting ThinPr...

Page 189: ...enu item appears only when a hard disk or an ISD is installed Mac Binary PS Auto On Off Set the printer to process Macintosh binary PostScript print jobs Notes Auto processes print jobs from computers using either Windows or Macintosh operating systems Off filters PostScript print jobs using the standard protocol Enable USB Port Off On Enable the front USB drive port Note An asterisk next to a valu...

Page 190: ...ss Use Profiles Cancel Jobs at the Device Change Language Internet Printing Protocol IPP Initiate Scans Remotely B W Print Color Print Network Folder Scan Hard Disk Print Hard Disk Color Print Hard Disk Scan Control access to the printer functions Note Some menu items appear only when a hard disk or an intelligent storage drive is installed Administrative Menus Security Menu Network Ports Menu Pape...

Page 191: ...n Manage Groups Permissions Show a list of all saved groups in the printer Add User User Name Password User Name Password PIN Create local accounts and specify their access to the printer functions administrative menus printer management options and applications Default Login Methods Note This menu appears only when you configure the settings in the Local Accounts menu Menu item Description Control...

Page 192: ...it log and remote syslog Enable Remote Syslog Off On Send audit logs to a remote server Remote Syslog Server Specify the remote syslog server Remote Syslog Port 1 65535 514 Specify the remote syslog port Remote Syslog Method Normal UDP Stunnel Specify a syslog method to transmit logged events to a remote server Note An asterisk next to a value indicates the factory default setting Use printer menu...

Page 193: ... Local Use 3 local3 20 Local Use 4 local4 21 Local Use 5 local5 22 Local Use 6 local6 23 Local Use 7 local7 Specify a facility code that the printer uses when sending log events to a remote server Severity of Events to Log 0 Emergency 1 Alert 2 Critical 3 Error 4 Warning 5 Notice 6 Informational 7 Debug Specify the priority level cutoff for logging messages and events Remote Syslog Non Logged Even...

Page 194: ...e administrator when the log fills its allotted memory Full Alert Level 1 99 90 E mail Log Exported Alert Off On Send e mail notification to the administrator when a log is exported E mail Log Settings Changed Alert Off On Send e mail notification to the administrator when Enable Audit is set Log Line Endings LF n CR r CRLF r n Specify how the log file terminates the end of each line Digitally Sign Ex...

Page 195: ...the print jobs for that user name are deleted Confidential Job Expiration Off 1 Hour 4 Hours 24 Hours 1 Week Set an individual expiration time for each held job before it is automatically deleted from the hard disk or intelligent storage drive Note A held job is either Confidential Repeat Reserve or Verify Repeat Job Expiration Off 1 Hour 4 Hours 24 Hours 1 Week Set the expiration time for a print j...

Page 196: ...tion Stored in onboard memory Off On Set the printer to erase automatically all the data of a job from its memory after the job is finished Stored on hard disk 1 Pass Erase 3 Pass Erase 7 Pass Erase Set the printer to erase automatically all the data of a job from a storage drive after the job is finished Note This menu item appears only when a hard disk or an intelligent storage drive is installed ...

Page 197: ... No Effect may make access to the printer impossible when the required security information is unavailable Use Intelligent Storage Drive for User Data Off On Enable intelligent storage drive to store user data Minimum Password Length 0 32 0 Specify the password length Enable Password PIN Reveal Off On Show the password or personal identification number Note An asterisk next to a value indicates the...

Page 198: ... status Profiles List Print a list of profiles that are stored in the printer Asset Report Print a diagnostic tool for print problems Note To avoid clipping the content print the report on letter or A4 size paper Print Menu item Description Print Fonts PCL Fonts PS Fonts Print samples and information about the fonts that are available in each printer language Print Demo Demo Page Print a page that s...

Page 199: ...u item Description Network Setup Page Print a page that shows the configured network and wireless settings on the printer Note This menu item appears only in network printers or printers connected to print servers Wi Fi Direct Connected Clients Print a page that shows the list of devices that are connected to the printer using Wi Fi Direct Note This menu item appears only when Enable Wi Fi Direct i...

Page 200: ...lick Custom Supply Notifications 4 Select a notification for each supply item 5 Apply the changes Setting up e mail alerts Configure the printer to send e mail alerts when supplies are low when paper must be changed or added or when there is a paper jam 1 Open a web browser and then type the printer IP address in the address field Notes View the printer IP address on the printer home screen The IP add...

Page 201: ...parts and supplies and may deliver unpredictable results if third party parts and supplies are used Imaging component usage beyond the intended life may damage your Lexmark printer or its associated components Warning Potential Damage Supplies and parts without Return Program agreement terms may be reset and remanufactured However the manufacturer s warranty does not cover any damage caused by non...

Page 202: ...81C2XY0 81C8XY0 Black 81C1XK0 81C2XK0 81C8XK0 1 Supported only in the Lexmark CX730 printer model 2 Supported only in the Lexmark CX735 printer model For more information on countries in each region go to www lexmark com regions Lexmark CX730 High yield toner cartridges Item Worldwide Cyan 71C0H20 Magenta 71C0H30 Yellow 71C0H40 Black 71C0H10 Lexmark CX735 Extra high yield toner cartridges Item Wor...

Page 203: ...ng certain types of paper requires more frequent replacement of the maintenance kit The separator assembly fuser and pick roller assembly are included in the maintenance kit and can be ordered individually and replaced if necessary For more information on replacing the maintenance kit see the documentation that came with the kit Item Part number Fuser maintenance kit 110 120 V 41X3882 Fuser mainte...

Page 204: ...Replacing parts and supplies Replacing a toner cartridge 1 Open door B Maintain the printer 204 ...

Page 205: ...2 Remove the used toner cartridge 3 Unpack the new toner cartridge Maintain the printer 205 ...

Page 206: ...4 Insert the new toner cartridge 5 Close door B Maintain the printer 206 ...

Page 207: ...Replacing the black imaging unit 1 Open door B Maintain the printer 207 ...

Page 208: ...2 Remove the waste toner bottle Note To avoid spilling the toner place the bottle in an upright position Maintain the printer 208 ...

Page 209: ...3 Remove the toner cartridges Maintain the printer 209 ...

Page 210: ...4 Disconnect the imaging kit cable Maintain the printer 210 ...

Page 211: ...5 Remove the imaging kit Note To avoid scratching the imaging kit or damaging the photoconductor drum place the imaging kit in an uplifted position Maintain the printer 211 ...

Page 212: ... used black imaging unit Warning Potential Damage Do not expose the photoconductor unit to direct light for more than 10 minutes Extended exposure to light may cause print quality problems Maintain the printer 212 ...

Page 213: ...ot touch the shiny photoconductor drum under the imaging kit Doing so may affect the quality of future print jobs 7 Unpack the new black imaging unit 8 Insert the new black imaging unit into the imaging kit Maintain the printer 213 ...

Page 214: ...9 Insert the imaging kit Maintain the printer 214 ...

Page 215: ...10 Connect the imaging kit cable 11 Insert the waste toner bottle 12 Insert the toner cartridges 13 Close door B Maintain the printer 215 ...

Page 216: ...Replacing the color imaging kit 1 Open door B Maintain the printer 216 ...

Page 217: ...2 Remove the waste toner bottle Note To avoid spilling the toner place the bottle in an upright position Maintain the printer 217 ...

Page 218: ...3 Remove the toner cartridges Maintain the printer 218 ...

Page 219: ...4 Disconnect the imaging kit cable Maintain the printer 219 ...

Page 220: ...5 Remove the used imaging kit Maintain the printer 220 ...

Page 221: ...d exposure to light may cause print quality problems Warning Potential Damage Do not touch the shiny photoconductor drum under the imaging unit Doing so may affect the quality of future print jobs 7 Unpack the new imaging kit Note The imaging kit includes the imaging kit and the cyan magenta and yellow developer units Maintain the printer 221 ...

Page 222: ...8 Insert the black imaging unit into the new imaging kit Maintain the printer 222 ...

Page 223: ...9 Insert the new imaging kit Maintain the printer 223 ...

Page 224: ...10 Connect the imaging kit cable 11 Insert the waste toner bottle 12 Insert the toner cartridges 13 Close door B Maintain the printer 224 ...

Page 225: ...Replacing the waste toner bottle 1 Open door B Maintain the printer 225 ...

Page 226: ...tle Note To avoid spilling the toner place the bottle in an upright position 3 Unpack the new waste toner bottle 4 Insert the new waste toner bottle 5 Close door B 6 Dispose the used waste toner bottle properly Maintain the printer 226 ...

Page 227: ...g the power cord from the electrical outlet 2 Open door A and then open door A1 CAUTION HOT SURFACE The inside of the printer might be hot To reduce the risk of injury from a hot component allow the surface to cool before touching it Maintain the printer 227 ...

Page 228: ...3 Remove the used fuser 4 Unpack the new fuser 5 Insert the new fuser 6 Close door A1 and then close door A Maintain the printer 228 ...

Page 229: ...ed and properly grounded electrical outlet that is near the product and easily accessible 8 Reset the fuser maintenance counter For more information see Resetting the maintenance counter on page 241 Replacing the pick roller Replacing the pick roller in the 550 sheet tray 1 Turn off the printer and then unplug the power cord from the electrical outlet 2 Remove the tray Maintain the printer 229 ...

Page 230: ...ve the used pick roller 4 Unpack the new pick roller Warning Potential Damage To avoid damage and poor printer performance make sure that your hands are clean when handling the parts Maintain the printer 230 ...

Page 231: ...the risk of fire or electrical shock connect the power cord to an appropriately rated and properly grounded electrical outlet that is near the product and easily accessible Replacing the pick roller in the multipurpose feeder 1 Turn off the printer and then unplug the power cord from the electrical outlet 2 Open the multipurpose feeder Maintain the printer 231 ...

Page 232: ...ve the used pick roller 4 Unpack the new pick roller Warning Potential Damage To avoid damage and poor printer performance make sure that your hands are clean when handling the parts Maintain the printer 232 ...

Page 233: ... and then turn on the printer CAUTION POTENTIAL INJURY To avoid the risk of fire or electrical shock connect the power cord to an appropriately rated and properly grounded electrical outlet that is near the product and easily accessible Replacing the separator bracket 1 Pull out the tray Maintain the printer 233 ...

Page 234: ...2 Remove the used separator bracket 3 Unpack the new separator bracket Maintain the printer 234 ...

Page 235: ...4 Insert the new separator bracket 5 Insert the tray Replacing the scanner glass pad 1 Open the scanner cover Maintain the printer 235 ...

Page 236: ... the used scanner glass pad 3 Unpack the new scanner glass pad 4 Place the white area of the new scanner glass pad facedown on the scanner glass and then remove the backing on the tape Maintain the printer 236 ...

Page 237: ... the scanner glass 5 Close the scanner cover to stick the new scanner glass pad to the cover 6 Open the scanner cover to check if the new scanner glass pad is properly attached to the cover 7 Close the scanner cover Replacing the ADF rollers 1 Open door C Maintain the printer 237 ...

Page 238: ...2 Remove the used ADF pick roller Maintain the printer 238 ...

Page 239: ...3 Remove the used ADF separator roller 4 Unpack the new ADF pick roller and ADF separator roller Maintain the printer 239 ...

Page 240: ...5 Insert the new ADF separator roller until it clicks into place Maintain the printer 240 ...

Page 241: ...until it clicks into place 7 Close door C Resetting the maintenance counter 1 From the home screen touch Settings Device Maintenance Configuration Menu Supply Usage And Counters 2 Touch Reset Maintenance Counter Maintain the printer 241 ...

Page 242: ... not covered by the printer warranty 1 Turn off the printer and then unplug the power cord from the electrical outlet 2 Remove paper from the standard bin and multipurpose feeder 3 Remove any dust lint and pieces of paper around the printer using a soft brush or vacuum 4 Wipe the outside of the printer with a damp soft lint free cloth Notes Do not use household cleaners or detergents as they may d...

Page 243: ... then turn on the printer CAUTION POTENTIAL INJURY To avoid the risk of fire or electrical shock connect the power cord to an appropriately rated and properly grounded electrical outlet that is near the product and easily accessible Cleaning the scanner 1 Open the scanner cover 2 Using a damp soft lint free cloth wipe the following areas ADF glass pad Scanner glass pad Maintain the printer 243 ...

Page 244: ... ADF glass Scanner glass 3 Close the scanner cover 4 Open door C 5 Using a damp soft lint free cloth wipe the following areas ADF glass pad in door C Maintain the printer 244 ...

Page 245: ... ADF glass in door C 6 Close door C Cleaning the pick tires 1 Turn off the printer and then unplug the power cord from the electrical outlet 2 Remove the tray Maintain the printer 245 ...

Page 246: ...3 Remove the pick roller 4 Apply isopropyl alcohol to a soft lint free cloth and then wipe the pick tires Maintain the printer 246 ...

Page 247: ...he risk of fire or electrical shock connect the power cord to an appropriately rated and properly grounded electrical outlet that is near the product and easily accessible Cleaning the pick roller in the multipurpose feeder 1 Turn off the printer and then unplug the power cord from the electrical outlet 2 Open the multipurpose feeder Maintain the printer 247 ...

Page 248: ...3 Remove the pick roller 4 Apply isopropyl alcohol to a soft lint free cloth and then wipe the pick roller Maintain the printer 248 ...

Page 249: ...tlet and then turn on the printer CAUTION POTENTIAL INJURY To avoid the risk of fire or electrical shock connect the power cord to an appropriately rated and properly grounded electrical outlet that is near the product and easily accessible Cleaning the ADF rollers 1 Open door C Maintain the printer 249 ...

Page 250: ...2 Remove the ADF pick roller Maintain the printer 250 ...

Page 251: ...3 Remove the ADF separator roller 4 Apply isopropyl alcohol to a soft lint free cloth and then wipe the ADF pick roller and ADF separator roller Maintain the printer 251 ...

Page 252: ...5 Insert the ADF separator roller until it clicks into place Maintain the printer 252 ...

Page 253: ...6 Insert the ADF pick roller until it clicks into place 7 Close door C Maintain the printer 253 ...

Page 254: ...lies Print on both sides of the paper Note Two sided printing is the default setting in the print driver Print multiple pages on a single sheet of paper Use the preview feature to see how the document looks like before printing it Print one copy of the document to check its content and format for accuracy Moving the printer to another location CAUTION POTENTIAL INJURY If the printer weight is grea...

Page 255: ...e time Always use the handholds on the printer to lift it Any cart used to move the printer must have a surface able to support the full footprint of the printer Any cart used to move the hardware options must have a surface able to support the dimensions of the options Keep the printer in an upright position Avoid severe jarring movements Make sure that your fingers are not under the printer when ...

Page 256: ...r white pages on page 264 Dark print on page 265 Ghost images on page 267 Gray or colored background on page 268 Incorrect margins on page 269 Light print on page 270 Missing colors on page 272 Mottled print and dots on page 273 Paper curl on page 274 Print crooked or skewed on page 275 Solid color or black images on page 276 Text or images cut off on page 276 Troubleshoot a problem 256 ...

Page 257: ...ntenance 9 00 Printer had to restart Last job may be incomplete Touch Continue to clear the message and continue printing 11 11 11 21 11 31 11 41 11 51 Load source with type size Open the indicated tray and then load paper For more information see Loading trays on page 46 11 12 11 22 11 32 11 42 11 52 Load source with type size orientation Open the indicated tray and then load paper For more infor...

Page 258: ...rpose feeder on page 49 12 92 Change multipurpose feeder to type size orientation Remove paper and then load the correct paper type and size For more information see Loading the multipurpose feeder on page 49 29 08 Reminder Remove packaging 1 Open door A and then remove the packing material inside the printer 2 Pull out each of the three red clips starting with the upper left lower left and ending...

Page 259: ...an upright position 3 Remove the toner cartridges 4 Disconnect the imaging kit cable 5 Remove the imaging kit Note To avoid scratching the imaging kit or damaging the photoconductor drum place the imaging kit in an uplifted position 6 Remove the black imaging unit Warning Potential Damage Do not expose the photoconductor unit to direct light for more than 10 minutes Extended exposure to light may ...

Page 260: ...place unsupported color cartridge See Replacing a toner cartridge on page 204 32 60 Replace unsupported black imaging unit See Replacing the black imaging unit on page 207 32 64 Replace unsupported color imaging kit See Replacing the color imaging kit on page 216 33 40 33 41 33 42 33 43 Non Lexmark color cartridge seeUser s Guide See Non Lexmark supply on page 307 33 60 Non Lexmark black imaging u...

Page 261: ...3 43 Replace defective color cartridge See Replacing a toner cartridge on page 204 43 40 43 41 43 42 43 43 Color cartridge problem 1 Open door B 2 Remove the cartridge 3 Insert the cartridge 4 Close door B If the problem persists then replace the cartridge 55 1 Error reading USB drive Remove USB Remove the flash drive to continue 55 2 Error reading USB hub Remove hub Remove the USB hub to continue ...

Page 262: ...er hard disk Install a printer hard disk 63 Format the disk Formatting now wipes all information from the storage drive To format the disk do the following 1 From the home screen touch Settings Device Maintenance Out of Service Erase 2 Touch Sanitize all information on hard disk and then touch ERASE 71 01 Fax Station Name not set up Contact system administrator See Setting up the fax function usin...

Page 263: ...0 21 80 29 Maintenance kit very low Touch Continue to clear the message 80 31 Replace maintenance kit recommended life exceeded See Ordering a fuser maintenance kit on page 203 82 00 82 02 82 09 Waste toner bottle nearly full Touch Continue to clear the message 82 12 82 13 82 19 82 20 82 22 82 23 82 29 Waste toner bottle almost full Touch Continue to clear the message 82 30 82 30 82 33 82 39 82 40...

Page 264: ...r jam in trays on page 295 200 03 240 05 240 06 240 82 240 83 240 84 647 82 647 83 647 84 647 85 648 82 648 83 648 84 648 85 649 82 649 83 649 84 649 85 650 82 650 83 650 84 650 85 660 81 660 82 660 83 660 84 660 85 660 86 Paper jam jam header xxx yy See Paper jam in the multipurpose feeder on page 296 230 03 230 13 230 23 230 33 230 43 230 53 Paper jam jam header xxx yy See Paper jam in the stand...

Page 265: ...Do not expose the color imaging kit and black imaging unit to direct light for more than 10 minutes Extended exposure to light may cause print quality problems Warning Potential Damage Do not touch the photoconductor drum under the color imaging kit and black imaging unit Doing so may affect the quality of future print jobs b Insert the black imaging unit and then insert the color imaging kit c Pr...

Page 266: ...The problem is solved Step 3 a Depending on your operating system specify the paper type from the Printing Preferences or Print dialog Notes Make sure that the settings match the paper loaded in the tray You can also change the settings on the printer control panel From the home screen touch Settings Paper Tray Configuration Paper Size Type b Print the document Is the print too dark Go to step 4 Go...

Page 267: ...st Pages Action Yes No Step 1 a Load the tray with the correct paper type and weight b Print the document Do ghost images appear on prints Go to step 2 The problem is solved Step 2 a Depending on your operating system specify the paper type from the Printing Preferences or Print dialog Notes Make sure that the setting matches the paper loaded in the tray You can also change the setting on the prin...

Page 268: ...on Yes No Step 1 a Depending on your operating system increase toner darkness from the Printing Preferences or Print dialog Note You can also change the setting on the printer control panel From the home screen touch Settings Print Quality Toner Darkness b Print the document Does gray or colored background appear on prints Go to step 2 The problem is solved Step 2 a Perform Color Adjust From the h...

Page 269: ...ctor drum under the color imaging kit and black imaging unit Doing so may affect the quality of future print jobs b Insert the black imaging unit and then insert the color imaging kit c Print the document Does gray or colored background appear on prints Contact customer support The problem is solved Incorrect margins Action Yes No Step 1 a Adjust the paper guides in the tray to the correct positio...

Page 270: ...lem print the Print Quality Test Pages From the home screen touch Settings Troubleshooting Print Quality Test Pages Action Yes No Step 1 a Perform Color Adjust From the home screen touch Settings Print Quality Advanced Imaging Color Adjust b Print the document Is the print light Go to step 2 The problem is solved Step 2 a Depending on your operating system increase toner darkness from the Printing...

Page 271: ...ch Settings Paper Tray Configuration Paper Size Type b Print the document Is the print light Go to step 5 The problem is solved Step 5 Check if paper has texture or rough finishes Are you printing on textured or rough paper Go to step 6 Go to step 7 Step 6 a Replace textured or rough paper with plain paper b Print the document Is the print light Go to step 7 The problem is solved Step 7 a Load paper...

Page 272: ... Note Before solving the problem print the Print Quality Test Pages From the home screen touch Settings Troubleshooting Print Quality Test Pages Action Yes No a Remove the color imaging kit Warning Potential Damage Do not expose the color imaging kit to direct light for more than 10 minutes Extended exposure to light may cause print quality problems Warning Potential Damage Do not touch the photoc...

Page 273: ...h finishes Do the settings match Go to step 4 Go to step 3 Step 3 a Depending on your operating system specify the paper size and paper type from the Printing Preferences or Print dialog Notes Make sure that the settings match the paper loaded in the tray You can also change the settings on the printer control panel From the home screen touch Settings Paper Tray Configuration Paper Size Type b Print...

Page 274: ...or imaging kit c Print the document Is the print mottled Contact customer support The problem is solved Paper curl Action Yes No Step 1 a Adjust the guides in the tray to the correct position for the paper loaded b Print the document Is the paper curled Go to step 2 The problem is solved Step 2 a Depending on your operating system specify the paper type from the Printing Preferences or Print dialo...

Page 275: ... Print Quality Test Pages From the home screen touch Settings Troubleshooting Print Quality Test Pages Action Yes No Step 1 a Pull out the tray b Remove the paper and then load paper from a fresh package Note Paper absorbs moisture due to high humidity Store paper in its original wrapper until you are ready to use it c Adjust the paper guides in the tray to the correct position for the paper loade...

Page 276: ...sure to light may cause print quality problems Warning Potential Damage Do not touch the photoconductor drum under the color imaging kit and black imaging unit Doing so may affect the quality of future print jobs b Insert the black imaging unit and then insert the color imaging kit c Print the document Is the printer printing solid color or black images Contact customer support The problem is solv...

Page 277: ...he document Is the text or image clipped Go to step 3 The problem is solved Step 3 a Remove the color imaging kit and then remove the black imaging unit Warning Potential Damage Do not expose the color imaging kit and black imaging unit to direct light for more than 10 minutes Extended exposure to light may cause print quality problems Warning Potential Damage Do not touch the photoconductor drum ...

Page 278: ... Note Before solving the problem print the Print Quality Test Pages From the home screen touch Settings Troubleshooting Print Quality Test Pages Action Yes No a Remove the color imaging kit and then remove the black imaging unit Warning Potential Damage Do not expose the color imaging kit and black imaging unit to direct light for more than 10 minutes Extended exposure to light may cause print qua...

Page 279: ...Print dialog Notes Make sure that the setting matches the paper loaded You can also change the setting on the printer control panel From the home screen touch Settings Paper Tray Configuration Paper Size Type b Print the document Do horizontal dark lines appear on prints Go to step 2 The problem is solved Step 2 a Load paper from a fresh package Note Paper absorbs moisture due to high humidity Stor...

Page 280: ... document Do horizontal dark lines appear on prints Contact customer support The problem is solved Vertical dark lines Note Before solving the problem print the Print Quality Test Pages From the home screen touch Settings Troubleshooting Print Quality Test Pages Action Yes No Step 1 a Depending on your operating system specify the paper type from the Printing Preferences or Print dialog Notes Make...

Page 281: ... to light may cause print quality problems Warning Potential Damage Do not touch the photoconductor drum under the color imaging kit and black imaging unit Doing so may affect the quality of future print jobs b Insert the black imaging unit and then insert the color imaging kit c Print the document Do vertical dark lines appear on prints Contact customer support The problem is solved Horizontal wh...

Page 282: ...horizontal white lines appear on prints Go to step 3 The problem is solved Step 3 a Remove the color imaging kit and then remove the black imaging unit Warning Potential Damage Do not expose the color imaging kit and black imaging unit to direct light for more than 10 minutes Extended exposure to light may cause print quality problems Warning Potential Damage Do not touch the photoconductor drum u...

Page 283: ...mmended paper type a Load the specified paper source with the recommended paper type b Print the document Do vertical white lines appear on prints Go to step 3 The problem is solved Step 3 a Remove the color imaging kit and then remove the black imaging unit Warning Potential Damage Do not expose the color imaging kit and black imaging unit to direct light for more than 10 minutes Extended exposure...

Page 284: ...ing the Maintenance Defect Ruler measure the distance between the repeating defects on the affected color page b Replace the supply item that matches the measurement on the affected color page Color imaging kit or black imaging unit 94 5 mm 3 72 in 29 9 mm 1 18 in 23 2 mm 0 91 in Developer unit 43 6 mm 1 72 in 45 0 mm 1 77 in c Print the Print Quality Test Pages Do the defects still appear Take no...

Page 285: ...s do not print Action Yes No Step 1 a From the document you are trying to print open the Print dialog and then check if you have selected the correct printer b Print the document Is the document printed The problem is solved Go to step 2 Step 2 a Check if the printer is on b Resolve any error messages that appear on the display c Print the document Is the document printed The problem is solved Go ...

Page 286: ...ments do not print Action Yes No Step 1 a From the control panel check if the documents appear in the Held Jobs list Note If the documents are not listed then print the documents using the Print and Hold options b Print the documents Are the documents printed The problem is solved Go to step 2 Step 2 The print job may contain a formatting error or invalid data Delete the print job and then send it...

Page 287: ...job individually Are the documents printed The problem is solved Go to step 4 Step 4 a Delete some held jobs to free up printer memory b Print the documents Are the documents printed The problem is solved Go to step 5 Step 5 a Add printer memory b Print the documents Are the documents printed The problem is solved Contact customer support Job prints from the wrong tray or on the wrong paper Action...

Page 288: ...tray The problem is solved Contact customer support Slow printing Action Yes No Step 1 Make sure that the printer cable is securely connected to the printer and to the computer print server option or other network device Is the printer printing slow Go to step 2 The problem is solved Step 2 a Make sure that the printer is not in Quiet Mode From the home screen touch Settings Device Maintenance Con...

Page 289: ...Settings Paper Tray Configuration Paper Size Type Heavier paper prints more slowly Paper narrower than letter A4 and legal may print more slowly b Print the document Is the printer printing slow Go to step 6 The problem is solved Step 6 a Make sure that the printer settings for texture and weight match the paper being loaded From the home screen touch Settings Paper Media Configuration Media Types N...

Page 290: ...properly grounded electrical outlet that is near the product and easily accessible Is the printer responding The problem is solved Go to step 2 Step 2 Check if the electrical outlet is turned off by a switch or breaker Is the electrical outlet turned off by a switch or breaker Turn on the switch or reset the breaker Go to step 3 Step 3 Check if the printer is on Is the printer on Go to step 4 Turn...

Page 291: ...sh drive Action Yes No Step 1 Check if the printer is not busy processing another print copy scan or fax job Is the printer ready Go to step 3 Go to step 2 Step 2 Wait for the printer to finish processing the other job Remove and then insert the flash drive Does the printer recognize the flash drive The problem is solved Go to step 3 Step 3 Check if the flash drive is inserted into the front USB port ...

Page 292: ...t the flash drive Does the printer recognize the flash drive The problem is solved Contact customer support Enabling the USB port From the home screen touch Settings Network Ports USB Enable USB Port Clearing jams Avoiding jams Load paper properly Make sure that the paper lies flat in the tray Correct loading of paper Incorrect loading of paper Do not load or remove a tray while the printer is printi...

Page 293: ...gn the paper edges before loading Do not use paper that has been cut or trimmed by hand Do not mix paper sizes weights or types in the same tray Make sure that the paper size and type are set correctly on the computer or printer control panel Store paper according to manufacturer recommendations Identifying jam locations Notes When Jam Assist is set to On the printer flushes blank pages or pages wi...

Page 294: ...Jam locations 1 ADF 2 Standard bin 3 Door A 4 Multipurpose feeder 5 Trays Troubleshoot a problem 294 ...

Page 295: ...A sensor inside the optional tray is easily damaged by static electricity Touch a metal surface before removing the jammed paper in the tray 2 Remove the jammed paper Note Make sure that all paper fragments are removed 3 Insert the tray Troubleshoot a problem 295 ...

Page 296: ...or C 3 Remove the jammed paper Note Make sure that all paper fragments are removed 4 Close door C Paper jam in the multipurpose feeder 1 Remove paper from the multipurpose feeder 2 Pull out the tray 3 Remove the jammed paper Note Make sure that all paper fragments are removed Troubleshoot a problem 296 ...

Page 297: ...sure that all paper fragments are removed Paper jam in door A Paper jam in the fuser area 1 Open door A CAUTION HOT SURFACE The inside of the printer might be hot To reduce the risk of injury from a hot component allow the surface to cool before touching it Troubleshoot a problem 297 ...

Page 298: ...2 Remove the jammed paper Note Make sure that all paper fragments are removed 3 Open door A1 Troubleshoot a problem 298 ...

Page 299: ...moved 6 Close and latch the fuser access door 7 Close door A1 and then close door A Paper jam behind door A 1 Open door A CAUTION HOT SURFACE The inside of the printer might be hot To reduce the risk of injury from a hot component allow the surface to cool before touching it Troubleshoot a problem 299 ...

Page 300: ...2 Open the isolation unit door 3 Remove the jammed paper Note Make sure that all paper fragments are removed Troubleshoot a problem 300 ...

Page 301: ...en door A CAUTION HOT SURFACE The inside of the printer might be hot To reduce the risk of injury from a hot component allow the surface to cool before touching it 2 Open the duplex cover 3 Remove the jammed paper Note Make sure that all paper fragments are removed Troubleshoot a problem 301 ...

Page 302: ...Notes View the IP address on the home screen An IP address appears as four sets of numbers separated by periods such as 123 123 123 123 b Access the EWS Can you open the EWS The problem is solved Go to step 3 Step 3 a Make sure that you installed a supported browser Internet Explorer version 11 or later Microsoft Edge Safari version 6 or later Google ChromeTM version 32 or later Mozilla Firefox ve...

Page 303: ... Access the EWS Can you open the EWS The problem is solved Contact customer support Cannot connect the printer to the Wi Fi network Action Yes No Step 1 Make sure that Active Adapter is set to Auto From the home screen touch Settings Network Ports Network Overview Active Adapter Auto Can the printer connect to the Wi Fi network The problem is solved Go to step 2 Step 2 Check if the correct Wi Fi n...

Page 304: ...sword Note Take note of the spaces numbers and capitalization in the password Can the printer connect to the Wi Fi network The problem is solved Contact customer support Hardware options problems Cannot detect internal option Action Yes No Step 1 Turn off the printer wait for about 10 seconds and then turn on the printer Does the printer detect the internal option The problem is solved Go to step ...

Page 305: ...a Check if the internal option is available in the print driver Note If necessary manually add the internal option in the print driver to make it available for print jobs For more information see Adding available options in the print driver on page 54 b Print the document Does the printer detect the internal option The problem is solved Contact customer support Internal solutions port does not ope...

Page 306: ...ll the parallel or serial interface card For more information see Installing an internal solutions port on page 68 Does the parallel or serial interface card operate correctly The problem is solved Go to step 3 Step 3 Check the connection between the cable and the parallel or serial interface card Does the parallel or serial interface card operate correctly The problem is solved Contact customer s...

Page 307: ... The second number in the message after 42 indicates the region of the cartridge Printer and toner cartridge regions Region Numeric code Worldwide or Undefined region 0 North America United States Canada 1 European Economic Area Western Europe Nordic countries Switzerland 2 Asia Pacific 3 Latin America 4 Rest of Europe Middle East Africa 5 Australia New Zealand 6 Invalid region 9 Note To find the reg...

Page 308: ...rts and supplies on page 201 If the printer does not print after clearing the error message then reset the supply usage counter 1 From the home screen touch Settings Device Maintenance Configuration Menu Supply Usage And Counters 2 Select the part or supply that you want to reset and then touch Start 3 Read the warning message and then touch Continue 4 Using two fingers touch the display for 15 seco...

Page 309: ...act customer support Tray linking does not work Action Yes No Step 1 a Check if the trays contain the same paper size and paper type b Check if the paper guides are positioned correctly c Print the document Do the trays link correctly The problem is solved Go to step 2 Step 2 a From the home screen touch Settings Paper Tray Configuration Paper Size Type b Set the paper size and paper type to match ...

Page 310: ...pe b Set the correct paper size and type c Print the document Do paper jams occur frequently Go to step 3 The problem is solved Step 3 a Load paper from a fresh package Note Paper absorbs moisture due to high humidity Store paper in its original wrapper until you are ready to use it b Print the document Do paper jams occur frequently Contact customer support The problem is solved Jammed pages are ...

Page 311: ...t the e mail SMTP settings are configured correctly For more information see Configuring the e mail SMTP settings on page 38 Can you send an e mail The problem is solved Go to step 2 Step 2 Make sure that you are using the correct password Depending on your e mail service provider use your account password app password or authentication password For more information see Configuring the e mail SMTP se...

Page 312: ... faxes using analog fax Action Yes No Step 1 Resolve any error messages that appear on the display Can you send or receive a fax The problem is solved Go to step 2 Step 2 Make sure that the cable connections for the following equipment are secure Telephone Handset Answering machine Can you send or receive a fax The problem is solved Go to step 3 Step 3 Check for a dial tone Call the fax number to ...

Page 313: ...ect to a DSL filter or router that supports analog use For more information contact your DSL provider If you are using a private branch exchange PBX telephone service then make sure that you are connecting to an analog connection on the PBX If none exists then consider installing an analog telephone line for the fax machine Can you send or receive a fax The problem is solved Go to step 6 Step 6 Tem...

Page 314: ...er source is not empty Can you receive faxes The problem is solved Go to step 2 Step 2 Check the ring count delay settings From the home screen touch Settings Fax Fax Setup Fax Receive Settings Rings to Answer Can you receive faxes The problem is solved Go to step 3 Step 3 If the printer is printing blank pages then see Blank or white pages on page 264 Can you receive faxes The problem is solved C...

Page 315: ...nected to the Internet Can you send or receive faxes using etherFAX The problem is solved Go to step 2 Step 2 Make sure that etherFAX is set up correctly a From the home screen touch Settings Fax Fax Setup General Fax Settings b Make sure that you have the correct fax number c Make sure that Fax Transport is set to etherFAX Notes This menu shows up only when more than one fax transport is availabl...

Page 316: ...min Controls b In the Max Speed menu select a lower transmission speed Is the fax print quality satisfactory The problem is solved Contact customer support Missing information on the fax cover page Action No Yes a Turn off the printer wait for about 10 seconds and then turn on the printer b Send or retrieve the fax Is there missing information on the fax cover page The problem is solved Contact cu...

Page 317: ...s the copy job successful Go to step 3 Go to step 2 Step 2 a Turn off the printer wait for about 10 seconds and then turn it back on b Scan the document Can you scan the document to a computer The problem is solved Go to step 3 Step 3 Check the printer connectivity a Print the Network Setup Page From the home screen touch Settings Reports Network Network Setup Page b Check the network status Is th...

Page 318: ... a network folder on page 114 Can you scan a document and save it to a network folder The problem is solved Go to step 2 Step 2 Make sure that the network folder path and format are correct For example server_hostname foldername path where server_hostname is a fully qualified domain FQDN or IP address Is the network folder path and format correct Go to step 3 Go to step 4 Step 3 Make sure that you ...

Page 319: ...ure that you use forward slashes when typing the share path d From the Authentication menu select your authentication method Note If Authentication is set to Use assigned username and password then in the User Name and Password fields type your credentials e Click Save Can you scan a document and save it to a network folder The problem is solved Go to step 5 Step 5 Make sure that the printer and th...

Page 320: ...hen also clean that glass For more information see Cleaning the scanner on page 243 b Make sure that the document or photo is loaded facedown on the upper left corner of the scanner glass c Copy the document or photo Is the copy quality satisfactory The problem is solved Go to step 2 Step 2 a Check the quality of the original document or photo b Adjust the scan quality settings c Copy the document...

Page 321: ...erside of the ADF cover c Close the ADF cover Do vertical streaks appear on scanned documents Contact customer support The problem is solved Jagged image or text when scanning from the ADF Action Yes No a Load 50 sheets of clean plain paper into the ADF Note The plain paper helps clean or remove dust and other coating from the ADF feed rollers b From the home screen touch c Load an original docume...

Page 322: ... successful The problem is solved Go to step 3 Step 3 a Make sure that the Append time stamp or the Overwrite existing file check box is selected in the destination configuration settings b Resend the scan job Is the scan job successful The problem is solved Contact customer support Scanner does not close Action Yes No Remove obstructions that keep the scanner cover open Did the scanner cover close ...

Page 323: ... document Is the scanner responding The problem is solved Contact customer support Adjusting scanner registration 1 From the home screen touch Settings Device Maintenance Configuration Menu Scanner Configuration Scanner Manual Registration 2 In the Print Quick Test menu touch Start 3 Place the Print Quick Test page on the scanner glass and then touch Flatbed Registration 4 In the Copy Quick Test men...

Page 324: ...rrection Content 3 Choose the appropriate color conversion setting Object type Color conversion tables RGB Image RGB Text RGB Graphics Vivid Produces brighter more saturated colors and may be applied to all incoming color formats sRGB Display Produces an output that approximates the colors shown on a computer monitor Black toner usage is optimized for printing photographs Display True Black Produc...

Page 325: ...re specific to the type of object being printed text graphics or images It is also specific to how the color of the object is specified in the software program RGB or CMYK combinations To apply a different color conversion table manually see Modifying the colors in printed output on page 324 If the software program does not specify colors with RGB or CMYK combinations then manual color correction is ...

Page 326: ...blem is solved Step 2 Perform Color Balance a From the home screen touch Settings Print Quality Advanced Imaging Color Balance b Adjust the settings c Print the document Does the print appear tinted Contact customer support The problem is solved Contacting customer support Before contacting customer support make sure to have the following information Printer problem Error message Printer model typ...

Page 327: ... These efficiencies result in fewer greenhouse emissions energy savings and natural resource savings Lexmark also offers recycling of packaging components in some countries or regions For more information go to www lexmark com recycle and then choose your country or region Information on available packaging recycling programs is included with the information on product recycling Lexmark cartons ar...

Page 328: ... to make these available in all countries in which it operates Any reference to a product program or service is not intended to state or imply that only that product program or service may be used Any functionally equivalent product program or service that does not infringe any existing intellectual property right may be used instead Evaluation and verification of operation in conjunction with othe...

Page 329: ...f Mopria Alliance Inc in the United States and other countries Unauthorized use is strictly prohibited PCL is a registered trademark of the Hewlett Packard Company PCL is Hewlett Packard Company s designation of a set of printer commands language and functions included in its printer products This printer is intended to be compatible with the PCL language This means the printer recognizes PCL comm...

Page 330: ...es of the European Union We encourage the recycling of our products If you have further questions about recycling options visit the Lexmark Web site at www lexmark com for your local sales office phone number India E Waste notice This product including components consumables parts and spares complies with the India E Waste Rules and prohibits use of lead mercury hexavalent chromium polybrominated ...

Page 331: ...s normal household waste Consult your local authorities for disposal and recycling options Returning Lexmark cartridges for reuse or recycling The Lexmark Cartridge Collection Program allows you to return used cartridges for free to Lexmark for reuse or recycling One hundred percent of the empty cartridges returned to Lexmark are either reused or demanufactured for recycling The boxes used to retu...

Page 332: ...2 years This is based on storage in a standard office environment at 22 C 72 F and 45 humidity 2 Wet bulb temperature is determined by the air temperature and the relative humidity Laser notice The printer is certified in the U S to conform to the requirements of DHHS 21 CFR Chapter I Subchapter J for Class I 1 laser products and elsewhere is certified as a Class I laser product conforming to the re...

Page 333: ... time averaged measurements Instantaneous power draws may be substantially higher than the average Values are subject to change See www lexmark com for current values Sleep Mode This product is designed with an energy saving mode called Sleep Mode The Sleep Mode saves energy by lowering power consumption during extended periods of inactivity The Sleep Mode is automatically engaged after this produ...

Page 334: ... from the electrical outlet Total energy usage It is sometimes helpful to estimate the total product energy usage Since power consumption claims are provided in power units of Watts the power consumption should be multiplied by the time the product spends in each mode in order to calculate energy usage The total product energy usage is the sum of each mode s energy usage Applicability of Regulatio...

Page 335: ...phone company will provide advance notice in order for you to make necessary modifications to maintain uninterrupted service If you experience trouble with this equipment for repair or warranty information contact Lexmark International Inc at www lexmark com or your Lexmark representative If the equipment is causing harm to the telephone network the telephone company may request that you disconnect...

Page 336: ...mpatible with all of Spark s network services This equipment shall not be set up to make automatic calls to the Spark 111 Emergency Service This equipment may not provide for the effective hand over of a call to another device connected to the same line This equipment should not be used under any circumstances that may constitute a nuisance to other Spark customers This equipment is not capable un...

Page 337: ...r Zählzeichenübertragung Lexmark Teilenummer 80D1877 für jede Leitung installiert werden über die in der Schweiz Zeitsteuertakte übertragen werden Uso del prodotto in Svizzera Questo prodotto richiede un filtro toni Billing svizzero codice Lexmark 80D1877 da installare su tutte le linee che ricevono impulsi remoti in Svizzera Federal Communications Commission FCC compliance information statement Th...

Page 338: ...shielded and grounded cable such as Lexmark part number 1021231 for parallel attach or 1021294 for USB attach Use of a substitute cable not properly shielded and grounded may result in a violation of FCC regulations Any questions regarding this compliance information statement should be directed to Director of Lexmark Technology Services Lexmark International Inc 740 West New Circle Road Lexington...

Page 339: ...r may be obtained at www lexmark com en_us about regulatory compliance european union declaration of conformity html This product satisfies the Class A limits of EN 55032 and safety requirements of EN 62368 1 United Kingdom UK conformity This product is in conformity with the protection requirements of the Electromagnetic Compatibility Regulations 2016 the Electrical Equipment Safety Regulations 20...

Page 340: ...of original purchase and this statement to that user Limited warranty service The warranty period starts on the date of original purchase as shown on the purchase receipt and ends 12 months later provided that the warranty period for any supplies and for any maintenance items included with the printer shall end earlier if it or its original contents are substantially used up depleted or consumed F...

Page 341: ...ng or remanufacture by a third party of products supplies or parts Products supplies parts materials such as toners and inks software or interfaces not furnished by Lexmark TO THE EXTENT PERMITTED BY APPLICABLE LAW NEITHER LEXMARK NOR ITS THIRD PARTY SUPPLIERS OR REMARKETERS MAKE ANY OTHER WARRANTY OR CONDITION OF ANY KIND WHETHER EXPRESS OR IMPLIED WITH RESPECT TO THIS PRODUCT AND SPECIFICALLY DI...

Page 342: ...s are intended beneficiaries of this limitation Additional rights Some states do not allow limitations on how long an implied warranty lasts or do not allow the exclusion or limitation of incidental or consequential damages so the limitations or exclusions contained above may not apply to you This limited warranty gives you specific legal rights You may also have other rights that vary from state to...

Page 343: ...ax 314 cannot scan to a computer 317 cannot scan to a network folder 318 cannot send e mails 311 cannot send or receive faxes using analog fax 312 cannot send or receive faxes using etherFAX 315 cannot send the fax cover page from the computer 316 Card Copy setting up 24 card stock loading 49 cards copying 106 changing fax resolution 109 changing the printer port settings after installing ISP 73 c...

Page 344: ...ing 30 default speaker volume adjusting 30 defective intelligent storage drive 306 deleting contact groups 27 deleting contacts 27 Device Quotas setting up 26 different paper sizes copying 104 directory list printing 103 disabling SMTP server not set up error 311 display brightness adjusting 254 Display Customization using 25 displaying apps on home screen 23 distinctive ring service fax enabling ...

Page 345: ...asing 96 hard disk storage drive 97 hardware options trays 55 hardware options adding print driver 54 held documents do not print 286 held jobs printing 102 setting expiration time 101 Hibernate mode configuring 254 holding faxes 110 home screen customizing 23 using 22 home screen icons displaying 23 horizontal dark lines 279 horizontal white lines 281 humidity around the printer 332 I icons on the...

Page 346: ...t of Service Erase 131 PCL 138 PDF 137 PostScript 138 Power Management 123 Preferences 117 Print 198 Quality 135 Remote Operator Panel 119 Restore Factory Defaults 125 Restrict external network access 189 Schedule USB Devices 192 Security Audit Log 192 Setup 133 Shortcuts 199 SNMP 184 Solutions LDAP Settings 196 TCP IP 182 ThinPrint 188 Tray Configuration 141 Troubleshooting 199 Universal Setup 141...

Page 347: ...264 print troubleshooting collated printing does not work 309 confidential and other held documents do not print 286 envelope seals when printing 308 incorrect margins 269 job prints from the wrong tray 287 job prints on the wrong paper 287 paper frequently jams 310 print jobs do not print 285 slow printing 288 tray linking does not work 309 unable to read flash drive 291 printer minimum clearances ...

Page 348: ...oes not close 322 scanner glass pad replacing 235 scanning to a computer 112 to an FTP server 113 to flash drive 115 using the automatic document feeder ADF 112 using the scanner glass 112 scanning from ADF jagged image 321 jagged text 321 scanning quality problem 320 scanning to a network folder 114 scanning to an FTP server using the control panel 113 scheduling a fax 109 securing printer data 97...

Page 349: ...hen printing 308 incorrect margins 269 jammed pages are not reprinted 310 job prints from the wrong tray 287 job prints on the wrong paper 287 paper frequently jams 310 print jobs do not print 285 slow printing 288 tray linking does not work 309 troubleshooting print quality blank pages 264 crooked print 275 dark print 265 ghost images appear on prints 267 gray or colored background 268 horizontal...

Page 350: ...ng 28 deactivating 28 speech rate 30 Voice Guidance speech rate adjusting 30 volatile memory 97 erasing 96 W waste toner bottle ordering 203 replacing 225 white pages 264 wireless network connecting the printer to 91 wireless networking 91 wireless print server installing 83 89 Wi Fi Direct configuring 93 enabling 93 printing from a mobile device 99 Wi Fi network deactivating 94 Wi Fi Protected Set...

Reviews: