Setting the fax date and time
1
From the home screen, touch
Settings
>
Device
>
Preferences
>
Date and Time
>
Configure
.
2
Configure the settings.
Configuring daylight saving time
1
From the home screen, touch
Settings
>
Device
>
Preferences
>
Date and Time
>
Configure
.
2
In the Time Zone menu, select
(UTC+user) Custom
.
3
Configure the settings.
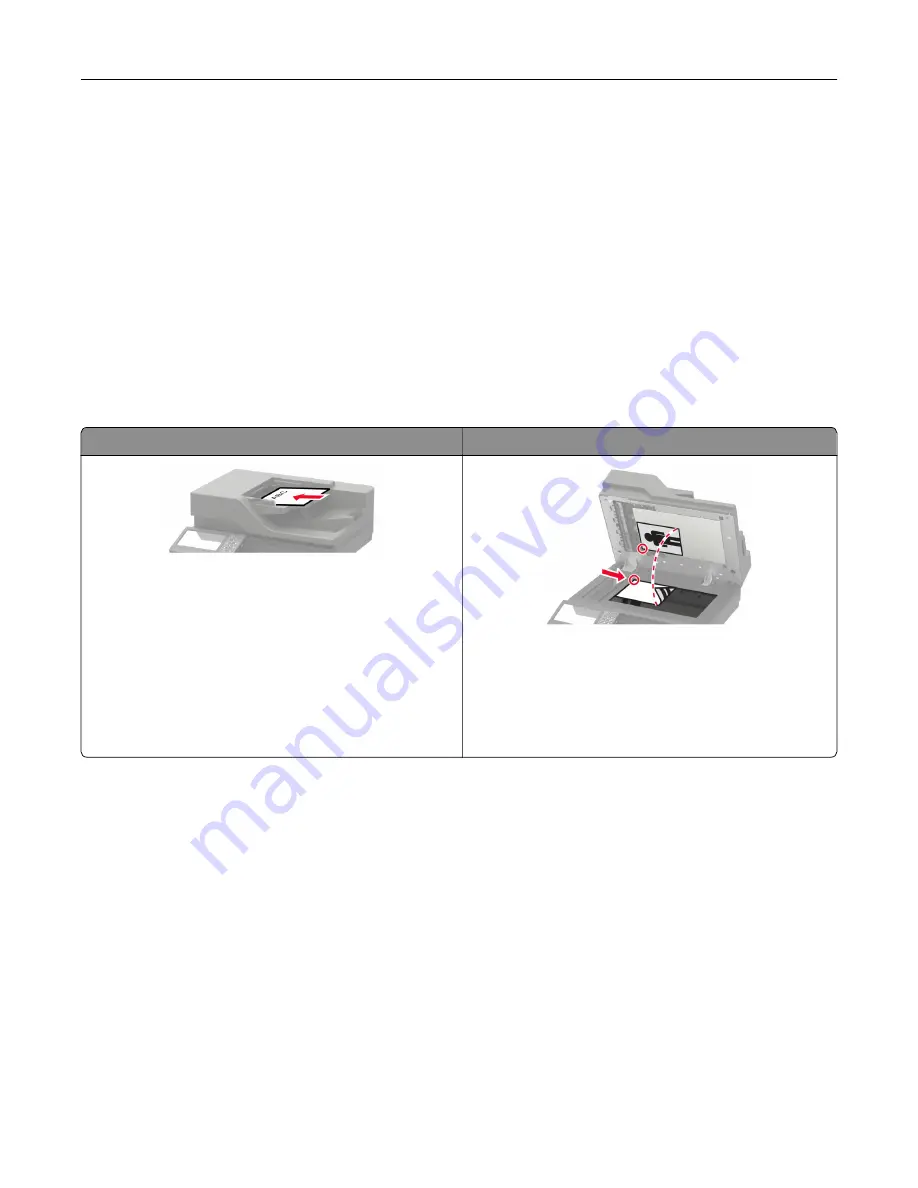
Using the automatic document feeder and scanner glass
Automatic document feeder (ADF)
Scanner glass
•
Use the ADF for multiple
‑
page or two-sided
documents.
•
Load an original document faceup. For multiple
‑
page
documents, make sure to align the leading edge
before loading.
•
Make sure to adjust the ADF guides to match the width
of the paper that you are loading.
•
Use the scanner glass for single
‑
page documents,
book pages, small items (such as postcards or
photos), transparencies, photo paper, or thin media
(such as magazine clippings).
•
Place the document facedown in the corner with the
arrow.
Sending a fax
Using the control panel
1
Load the original document into the ADF tray or on the scanner glass.
2
From the home screen, touch
Fax
, and then enter the needed information.
3
If necessary, configure other fax settings.
4
Send the fax job.
Using the computer
Note:
Make sure that the Universal Fax driver is installed.
Faxing
54
Summary of Contents for XC4140
Page 60: ...5 Touch Scan Here If necessary change the scan settings 6 Scan the document Scanning 60 ...
Page 155: ...2 Remove the waste toner bottle 3 Remove the imaging kit Maintaining the printer 155 ...
Page 157: ...8 Insert the black toner cartridge 9 Insert the imaging kit Maintaining the printer 157 ...
Page 159: ...2 Remove the waste toner bottle 3 Remove the imaging kit Maintaining the printer 159 ...
Page 161: ...8 Insert the toner cartridges 9 Insert the new imaging kit Maintaining the printer 161 ...
Page 190: ...4 Close the duplex cover and door A Clearing jams 190 ...
Page 236: ...4 Insert the memory card until it clicks into place Upgrading and migrating 236 ...
Page 239: ...5 ISP extended cable 4 Install the ISP into its housing Upgrading and migrating 239 ...
Page 240: ...5 Attach the housing to the controller board access cover Upgrading and migrating 240 ...
Page 246: ...5 Open door B 6 Open door C Upgrading and migrating 246 ...


