


•
To restore the name of an app, select the app name, click
Edit
, and then select
Restore app label
.
•
To add a space between apps, click
, select
BLANK SPACE
, and then click
Add
.
•
To arrange the apps, drag the app names in the order that you want.
•
To restore the default home screen, click
Restore home screen
.
4
Apply the changes.
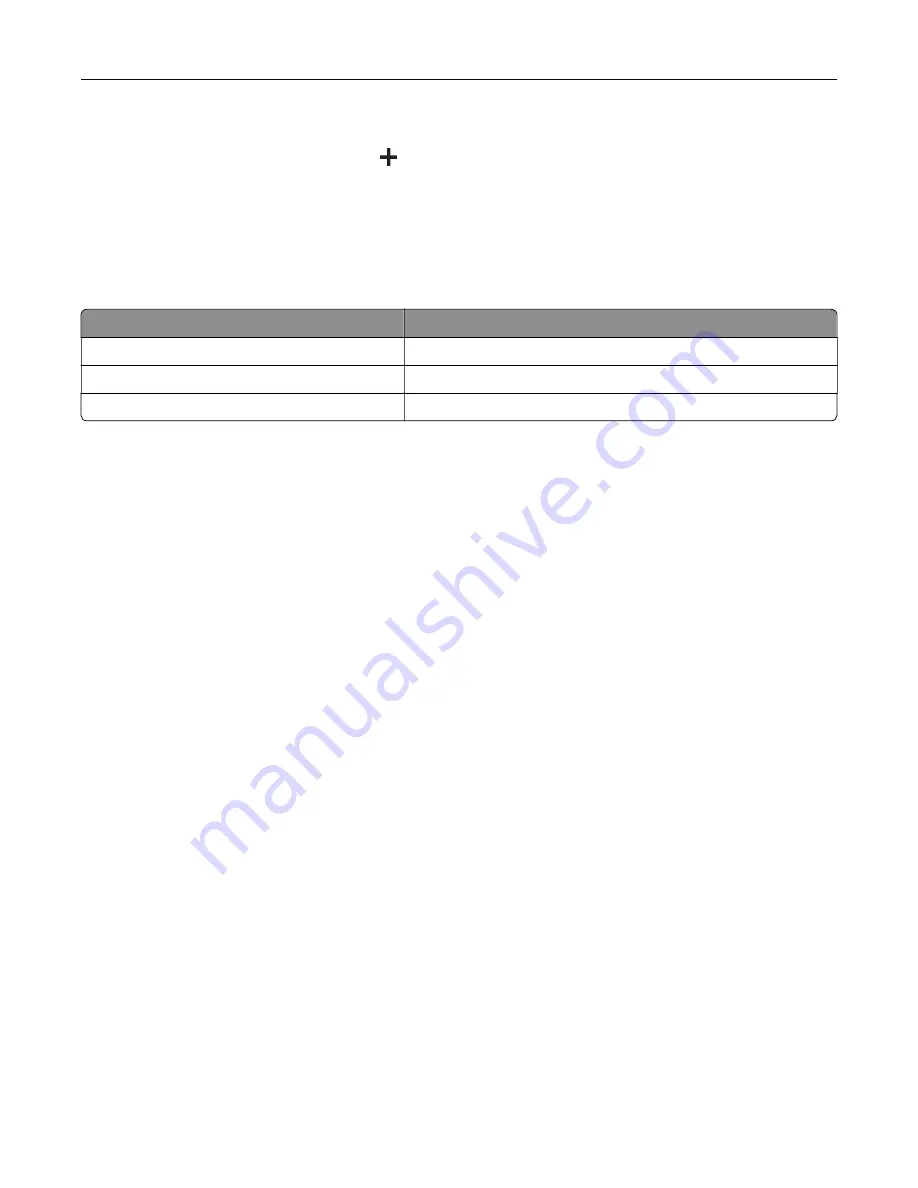
Supported applications
Application
Printer models
Display Customization
C4342, C4352, CS730, CS735
Customer Support
C4342, C4352
Device Quotas
C4342, C4352
Using Display Customization
Before using the application, make sure to do the following:
•
From the Embedded Web Server, click
Apps
>
Display Customization
>
Configure
.
•
Enable and configure the screen saver, slideshow, and wallpaper settings.
Managing screen saver and slide show images
1
From the Screen Saver and Slideshow Images section, add, edit, or delete an image.
Notes:
•
You can add up to 10 images.
•
When enabled, the status icons appear on the screen saver only when there are errors, warnings, or
cloud
‑
based notifications.
2
Apply the changes.
Changing the wallpaper image
1
From the home screen, touch
Change Wallpaper
.
2
Select an image to use.
3
Apply the changes.
Running a slide show from a flash drive
1
Insert a flash drive into the USB port.
2
From the home screen, touch
Slideshow
.
Images appear in alphabetical order.
Note:
You can remove the flash drive after the slide show starts, but the images are not stored in the
printer. If the slide show stops, then insert the flash drive again to view the images.
Set up, install, and configure
22
Summary of Contents for C4342
Page 46: ...4 Install the ISP into its housing Set up install and configure 46 ...
Page 47: ...5 Attach the housing to the controller board shield Set up install and configure 47 ...
Page 52: ...Set up install and configure 52 ...
Page 55: ...Set up install and configure 55 ...
Page 56: ...3 Install the wireless module into its housing Set up install and configure 56 ...
Page 57: ...4 Attach the wireless module to the controller board shield Set up install and configure 57 ...
Page 123: ...2 Remove the used toner cartridge 3 Unpack the new toner cartridge Maintain the printer 123 ...
Page 124: ...4 Insert the new toner cartridge 5 Close door B Maintain the printer 124 ...
Page 125: ...Replacing the black imaging unit 1 Open door B Maintain the printer 125 ...
Page 127: ...3 Remove the toner cartridges Maintain the printer 127 ...
Page 128: ...4 Disconnect the imaging kit cable Maintain the printer 128 ...
Page 132: ...9 Insert the imaging kit Maintain the printer 132 ...
Page 134: ...Replacing the color imaging kit 1 Open door B Maintain the printer 134 ...
Page 136: ...3 Remove the toner cartridges Maintain the printer 136 ...
Page 137: ...4 Disconnect the imaging kit cable Maintain the printer 137 ...
Page 138: ...5 Remove the used imaging kit Maintain the printer 138 ...
Page 141: ...8 Insert the black imaging unit into the new imaging kit Maintain the printer 141 ...
Page 142: ...9 Insert the new imaging kit Maintain the printer 142 ...
Page 144: ...Replacing the waste toner bottle 1 Open door B Maintain the printer 144 ...