Defective flash detected
Try one or more of the following:
•
Replace the defective intelligent storage drive.
•
From the home screen, touch
Continue
to ignore the message and continue printing.
•
Cancel the current print job.
Not enough free space in flash memory for resources
Try one or more of the following:
•
Touch
Continue
to clear the message and continue printing.
•
Delete fonts, macros, and other data stored in the flash memory.
•
Install a hard disk.
Note:
Downloaded fonts and macros that are not previously stored in the flash memory are deleted.
Issues with supplies
Replace cartridge, printer region mismatch
To correct this problem, purchase a cartridge with the correct region that matches the printer region, or
purchase a worldwide cartridge.
•
The first number in the message after 42 indicates the region of the printer.
•
The second number in the message after 42 indicates the region of the cartridge.
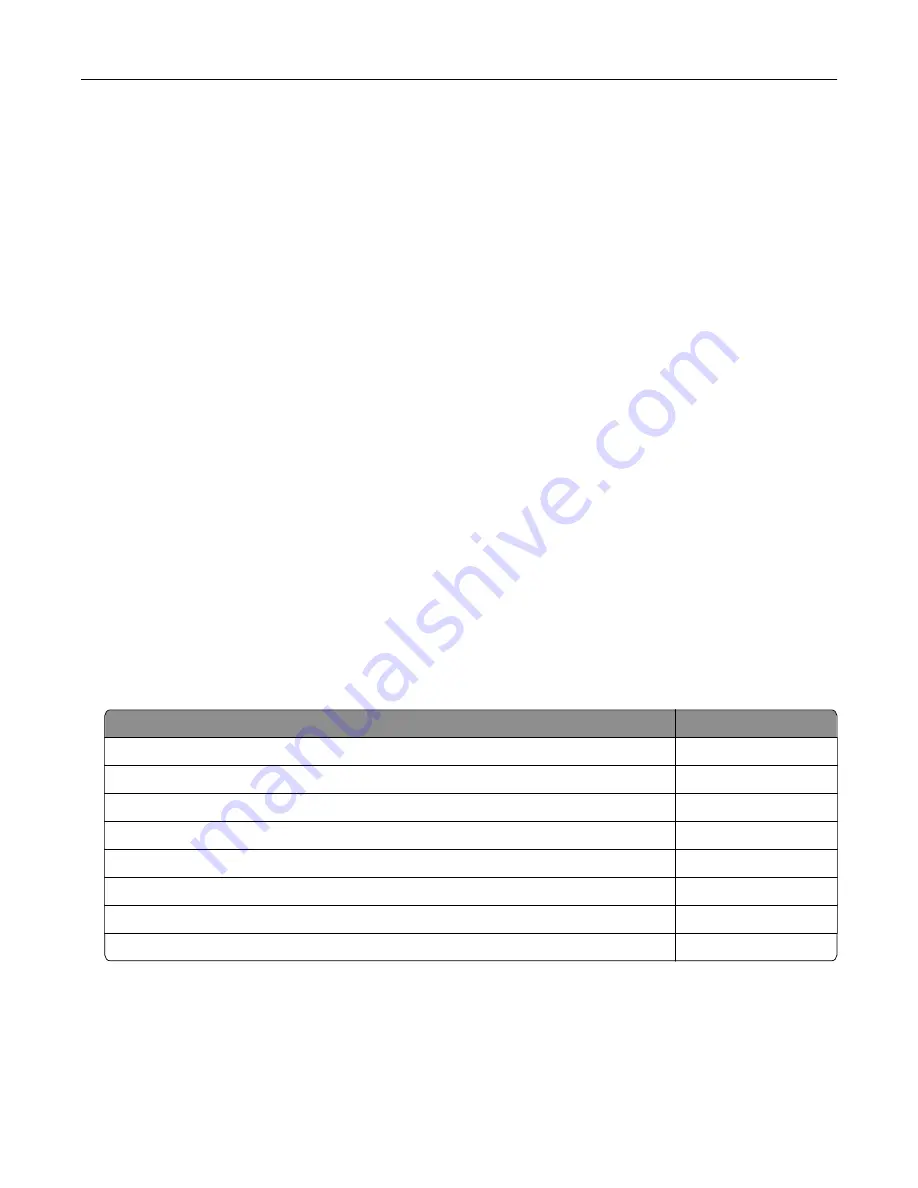
Printer and toner cartridge regions
Region
Numeric code
Worldwide or Undefined region
0
North America (United States, Canada)
1
European Economic Area, Western Europe, Nordic countries, Switzerland
2
Asia Pacific
3
Latin America
4
Rest of Europe, Middle East, Africa
5
Australia, New Zealand
6
Invalid region
9
Note:
To find the region settings of the printer and toner cartridge, print the print quality test pages.
From the home screen, touch
Settings
>
Troubleshooting
>
Print Quality Test Pages
.
Non
‑
Lexmark supply
The printer has detected a non
‑
Lexmark supply or part installed in the printer.
Troubleshoot a problem
212
Summary of Contents for C4342
Page 46: ...4 Install the ISP into its housing Set up install and configure 46 ...
Page 47: ...5 Attach the housing to the controller board shield Set up install and configure 47 ...
Page 52: ...Set up install and configure 52 ...
Page 55: ...Set up install and configure 55 ...
Page 56: ...3 Install the wireless module into its housing Set up install and configure 56 ...
Page 57: ...4 Attach the wireless module to the controller board shield Set up install and configure 57 ...
Page 123: ...2 Remove the used toner cartridge 3 Unpack the new toner cartridge Maintain the printer 123 ...
Page 124: ...4 Insert the new toner cartridge 5 Close door B Maintain the printer 124 ...
Page 125: ...Replacing the black imaging unit 1 Open door B Maintain the printer 125 ...
Page 127: ...3 Remove the toner cartridges Maintain the printer 127 ...
Page 128: ...4 Disconnect the imaging kit cable Maintain the printer 128 ...
Page 132: ...9 Insert the imaging kit Maintain the printer 132 ...
Page 134: ...Replacing the color imaging kit 1 Open door B Maintain the printer 134 ...
Page 136: ...3 Remove the toner cartridges Maintain the printer 136 ...
Page 137: ...4 Disconnect the imaging kit cable Maintain the printer 137 ...
Page 138: ...5 Remove the used imaging kit Maintain the printer 138 ...
Page 141: ...8 Insert the black imaging unit into the new imaging kit Maintain the printer 141 ...
Page 142: ...9 Insert the new imaging kit Maintain the printer 142 ...
Page 144: ...Replacing the waste toner bottle 1 Open door B Maintain the printer 144 ...


