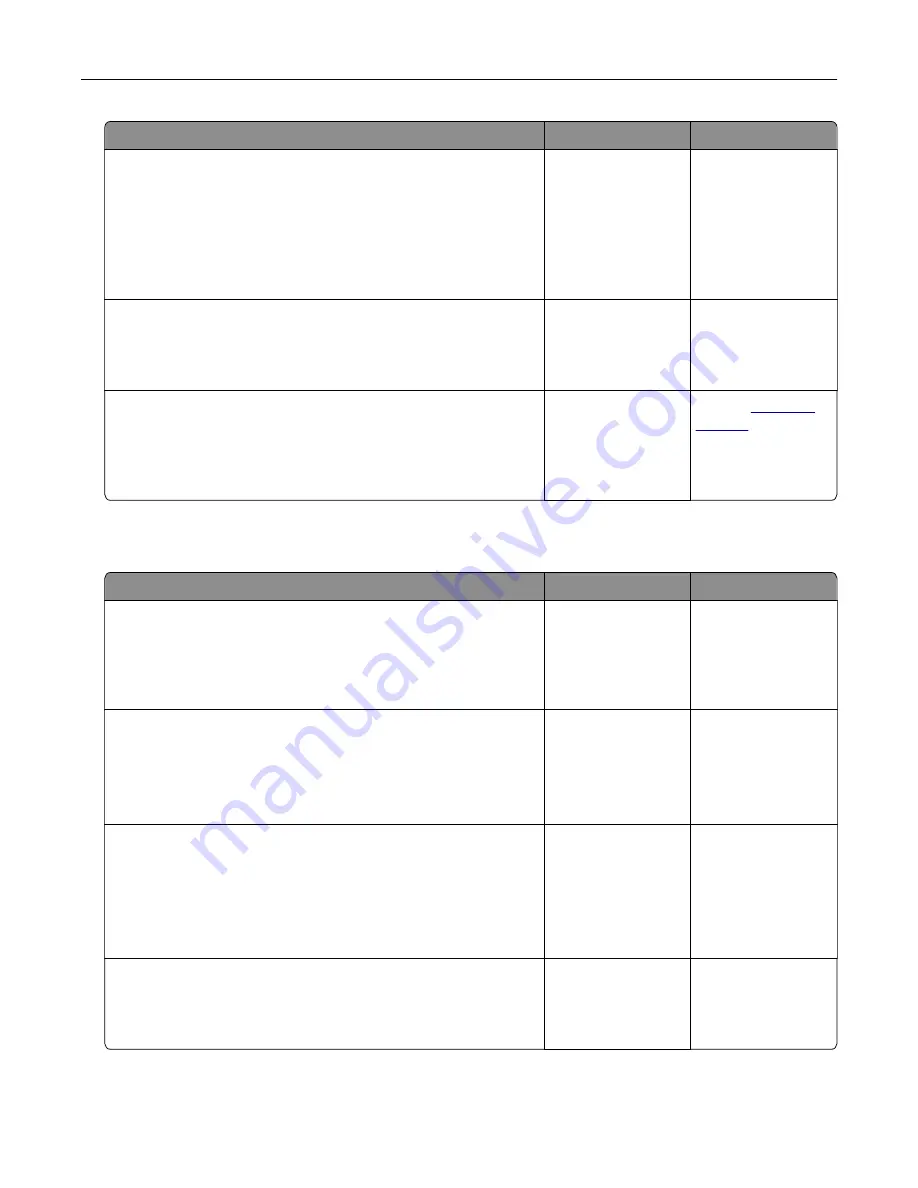
Action
Yes
No
Step 6
Turn off the printer, install the hardware options, and then turn on
the printer.
For more information, see the documentation that came with the
option.
Is the printer responding?
The problem is
solved.
Go to step 7.
Step 7
Install the correct print driver.
Is the printer responding?
The problem is
solved.
Go to step 8.
Step 8
Turn off the printer, wait for about 10 seconds, and then turn on the
printer.
Is the printer responding?
The problem is
solved.
Contact
Unable to read flash drive
Action
Yes
No
Step 1
Check if the printer is not busy processing another print, copy,
scan, or fax job.
Is the printer ready?
Go to step 3.
Go to step 2.
Step 2
•
Wait for the printer to finish processing the other job.
•
Remove, and then insert the flash drive.
Does the printer recognize the flash drive?
The problem is
solved.
Go to step 3.
Step 3
Check if the flash drive is inserted into the front USB port.
Note:
The flash drive does not work when it is inserted into the
rear USB port.
Is the flash drive inserted into the correct port?
Go to step 5.
Go to step 4.
Step 4
Insert the flash drive into the correct port.
Does the printer recognize the flash drive?
The problem is
solved.
Go to step 5.
Troubleshoot a problem
197
Summary of Contents for C4342
Page 46: ...4 Install the ISP into its housing Set up install and configure 46 ...
Page 47: ...5 Attach the housing to the controller board shield Set up install and configure 47 ...
Page 52: ...Set up install and configure 52 ...
Page 55: ...Set up install and configure 55 ...
Page 56: ...3 Install the wireless module into its housing Set up install and configure 56 ...
Page 57: ...4 Attach the wireless module to the controller board shield Set up install and configure 57 ...
Page 123: ...2 Remove the used toner cartridge 3 Unpack the new toner cartridge Maintain the printer 123 ...
Page 124: ...4 Insert the new toner cartridge 5 Close door B Maintain the printer 124 ...
Page 125: ...Replacing the black imaging unit 1 Open door B Maintain the printer 125 ...
Page 127: ...3 Remove the toner cartridges Maintain the printer 127 ...
Page 128: ...4 Disconnect the imaging kit cable Maintain the printer 128 ...
Page 132: ...9 Insert the imaging kit Maintain the printer 132 ...
Page 134: ...Replacing the color imaging kit 1 Open door B Maintain the printer 134 ...
Page 136: ...3 Remove the toner cartridges Maintain the printer 136 ...
Page 137: ...4 Disconnect the imaging kit cable Maintain the printer 137 ...
Page 138: ...5 Remove the used imaging kit Maintain the printer 138 ...
Page 141: ...8 Insert the black imaging unit into the new imaging kit Maintain the printer 141 ...
Page 142: ...9 Insert the new imaging kit Maintain the printer 142 ...
Page 144: ...Replacing the waste toner bottle 1 Open door B Maintain the printer 144 ...


