background image

Action

Yes

No

Step 6

a

Load paper from a fresh package.

Note: 

Paper absorbs moisture due to high humidity. Store

paper in its original wrapper until you are ready to use it.

b

Print the document.

Is the print dark?

Go to step 7.

The problem is
solved.

Step 7

a

Remove, and then insert the imaging unit.

Warning—Potential Damage: 

Do not expose the imaging unit

to direct light for more than 10 minutes. Extended exposure
to light may cause print quality problems.

Warning—Potential Damage: 

Do not touch the

photoconductor drum under the imaging unit. Doing so may
affect the quality of future print jobs.

b

Print the document.

Is the print dark?

Go to step 8.

The problem is
solved.

Step 8

a

Replace the imaging unit.

b

Print the document.

Is the print dark?

Contact 

customer

support

.

The problem is
solved.

Fine lines are not printed correctly

Note: 

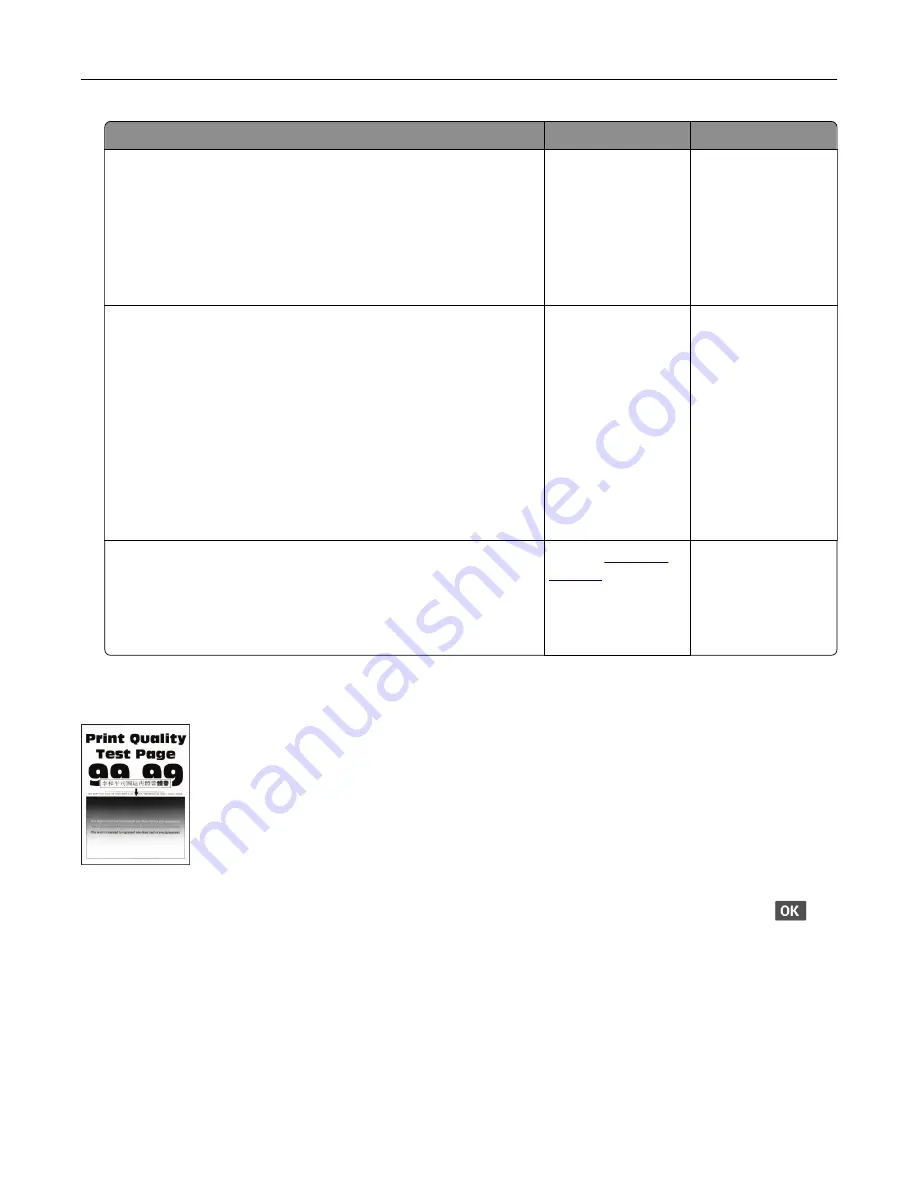
Before solving the problem, print the Print Quality Test Pages. From the control panel, navigate to

Settings

 > 

Troubleshooting

 > 

Print Quality Test Pages

. For non

touch

screen printer models, press 

 to

navigate through the settings.

Troubleshoot a problem

77

Summary of Contents for B2236

Page 1: ...B2236 Printer User s Guide November 2020 www lexmark com Machine type s 1400 Model s 438...

Page 2: ...g cables 17 Loading paper and specialty media 17 Installing and updating software drivers and rmware 21 Networking 23 Printing the Menu Settings Page 26 Secure the printer 27 Erasing printer memory 27...

Page 3: ...lies 64 Replacing parts and supplies 65 Cleaning the printer 70 Saving energy and paper 71 Moving the printer to another location 71 Shipping the printer 72 Troubleshoot a problem 73 Print quality pro...

Page 4: ...Notices 116 Index 127 Contents 4...

Page 5: ...o avoid the risk of re or electrical shock use only the power cord provided with this product or the manufacturer s authorized replacement CAUTION POTENTIAL INJURY Do not use this product with extensi...

Page 6: ...RY When moving the printer follow these guidelines to avoid personal injury or printer damage Make sure that all doors and trays are closed Turn off the printer and then unplug the power cord from the...

Page 7: ...ed in the user documentation to a service representative This product uses a printing process that heats the print media and the heat may cause the media to release emissions You must understand the s...

Page 8: ...g up and using the printer software Con guring the printer on a network Caring for and maintaining the printer Troubleshooting and solving problems Information Center Go to https infoserve lexmark com...

Page 9: ...that came with the printer Have the following information ready when you contact customer support Place and date of purchase Machine type and serial number Safety information Regulatory information W...

Page 10: ...sheet tray 5 Standard bin Using the control panel Control panel part Function 1 Display View printer messages and supply status Set up and operate the printer 2 Indicator light Check the status of th...

Page 11: ...in Sleep mode Blue The printer is on or ready Blinking blue The printer is processing data Blinking red The printer requires user intervention Power button light Printer status Off The printer is off...

Page 12: ...o moisture changes can degrade its performance Store paper in its original wrapper in the same environment as the printer for 24 to 48 hours before printing Extend the time several days if the storage...

Page 13: ...d load the paper in the proper orientation for your printer For more information see the Paper and Specialty Media Guide Storing paper Use these paper storage guidelines to help avoid jams and uneven...

Page 14: ...X O cio Mexico 215 9 x 340 4 mm 8 5 x 13 4 in Hagaki 100 x 148 mm 3 94 x 5 83 in X X Statement 139 7 x 215 9 mm 5 5 x 8 5 in X Executive 184 2 x 266 7 mm 7 25 x 10 5 in X Letter 215 9 x 279 4 mm 8 5 x...

Page 15: ...93 x 9 84 in X X Supported paper types Note Labels envelopes and card stock always print at reduced speed Paper type 250 sheet tray Manual feeder Two sided printing Plain paper Card stock X X Labels...

Page 16: ...ations Make sure that air ow in the room meets the latest revision of the ASHRAE 62 standard or the CEN Technical Committee 156 standard Provide a at sturdy and stable surface Keep the printer Clean d...

Page 17: ...INJURY To avoid the risk of re or electrical shock use only the power cord provided with this product or the manufacturer s authorized replacement Warning Potential Damage To avoid loss of data or pri...

Page 18: ...g on letter legal O cio or folio size paper make sure that the paper size setting in the duplex unit is set to Letter Con guring Universal paper settings 1 From the control panel navigate to Paper Med...

Page 19: ...2 Adjust the paper guides to match the size of the paper that you are loading 3 Flex fan and align the paper edges before loading Set up install and con gure 19...

Page 20: ...ing Load letterhead faceup with the bottom edge of the sheet toward the front of the tray for two sided printing Do not slide paper into the tray To avoid paper jams make sure that the stack height is...

Page 21: ...S version 10 7 or later you do not need to install the driver to print on an AirPrint certi ed printer If you want custom printing features then download the print driver 1 Obtain a copy of the softwa...

Page 22: ...ct a print driver and then click Next d Select Use the print driver that is currently installed recommended and then click Next e Type a printer name and then click Next f Select a printer sharing opt...

Page 23: ...periods such as 123 123 123 123 If you are using a proxy server then temporarily disable it to load the web page correctly 2 From the Embedded Web Server click Export Con guration or Import Con gurat...

Page 24: ...to a wireless network using Wi Fi Protected Setup WPS Before you begin make sure that The access point wireless router is WPS certi ed or WPS compatible For more information see the documentation tha...

Page 25: ...ireless security when using the peer to peer connection Show Password on Setup Page Shows the password on the Network Setup Page Auto Accept Push Button Requests Lets the printer accept connection req...

Page 26: ...cters is added before the Wi Fi Direct name 2 Type the Wi Fi Direct password Note Switch your computer back to its previous network after disconnecting from the Wi Fi Direct network Deactivating the W...

Page 27: ...ty Your printer contains various types of memory that can store device and network settings and user data Type of memory Description Volatile memory Your printer uses standard random access memory RAM...

Page 28: ...e the documentation that came with the application 2 Select a printer 3 Print the document Printing from a mobile device using Mopria Print Service Mopria Print Service is a mobile printing solution f...

Page 29: ...patible application or select a document from your le manager 2 Depending on your mobile device do one of the following Tap Print Tap Print Tap Print 3 Select a printer and then adjust the settings if...

Page 30: ...a document open click File Print 2 Select a printer and then click Properties Preferences Options or Setup 3 Click Print and Hold 4 Select Use Print and Hold and then assign a user name 5 Select the...

Page 31: ...on dential select the print job enter the PIN Print Printing a font sample list 1 From the control panel navigate to Reports Print Print Fonts 2 Select PCL Fonts and then press Placing separator sheet...

Page 32: ...Adjusting toner darkness 1 From the control panel navigate to Print Quality Toner Darkness 2 Adjust the setting and then press Print 32...

Page 33: ...network access Security Login methods Certi cate Management Login Restrictions Con dential Print Setup Erase Temporary Data Files Miscellaneous Reports Menu Settings Page Device Print Network Troubles...

Page 34: ...itial setup wizard determines the initial paper size setting Screen Timeout 10 300 60 Set the idle time in seconds before the display shows the home screen or before the printer logs out a user accoun...

Page 35: ...client server VNC Password Specify the password to connect to the VNC client server Note This menu item appears only if Authentication Type is set to Standard Authentication Note An asterisk next to...

Page 36: ...isabled 5 255 5 Let the printer continue processing or printing a job automatically after clearing certain attendance conditions Error Prevention Auto Reboot Auto Reboot Reboot always Set the printer...

Page 37: ...eep Mode after printing Set the printer to stay in Ready mode or return to Sleep mode after printing Timeouts Sleep Mode 1 120 minutes 15 Set the idle time before the printer begins operating in Sleep...

Page 38: ...the USB driver mode of the printer to improve its compatibility with a personal computer USB Con guration USB Speed Full Auto Set the USB port to run at full speed and disable its high speed capabilit...

Page 39: ...Set the page timeout during emulation Printer Emulations Emulator Security Reset Emulator After Job Off On Reset the emulator after a print job Printer Emulations Emulator Security Disable Printer Me...

Page 40: ...ettings is available only in some printer models About this Printer Menu item Description Asset Tag Show the serial number of the printer Printer s Location Identify the printer location The maximum l...

Page 41: ...es per side Print multiple page images on one side of a sheet of paper Pages per Side Ordering Horizontal Reverse Horizontal Vertical Reverse Vertical Specify the positioning of multiple page images w...

Page 42: ...al Detail Enhance the printed output to have smoother lines with sharper edges Note An asterisk next to a value indicates the factory default setting PCL Menu item Description Font Name List of availa...

Page 43: ...th of the logical page on A4 size paper Note Logical page is the space on the physical page where data is printed Auto CR after LF Off On Set the printer to perform a carriage return after a line feed...

Page 44: ...e printable area Note When Auto Fit is set to On Scaling is automatically set to Best Fit Orientation Portrait Landscape Reverse Portrait Reverse Landscape Specify the orientation of text and graphics...

Page 45: ...Description Units of Measure Inches Millimeters Specify the unit of measurement for the universal paper Note Inches is the U S factory default setting Millimeters is the international factory default...

Page 46: ...nter network Display Network Status on Printer Off On Show the network status on the display Speed Duplex Show the speed of the currently active network card IPv4 Show the IPv4 address All IPv6 Addres...

Page 47: ...nd enable network security Notes Start Push Button Method connects the printer to a wireless network when buttons on both the printer and the access point wireless router are pressed within a given ti...

Page 48: ...guration Protocol DHCP Note DHCP is a standard protocol that lets a server dynamically assign an IP address and other network con guration parameters to each device on the network so that they can co...

Page 49: ...his menu item appears only in some printer models If PS SmartSwitch is off then the printer does not examine incoming data and uses the default printer language speci ed in the Setup menu Mac Binary P...

Page 50: ...CP On Off Enable Dynamic Host Con guration Protocol DHCP Note DHCP is a standard protocol that allows a server to distribute IP addressing and con guration information to clients in a dynamic manner I...

Page 51: ...uto On Off Reduce power consumption when the printer does not receive data from the Ethernet network Note An asterisk next to a value indicates the factory default setting TCP IP Note This menu appear...

Page 52: ...Server List Specify an IP address for the TCP connections Notes This menu item appears only in the Embedded Web Server Use a comma to separate each IP address You can add up to 50 IP addresses Restric...

Page 53: ...tting SNMP Note This menu appears only in network printers or printers that are attached to print servers Menu item Description SNMP Versions 1 and 2c Enabled Off On Allow SNMP Set Off On Enable PPM M...

Page 54: ...erisk next to a value indicates the factory default setting IPSec Note This menu appears only in network printers or printers that are attached to print servers Menu item Description Enable IPSec Off...

Page 55: ...enu item appears only when Base Con guration is set to Compatibility or Secure Pre Shared Key Authenticated Connections Host x Address Key Con gure the authenticated connections of the printer Note Th...

Page 56: ...rsor to the rst position on the same line Note An asterisk next to a value indicates the factory default setting HTTP FTP Settings Note This menu appears only in network printers or printers that are...

Page 57: ...incoming data and uses the default printer language speci ed in the Setup menu Enable USB Port Enable Disable Enable the standard USB port Note An asterisk next to a value indicates the factory defau...

Page 58: ...ork Ports Menu Paper Menu Reports Menu Function Con guration Menus Supplies Menu SE Menu Device Menu Control access to the printer menus Manage Permissions Device Management Remote Management Firmware...

Page 59: ...ct Alternate Name Set the default values for generated certi cates Device Certi cates Generate delete or view device certi cates Manage CA Certi cates Load delete or view Certi cate Authority CA certi...

Page 60: ...ential jobs held in the printer memory are deleted Repeat Job Expiration Off 1 Hour 4 Hours 24 Hours 1 Week Set the expiration time for a print job that you want to repeat Verify Job Expiration Off 1...

Page 61: ...ntroller board Enable Guest access gives anyone access to all aspects of the printer No Effect may make access to the printer impossible when the required security information is unavailable Minimum P...

Page 62: ...on the printer Note This menu item appears only in network printers or printers connected to print servers Wi Fi Direct Connected Clients Print a page that shows the list of devices that are connecte...

Page 63: ...click Custom Supply Noti cations 4 Select a noti cation for each supply item 5 Apply the changes Setting up e mail alerts Con gure the printer to send e mail alerts when supplies are low when paper mu...

Page 64: ...ing components It can also affect warranty coverage Damage caused by the use of third party parts and supplies is not covered by the warranty All life indicators are designed to function with Lexmark...

Page 65: ...221X00 B222X00 B223X00 B224X00 B225X00 B226X00 Regular toner cartridge Item Worldwide Extra high yield toner cartridge B220XA0 Ordering an imaging unit Extremely low print coverage for extended period...

Page 66: ...2 Remove the imaging unit 3 Remove the used toner cartridge from the imaging unit 4 Unpack the new toner cartridge 5 Shake the toner cartridge to redistribute the toner Maintain the printer 66...

Page 67: ...nit 8 Insert the imaging unit 9 Close the door Replacing the imaging unit 1 Open the front door Warning Potential Damage To prevent damage from electrostatic discharge touch any exposed metal frame of...

Page 68: ...n insert the toner cartridge Warning Potential Damage Do not expose the imaging unit to direct light for more than 10 minutes Extended exposure to light may cause print quality problems Warning Potent...

Page 69: ...new imaging unit 6 Close the door Replacing the duplex unit 1 Remove the used duplex unit 2 Unpack the new duplex unit 3 Insert the new duplex unit Replacing the tray 1 Remove the used tray Maintain t...

Page 70: ...error indicating the presence of the reset item Cleaning the printer CAUTION SHOCK HAZARD To avoid the risk of electrical shock when cleaning the exterior of the printer unplug the power cord from th...

Page 71: ...nter enters Hibernate mode Notes Make sure to wake the printer from Hibernate mode before sending a print job To wake the printer from Hibernate mode press the power button The Embedded Web Server is...

Page 72: ...s or output options then remove the output options and lift the printer off the trays Do not try to lift the printer and any options at the same time Always use the handholds on the printer to lift it...

Page 73: ...white pages on page 74 Dark print on page 75 Fine lines are not printed correctly on page 77 Folded or wrinkled paper on page 78 Gray background on page 79 Horizontal light bands on page 89 Incorrect...

Page 74: ...nt missing on page 94 Vertical light bands on page 90 Vertical white lines on page 91 Printing problems Print quality is poor Blank or white pages Note Before solving the problem print the Print Quali...

Page 75: ...touch the photoconductor drum under the imaging unit Doing so may affect the quality of future print jobs b Check the imaging unit for signs of damage Note Make sure that the photoconductor drum conta...

Page 76: ...the control panel navigate to Settings Print Quality Toner Darkness c Print the document Is the print dark Go to step 3 The problem is solved Step 3 a Depending on your operating system specify the p...

Page 77: ...lity problems Warning Potential Damage Do not touch the photoconductor drum under the imaging unit Doing so may affect the quality of future print jobs b Print the document Is the print dark Go to ste...

Page 78: ...t printed correctly Contact customer support The problem is solved Folded or wrinkled paper Note Before solving the problem print the Print Quality Test Pages From the control panel navigate to Settin...

Page 79: ...Settings Paper Tray Con guration Paper Size Type b Print the document Is the paper folded or wrinkled Contact customer support The problem is solved Gray background Note Before solving the problem pri...

Page 80: ...s Go to step 4 The problem is solved Step 4 a Remove and then insert the imaging unit Warning Potential Damage Do not expose the imaging unit to direct light for more than 10 minutes Extended exposure...

Page 81: ...blem is solved Go to step 3 Step 3 a Depending on your operating system specify the paper size from the Printing Preferences or Print dialog Note Make sure that the setting matches the paper loaded b...

Page 82: ...light Go to step 3 The problem is solved Step 3 a Depending on your operating system specify the paper type from the Printing Preferences or Print dialog Notes Make sure that the setting matches the...

Page 83: ...Go to step 6 The problem is solved Step 6 a Check the status of the toner cartridge From the control panel navigate to Settings Reports Device Device Statistics b From the Supply Information section o...

Page 84: ...he control panel navigate to Settings Reports Device Device Statistics b From the Supply Information section of the pages printed check the status of the imaging unit Is the imaging unit near end of l...

Page 85: ...d Step 4 a Depending on your operating system specify the paper size and paper type from the Printing Preferences or Print dialog Notes Make sure that the settings match the paper loaded You can also...

Page 86: ...Paper absorbs moisture due to high humidity Store paper in its original wrapper until you are ready to use it b Print the document Is the print crooked or skewed Go to step 3 The problem is solved Ste...

Page 87: ...Warning Potential Damage Do not expose the imaging unit to direct light for more than 10 minutes Extended exposure to light may cause print quality problems Warning Potential Damage Do not touch the p...

Page 88: ...Are text or images cut off Go to step 2 The problem is solved Step 2 a Remove and then insert the imaging unit Warning Potential Damage Do not expose the imaging unit to direct light for more than 10...

Page 89: ...tridge is not supported then install a supported one b Print the document Does toner easily rub off Go to step 2 The problem is solved Step 2 a Depending on your operating system specify the paper typ...

Page 90: ...pose the imaging unit to direct light for more than 10 minutes Extended exposure to light may cause print quality problems Warning Potential Damage Do not touch the photoconductor drum under the imagi...

Page 91: ...From the Supply Information section of the pages printed check the status of the toner cartridge Do vertical light bands appear on prints Go to step 3 The problem is solved Step 3 a Replace the toner...

Page 92: ...to Settings Paper Tray Con guration Paper Size Type b Print the document Do vertical white lines appear on prints Contact customer support The problem is solved Vertical dark bands Note Before solvin...

Page 93: ...printer and move the printer if necessary b Print the document Do vertical dark bands appear on prints Contact customer support The problem is solved Vertical dark lines or streaks Note Before solving...

Page 94: ...ort The problem is solved Vertical dark streaks with print missing Note Before solving the problem print the Print Quality Test Pages From the control panel navigate to Settings Troubleshooting Print...

Page 95: ...Settings Troubleshooting Print Quality Test Pages For non touch screen printer models press to navigate through the settings Action Yes No Step 1 Using the Print Quality Test Pages check if the dista...

Page 96: ...er is on b Resolve any error messages that appear on the display c Print the document Is the document printed The problem is solved Go to step 3 Step 3 a Check if the ports are working and if the cabl...

Page 97: ...rations Quiet Mode b Print the document Is the printer printing slow Go to step 3 The problem is solved Step 3 a Depending on your operating system specify the print resolution from the Printing Prefe...

Page 98: ...texture and weight match the paper being loaded From the control panel navigate to Paper Media Con guration Media Types Note Rough paper textures and heavy paper weights may print more slowly b Print...

Page 99: ...b Make sure that the settings match the paper loaded c Print the document Is the document printed on the correct paper The problem is solved Contact customer support Con dential and other held docume...

Page 100: ...cuments Are the documents printed The problem is solved Contact customer support The printer is not responding Action Yes No Step 1 Check if the power cord is connected to the electrical outlet CAUTIO...

Page 101: ...ved Go to step 7 Step 7 Turn off the printer wait for about 10 seconds and then turn on the printer Is the printer responding The problem is solved Contact customer support Network connection problems...

Page 102: ...ion working Go to step 5 Contact your administrator Step 5 Make sure that the cable connections to the printer and print server are secure For more information see the documentation that came with the...

Page 103: ...n see Connecting the printer to a Wi Fi network on page 23 Can the printer connect to the Wi Fi network The problem is solved Go to step 4 Step 4 Check the wireless security mode From the control pane...

Page 104: ...art installed in the printer Your Lexmark printer is designed to function best with genuine Lexmark supplies and parts Use of third party supplies or parts may affect the performance reliability or li...

Page 105: ...ge press and hold X and simultaneously for 15 seconds Note If you are unable to reset the supply usage counters then return the item to the place of purchase Clearing jams Avoiding jams Load paper pro...

Page 106: ...y media Do not load paper that is wrinkled creased damp bent or curled Flex fan and align the paper edges before loading Do not use paper that has been cut or trimmed by hand Do not mix paper sizes we...

Page 107: ...Jam locations 1 Standard bin 2 Front door 3 Manual feeder 4 Tray 5 Rear door 6 Duplex unit Paper jam in the tray 1 Remove the tray 2 Remove the jammed paper Troubleshoot a problem 107...

Page 108: ...metal frame of the printer before accessing or touching interior areas of the printer 2 Remove the imaging unit Warning Potential Damage Do not expose the imaging unit to direct light for more than 10...

Page 109: ...to cool before touching it Note Make sure that all paper fragments are removed 4 Insert the imaging unit 5 Close the door Paper jam in the rear door 1 Open the rear door CAUTION HOT SURFACE The insid...

Page 110: ...jam in the duplex unit 1 Pull out the duplex unit and then remove the jammed paper Warning Potential Damage To prevent damage from electrostatic discharge touch any exposed metal frame of the printer...

Page 111: ...ake sure that all paper fragments are removed Paper feed problems Envelope seals when printing Action Yes No Step 1 a Use an envelope that has been stored in a dry environment Note Printing on envelop...

Page 112: ...trol panel navigate to Print Layout Collate On 1 2 1 2 1 2 b Print the document Is the document collated correctly The problem is solved Go to step 2 Step 2 a From the document that you are trying to...

Page 113: ...Size Type b Set the correct paper size and type c Print the document Do paper jams occur frequently Go to step 3 The problem is solved Step 3 a Load paper from a fresh package Note Paper absorbs moist...

Page 114: ...and serial number Go to http support lexmark com to receive e mail or chat support or browse through the library of manuals support documentation drivers and other downloads Technical support via tel...

Page 115: ...These efficiencies result in fewer greenhouse emissions energy savings and natural resource savings Lexmark also offers recycling of packaging components in some countries or regions For more informat...

Page 116: ...ll countries in which it operates Any reference to a product program or service is not intended to state or imply that only that product program or service may be used Any functionally equivalent prod...

Page 117: ...use is strictly prohibited PCL is a registered trademark of the Hewlett Packard Company PCL is Hewlett Packard Company s designation of a set of printer commands language and functions included in it...

Page 118: ...l ethers in concentrations exceeding 0 1 by weight and 0 01 by weight for cadmium except for the exemption set in the Rule Product disposal Do not dispose of the printer or supplies in the same manner...

Page 119: ...perature information Ambient operating temperature 10 to 32 2 C 50 to 90 F Shipping temperature 40 to 43 3 C 40 to 110 F Storage temperature and relative humidity 40 to 43 3 C 40 to 110 F 8 to 80 RH L...

Page 120: ...e average Values are subject to change See www lexmark com for current values Sleep Mode This product is designed with an energy saving mode called Sleep Mode The Sleep Mode saves energy by lowering p...

Page 121: ...ormation that applies only to wireless models If in doubt as to whether your model is a wireless model go to http support lexmark com Modular component notice Wireless models contain the following mod...

Page 122: ...ion reception which can be determined by turning the equipment off and on the user is encouraged to try to correct the interference by one or more of the following measures Reorient or relocate the re...

Page 123: ...ria Kft 8 Lechner d n fasor Millennium Tower III 1095 Budapest HUNGARY A declaration of conformity to the requirements of the Directives is available upon request from the Authorized Representative o...

Page 124: ...le from Lexmark or a Lexmark Remarketer referred to in this statement as Remarketer Limited warranty Lexmark warrants that this product Is manufactured from new parts or new and serviceable used parts...

Page 125: ...in your area contact Lexmark on the World Wide Web Remote technical support is provided for this product throughout its warranty period For products no longer covered by a Lexmark warranty technical...

Page 126: ...FITS LOST SAVINGS INCIDENTAL DAMAGE OR OTHER ECONOMIC OR CONSEQUENTIAL DAMAGES This is true even if you advise Lexmark or a Remarketer of the possibility of such damages Lexmark is not liable for any...

Page 127: ...s 88 cut off text 88 D dark print 75 deactivating the Wi Fi network 26 documents printing from a computer 28 from a mobile device 28 dots on print 83 duplex unit replacing 69 setting the paper size 17...

Page 128: ...unacceptable 12 paper characteristics 12 paper curl 84 paper guidelines 11 paper jam in the manual feeder 111 paper jam in the duplex unit 110 paper jam in the front door 108 paper jam in the rear doo...

Page 129: ...inter region mismatch 104 replacing parts duplex unit 69 tray 69 replacing supplies imaging unit 67 toner cartridge 65 resetting supply usage counters 104 resetting counters 70 restoring factory defau...

Page 130: ...using genuine Lexmark parts and supplies 64 using the control panel 10 V vertical dark bands 92 vertical dark lines on prints 93 vertical dark streaks 94 vertical light bands 90 vertical streaks on pr...

Reviews: