


9
Figure 2-3 Setup of LAN and WAN connections for this product.
3. Setup ADSL connection
Prepare a telephone cable for connecting this product to your ISP. Figure 2-3 illustrates the ADSL
connection.
4. Connecting this product with your printer
Use the printer cable to connect your printer to the USB printer port of this product.
5. Power on
Connecting the power cord to power inlet and turning the power switch on, this product will
automatically enter the self-test phase. When it is in the self-test phase, the indicators STATUS
will be lighted ON for about 10 seconds, and then STATUS will be flashed 3 times to indicate that
the self-test operation has finished. Finally, the STATUS will be continuously flashed once per
second to indicate that this product is in normal operation.
Summary of Contents for WBR-3402TX
Page 1: ...1 LevelOne WBR 3402TX 1W 4L 11g Wireless ADSL Router w VPN Printer Server USB User s Manual ...
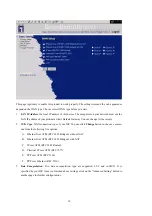
Page 18: ...18 4 4 1 Primary Setup WAN Type Press Change ...
Page 22: ...22 ...
Page 33: ...33 4 5 Forwarding Rules 4 5 1 Virtual Server ...
Page 37: ...37 4 6 Security Settings ...
Page 55: ...55 4 7 Advanced Setting ...
Page 60: ...60 E mail Subject The subject of email alert This setting is optional ...
Page 68: ...68 ...
Page 70: ...70 Exanple2 Packet Filter Apply Rule 1 ftp time everyday 14 10 to 16 20 ...
Page 71: ...71 4 8 Toolbox ...
Page 72: ...72 4 8 1 View Log You can View system log by clicking the View Log button ...
Page 73: ...73 4 8 2 Firmware Upgrade You can upgrade firmware by clicking Firmware Upgrade button ...
Page 81: ...81 2 Select Ports page Click Add Port 3 Select Standard TCP IP Port and then click New Port ...
Page 83: ...83 6 Select LPR type lp lowercase letter in Queue Name And enable LPR Byte Counting Enabled ...
Page 84: ...84 7 Apply your settings ...
Page 86: ...86 2 Click Add Forward 3 Enter the Pinter Name Comments then forward ...
Page 88: ...88 6 Select the Printer Brand and Model Name Then Forward 7 Click Apply to finish setup ...
Page 98: ...98 Double click Administrative Tools ...
Page 99: ...99 Local Security Policy Settings Double click Local Security Policy ...
Page 102: ...102 click Add button ...
Page 105: ...105 Click OK button Then click OK button on the IP Filter List page ...
Page 106: ...106 select Filter Action select Require Security then click Edit button ...
Page 108: ...108 select Custom button ...
Page 110: ...110 select Authentication Methods page click Add button ...
Page 114: ...114 click Add button ...
Page 115: ...115 Enter a name such as router xp and dis select Use Add Wizard check box Click Add button ...
Page 117: ...117 Click OK button Then click OK button on IP Filter List window ...
Page 118: ...118 select Filter Action tab select Require Security then click Edit button ...
Page 120: ...120 select Custom button ...
Page 122: ...122 select Authentication Methods page click Add button ...
Page 125: ...125 select All network connections ...
Page 126: ...126 Configure IKE properties Select General Click Advanced ...
Page 129: ...129 VPN Settings VPN Enable Max number of tunnels 2 ID 1 Tunnel Name 1 Method IKE Press More ...
Page 134: ...134 3 Choose Virtual Private Network 4 Do not dial to initial connection ...
Page 136: ...136 7 Select the type of VPN ...
Page 138: ...138 Then the steps refer to pptp settings ...
Page 141: ...141 Figure 2 Enable IEEE 802 1X access control ...
Page 143: ...143 Figure 4 Certificate information on PC1 Figure 5 Authenticating ...