10
LESCO
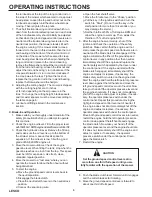
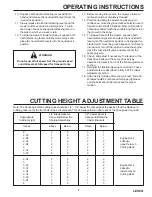
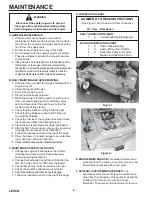
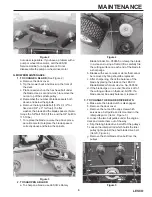
removing two large wing nuts.
b. With the mower deck positioned in front of the
power unit, visually align mower deck channels
with power unit frame tubes.
c. Push down on power unit handle bar to bring the
front caster wheels to a level above top of the
mower deck.
d. Push the power unit over the mower deck. Align
the power unit frame tubes with the mower deck
channels.
e. Slowly reduce force on the handle bar to lower
the front caster wheels until they rest on the
surface with the frame tubes inside the mower
deck channels.
f. Push the power unit forward until the rear stop
tabs of the frame contact the mower deck
channels.
INSTALLING THE MOWER DECK
WARNING: Disengage the PTO, stop engine and
remove key to avoid accidental starting and injury.
WARNING: When handling the mower deck, be
careful not to cut yourself on the sharp blades.
a. Lift one side of the mower deck to achieve the
desired cutting height.
b. Push the button in the center of the handle of
each of the retaining pins to insert the retaining
pins through the appropriate front and rear height
adjustment holes in the mower deck channel.
Select the lowest holes that allow insertion of the
pins just above the bottom inside edge of the
power unit frame U-brackets inside the brackets.
NOTE: The same height adjustment hole must
be used for both front and rear pin installation.
c. Release the mower deck.
d. Repeat the above procedure to install the other
side of the mower deck.
NOTE: The same height adjustment hole must
be used for all four pin installations.
e. Adjust the mower deck as required. Refer to
"Adjustments" in your Operator's Manual.
f. Install the PTO belt by executing the following
procedures:
1. Remove center mower deck cover by first
removing two large wing nuts.
2. Push against idler arm to release tension on
the PTO belt. For increased leverage, a 3/8-
inch square drive of a breaker bar can be
placed in the 3/8-inch hole of the idler arm.
The breaker bar handle can be pushed to
release tension on the PTO belt.
NOTE: Be sure the narrow side of the belt is in
the bottom of the pulley grooves.
3. Carefully remove old PTO belt, and replace it
with a new belt.
4. Release force on the idler arm to restore
h. Place a new short blade drive belt back on the
pulleys and tighten the idler pull rod to hold the
idler pulley tight against the belt.
i. Place a new long blade drive belt through the
belt guide and loop it around the engine pulley
and then around the two deck pulleys. The
belt’s back side should ride on the idler pulley.
j. Replace the cap screw and nut in the idler
pulley arm. Readjust and tighten the two belt
guides under the engine deck.
k. The idler pulleys should be adjusted so that
when the blade clutch is engaged, a ten-pound
pull between two pulleys deflects either belt
about 1/2". Do not overtighten these belts. The
blade clutch should engage with only moderate
force.
l. Replace the deck cover.
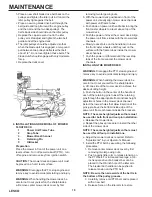
4. INSTALLATION AND REMOVAL OF MOWER
FLOAT DECK
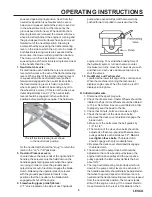
1.
Power Unit Frame Tube
2.
Stop Tabs
3.
Mower Deck Channel
4.
Retaining Pin
5.
U-Bracket
Preparation
Place the mower in front of the power unit on a
level surface. Turn off power take-off (PTO), turn
off engine and remove key from ignition switch.
CAUTION: The mower deck and power unit must
be placed on a hard, level surface.
WARNING: Disengage the PTO, stop engine and
remove key to avoid accidental starting and injury.
WARNING: When handling the mower deck, be
careful not to cut yourself on the sharp blades.
a. Remove center mower deck cover by first
MAINTENANCE


