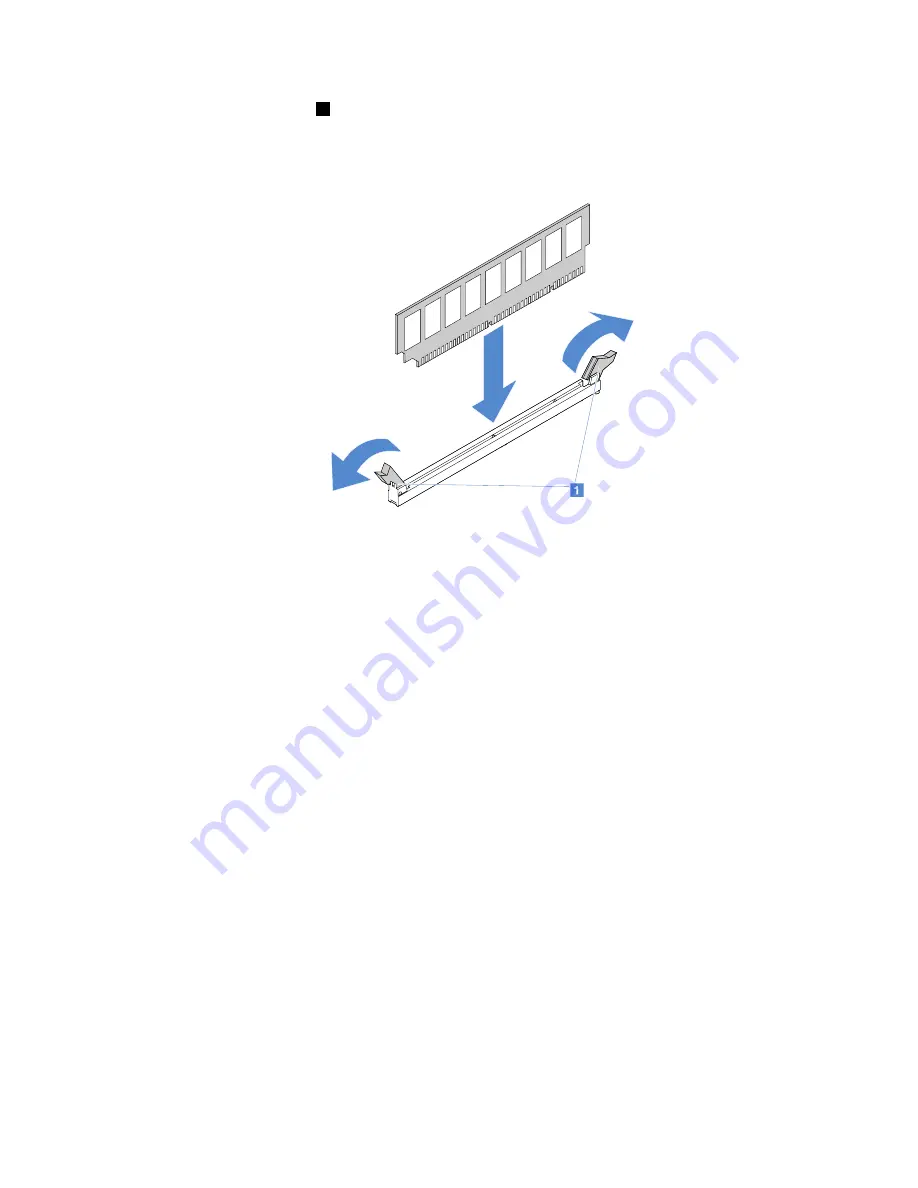
Step 6.
Open the retaining clips
1
on each end of the DIMM slot. Then, install the DIMM into the slot.
Attention:
To avoid breaking the retaining clips or damaging the DIMM slots, open and close
the clips gently.
Figure 27. DIMM installation
Step 7.
Firmly press the DIMM straight down into the connector by applying pressure on both ends of the
DIMM simultaneously. The retaining clips snap into the locked position when the DIMM is firmly
seated in the connector.
Note:
If there is a gap between the DIMM and the retaining clips, the DIMM has not been correctly
inserted; open the retaining clips, remove the DIMM, and then reinsert it.
Step 8.
Complete the parts replacement. See “Completing the parts replacement” on page 172.
Removing a hot-swap hard disk drive
The drive ID that is assigned to each drive is printed on the front of the server. The ID numbers and the drive
bay numbers are the same. For detailed information, see “Front view” on page 15.
Attention:
• To avoid damage to the hard disk drive connectors, make sure that the server cover is in place and fully
closed whenever you install or remove a hard disk drive.
• To ensure adequate system cooling, do not operate the server for more than two minutes without either
a hard disk drive or a filler installed in each bay.
• Before you change hard disk drives, HDD controllers (including controllers that are integrated on the
system board), HDD backplanes, or HDD cables, back up all important data that is stored on the hard
disk drives.
• Before you remove any component of a RAID array, back up all RAID configuration information and
data on your drive.
To remove a hot-swap hard disk drive, do the following:
100
Lenovo System x3250 M6 Installation and Service Guide
Summary of Contents for x3250 m6
Page 1: ...Lenovo System x3250 M6 Installation and Service Guide Machine Types 3633 and 3943 ...
Page 6: ...iv Lenovo System x3250 M6 Installation and Service Guide ...
Page 18: ...4 Lenovo System x3250 M6 Installation and Service Guide ...
Page 60: ...46 Lenovo System x3250 M6 Installation and Service Guide ...
Page 100: ...86 Lenovo System x3250 M6 Installation and Service Guide ...
Page 516: ...502 Lenovo System x3250 M6 Installation and Service Guide ...
Page 678: ...664 Lenovo System x3250 M6 Installation and Service Guide ...
Page 685: ...Taiwan Class A compliance statement Appendix E Notices 671 ...
Page 695: ......
Page 696: ......


