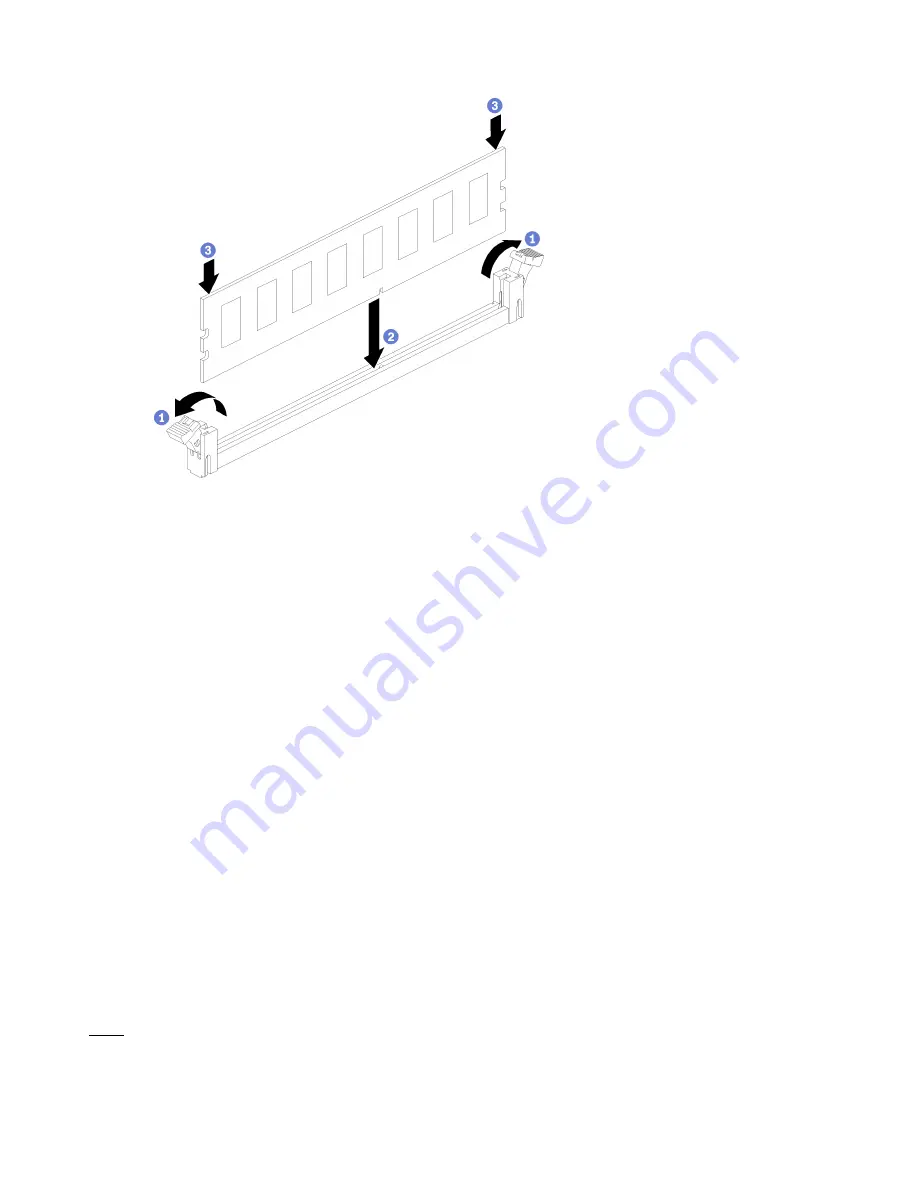
Figure 33. Memory module installation
a. Open the memory module connector retaining clips. If a memory module is already installed in
the connector, remove it.
b. Align the keys on the memory module that you are installing with the connector; then, insert the
memory module.
c. Firmly press both ends of the memory module straight down into the connector until the
retaining clips snap into the locked position.
Step 2. If you are installing additional memory modules, do so now.
After installing a memory module option:
1. Install the upper system board or system board filler, if it was removed. See “Install a system board” on
2. Install the compute tray . See “Install a compute tray” on page 307.
3. If you have no additional options to install in the upper or lower compute tray, install the front cover. See
“Install the front cover” on page 227.
Install a hard disk drive backplane
Hard disk drive backplanes are in the upper and lower compute trays that are accessed from the front of the
server. The installation procedure for backplanes in the upper and lower compute trays is different.
Install a hard disk drive backplane (upper tray)
Hard disk drive backplanes in the upper compute tray or optional storage tray are accessed from the front of
the server. There are several types of hard disk drive backplane. Steps that are backplane specific are noted
in each procedure.
S002
220
ThinkSystem SR950 Setup Guide
Summary of Contents for ThinkSystem SR950
Page 1: ...ThinkSystem SR950 Setup Guide Machine Types 7X12 7X11 and 7X13 ...
Page 55: ...Figure 22 Server components Chapter 2 Server components 51 ...
Page 276: ...272 ThinkSystem SR950 Setup Guide ...
Page 282: ...278 ThinkSystem SR950 Setup Guide ...
Page 286: ...282 ThinkSystem SR950 Setup Guide ...
Page 389: ......
Page 390: ......


