


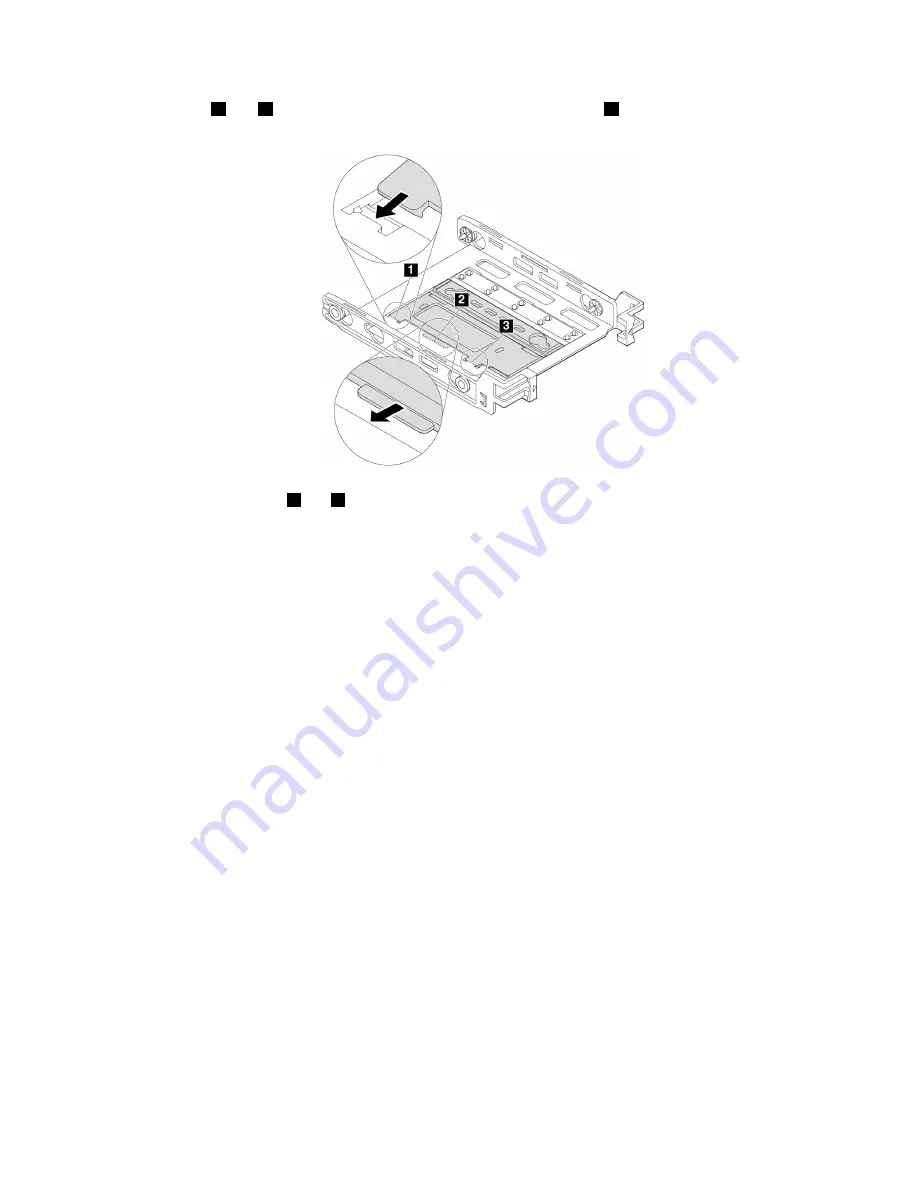
5. Insert tabs
1
and
3
into the corresponding slots. Ensure that the tab
2
is secured in place.
Figure 58. Inserting tabs
1
and
3
into the corresponding slots
6. Install a 3.5-inch internal storage drive into the bracket. See “3.5-inch internal storage drive” on page 73.
What to do next:
• To work with another piece of hardware, go to the appropriate section.
• To complete the installation or replacement, go to “Completing the parts replacement” on page 97.
Battery
Attention:
Do not open your computer or attempt any repair before reading and understanding the “Read
this first: Important safety information” on page iii.
Your computer has a special type of memory that maintains the date, time, and settings for built-in features.
A battery keeps this information active when you turn off the computer.
The battery normally requires no charging or maintenance throughout its life; however, no battery lasts
forever. If the battery fails, the date, time, and configuration information (including passwords) are lost. An
error message is displayed when you turn on the computer.
Refer to the “Lithium coin cell battery notice” in the
Safety, Warranty, and Setup Guide
for information about
replacing and disposing of the battery.
To replace the battery, do the following:
1. Prepare your computer. See “Preparing your computer and removing the computer cover” on page 55.
2. Locate the battery. See “Parts on the system board” on page 6.
3. Remove the old battery.
Hardware installation and replacement
83
Summary of Contents for THINKSTATION P320 30BG
Page 1: ...P320 User Guide Machine Types 30BG 30BH and 30BR ...
Page 10: ...viii P320 User Guide ...
Page 36: ...26 P320 User Guide ...
Page 42: ...32 P320 User Guide ...
Page 52: ...42 P320 User Guide ...
Page 64: ...54 P320 User Guide ...
Page 112: ...102 P320 User Guide ...
Page 114: ...104 P320 User Guide ...
Page 116: ...106 P320 User Guide ...
Page 124: ...114 P320 User Guide ...
Page 128: ...118 P320 User Guide ...
Page 130: ...120 P320 User Guide ...
Page 132: ...122 P320 User Guide ...
Page 133: ......
Page 134: ......