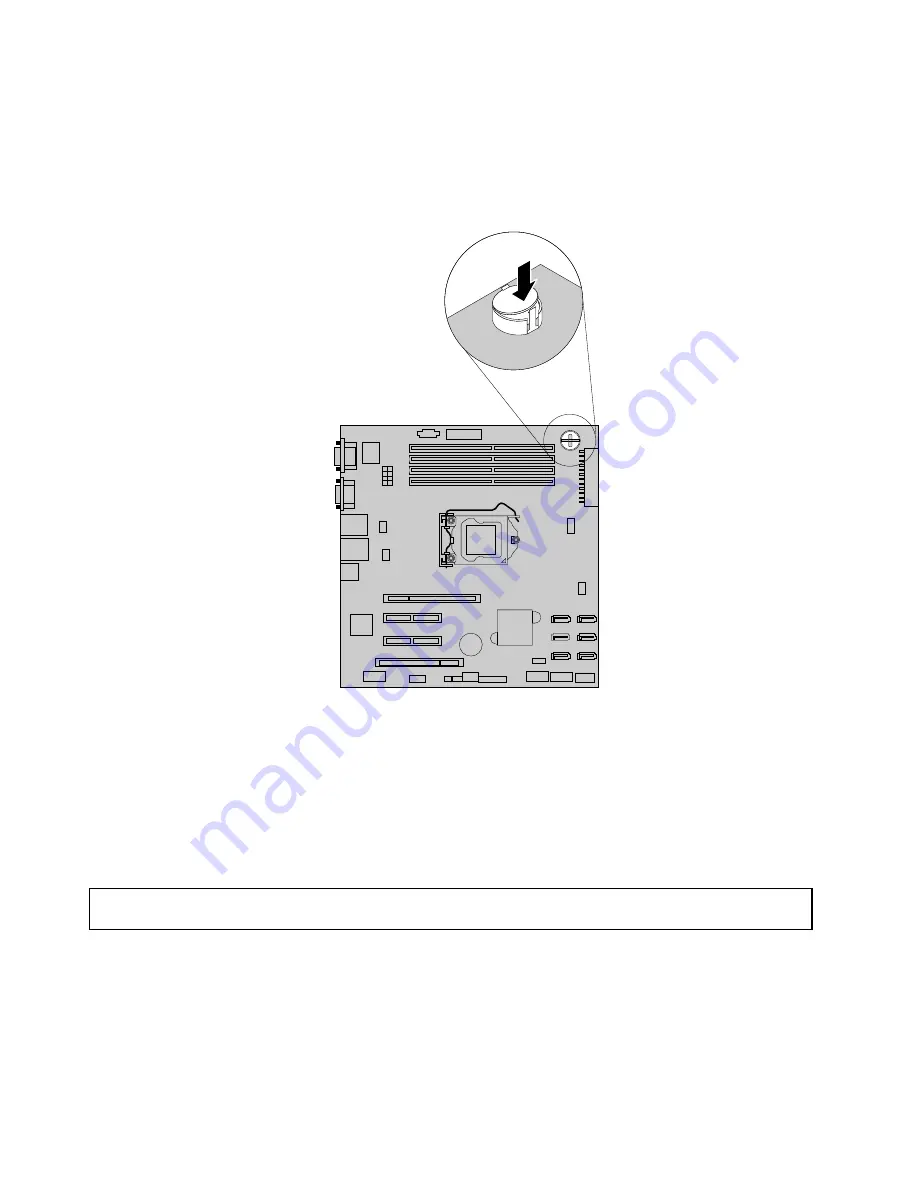
5. Locate the iButton socket on the system board. Insert one side of the TR 100 key under one of the
retaining clips on the iButton socket. Then, carefully press the other side of the TR 100 key straight
down until the key snaps into position and is secured by the two retaining clips on the iButton socket.
Note:
If necessary, remove any parts or disconnect any cables that might impede your operation.
Figure 53. Installing the TR 100 key
What to do next:
• To work with another piece of hardware, go to the appropriate section.
• To complete the installation, go to “Completing the parts replacement” on page 170. Then, the onboard
SATA software RAID 5 is available for your server if your server has the required number of hard disk
drives installed. To configure RAID, see “Configuring RAID” on page 73.
Removing the TR100 key
Attention:
Do not open your server or attempt any repair before reading and understanding the “Safety information”
on page iii and “Guidelines” on page 85.
This topic provides instructions on how to remove the TR 100 key.
Notes:
1. This topic applies only to servers that have a TR 100 key option installed.
2. If you remove the TR 100 key, the onboard SATA software RAID 5 will be disabled.
112
ThinkServer TS430 User Guide
Summary of Contents for ThinkServer TS430 0387
Page 1: ...ThinkServer TS430 User Guide Machine Types 0387 0388 0389 0390 0391 0392 0393 and 0441 ...
Page 18: ...6 ThinkServer TS430 User Guide ...
Page 66: ...54 ThinkServer TS430 User Guide ...
Page 96: ...84 ThinkServer TS430 User Guide ...
Page 186: ...174 ThinkServer TS430 User Guide ...
Page 194: ...182 ThinkServer TS430 User Guide ...
Page 198: ...186 ThinkServer TS430 User Guide ...
Page 218: ...206 ThinkServer TS430 User Guide ...
Page 219: ......
Page 220: ......


