


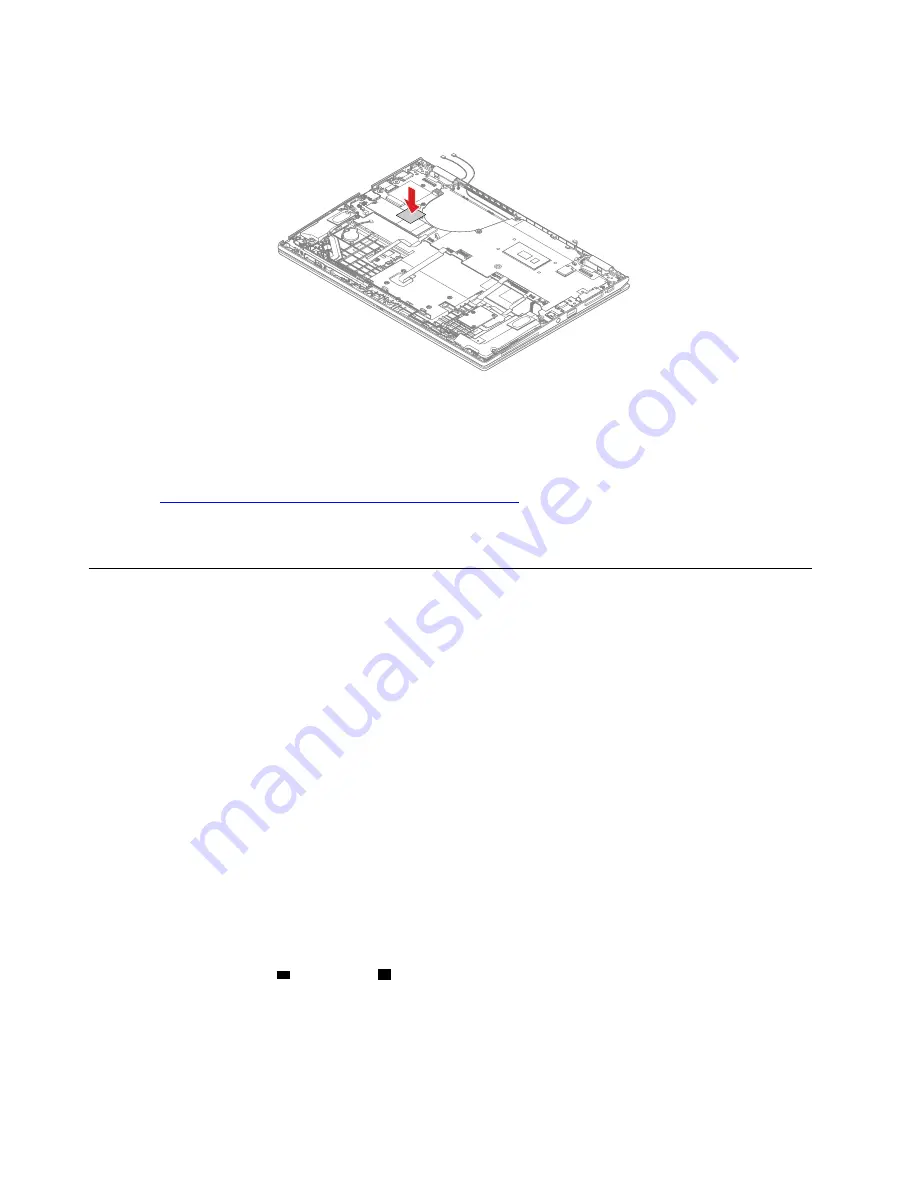
When installing:
Ensure that all the connectors are attached firmly to the system board. If you install a new
system board, paste the thermal pad in the M.2 solid-state drive slot as shown.
After the replacement finishes, calibrate the accelerometer using the sensor calibration tool. To download the
sensor calibration tool and the instruction, do the following:
Note:
Service account and password are required for downloading the sensor calibration tool and the
instruction.
1. Go to
https://support.lenovo.com/us/en/documents/HT103119
and follow the instructions on the screen.
2. Locate the sensor calibration tool and select the corresponding file name to download the sensor
calibration tool or the instruction.
1170 Keyboard assembly
For access, remove these FRUs in order:
• “1010 ThinkPad Pen Pro” on page 64
• “1020 Nano-SIM card tray (for selected models)” on page 65
• “1030 Base cover assembly” on page 65
• “1040 Battery” on page 66
• “1050 I/O bracket” on page 68
• “1060 Wireless-WAN card (for selected models)” on page 68
• “1070 M.2 solid-state drive” on page 69
• “1080 Coin-cell battery” on page 71
• “1090 Speaker assembly” on page 71
• “1100 Pen charger cable” on page 72
• “1110 Thermal fan assembly” on page 73
• “1120 NFC card, NFC cable, and NFC antenna (for selected models)” on page 75
• “1130 Smart-card reader, smart-card-reader cable, or dummy smart-card door” on page 75
• “1140 Fingerprint reader bracket, fingerprint reader cable, and fingerprint reader ” on page 77
• “1150 Trackpad and trackpad cable” on page 78
• “1160 System board” on page 79
• “1200 LCD unit” on page 83
When installing
: If you install a new keyboard bezel assembly for models without a smart card reader,
ensure to install the rubbers
a
and gaskets
b
as shown.
82
X390 Yoga Hardware Maintenance Manual
Summary of Contents for ThinkPad X390
Page 1: ...X390 Yoga Hardware Maintenance Manual ...
Page 6: ...iv X390 Yoga Hardware Maintenance Manual ...
Page 11: ...DANGER DANGER DANGER DANGER DANGER Chapter 1 Safety information 5 ...
Page 12: ...6 X390 Yoga Hardware Maintenance Manual ...
Page 13: ...PERIGO PERIGO Chapter 1 Safety information 7 ...
Page 14: ...PERIGO PERIGO PERIGO PERIGO PERIGO 8 X390 Yoga Hardware Maintenance Manual ...
Page 15: ...PERIGO DANGER DANGER DANGER DANGER Chapter 1 Safety information 9 ...
Page 16: ...DANGER DANGER DANGER DANGER VORSICHT 10 X390 Yoga Hardware Maintenance Manual ...
Page 17: ...VORSICHT VORSICHT VORSICHT VORSICHT Chapter 1 Safety information 11 ...
Page 18: ...VORSICHT VORSICHT VORSICHT 12 X390 Yoga Hardware Maintenance Manual ...
Page 19: ...Chapter 1 Safety information 13 ...
Page 20: ...14 X390 Yoga Hardware Maintenance Manual ...
Page 21: ...Chapter 1 Safety information 15 ...
Page 22: ...16 X390 Yoga Hardware Maintenance Manual ...
Page 23: ...Chapter 1 Safety information 17 ...
Page 24: ...18 X390 Yoga Hardware Maintenance Manual ...
Page 25: ...Chapter 1 Safety information 19 ...
Page 26: ...20 X390 Yoga Hardware Maintenance Manual ...
Page 30: ...24 X390 Yoga Hardware Maintenance Manual ...
Page 36: ...30 X390 Yoga Hardware Maintenance Manual ...
Page 48: ...42 X390 Yoga Hardware Maintenance Manual ...
Page 49: ... Copyright Lenovo 2019 43 ...
Page 52: ...46 X390 Yoga Hardware Maintenance Manual ...
Page 57: ...Major FRUs d a b c Chapter 6 Locations 51 ...
Page 60: ...LCD FRUs 54 X390 Yoga Hardware Maintenance Manual ...
Page 101: ... 2090 Wireless antenna kit on page 91 Chapter 8 Removing or replacing a FRU 95 ...
Page 102: ...96 X390 Yoga Hardware Maintenance Manual ...
Page 107: ......
Page 108: ...Part Number SP40K05260 Printed in 1P P N SP40K05260 1PSP40K05260 ...