
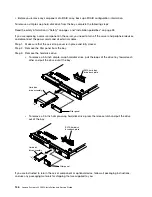


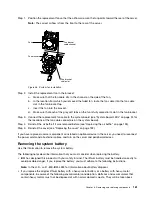
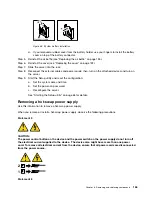

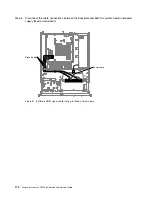
Step 5.
Touch the static-protective package that contains the DIMM to any unpainted metal surface on the
outside of the server. Then, remove the DIMM from the package.
Step 6.
Turn the DIMM so that the alignment slot align correctly with the alignment tab.
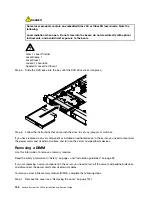
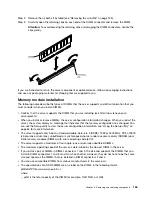
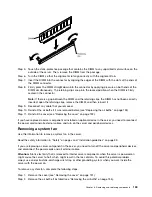
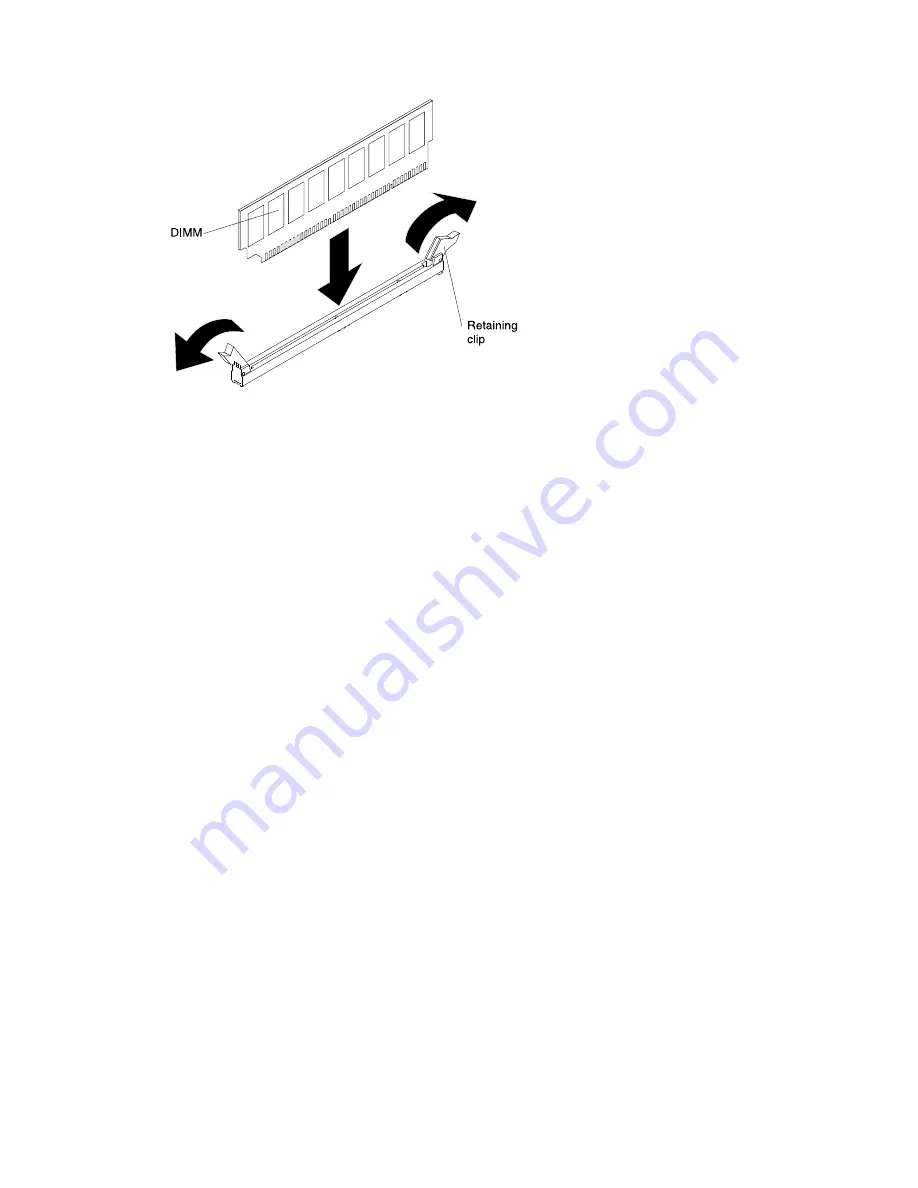
Step 7.
Insert the DIMM into the connector by aligning the edges of the DIMM with the slots at the ends of
the DIMM connector.
Step 8.
Firmly press the DIMM straight down into the connector by applying pressure on both ends of the
DIMM simultaneously. The retaining clips snap into the locked position when the DIMM is firmly
seated in the connector.
Note:
If there is a gap between the DIMM and the retaining clips, the DIMM has not been correctly
inserted; open the retaining clips, remove the DIMM, and then reinsert it.
Step 9.
Reconnect any cable that you removed.
Step 10. Reinstall the air baffle if it was removed before (see “Replacing the air baffle” on page 135).
Step 11. Reinstall the cover (see “Replacing the cover” on page 132).
If you have replaced a server component or installed an optional device in the server, you need to reconnect
the power cords and all external cables, and turn on the server and peripheral devices.
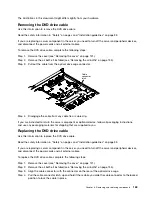
Removing a system fan
Use this information to remove a system fan in the server.
Read the safety information in “Safety” on page v and “Installation guidelines” on page 33.
If you are replacing a server component in the server, you need to turn off the server and peripheral devices,
and disconnect the power cords and all external cables.
Attention:
Static electricity that is released to internal server components when the server is powered-on
might cause the server to halt, which might result in the loss of data. To avoid this potential problem,
always use an electrostatic-discharge wrist strap or other grounding system when you work inside the
server with the power on.
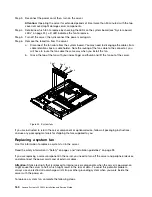
To remove a system fan, complete the following steps.
Step 1.
Remove the cover (see “Removing the cover” on page 131).
Step 2.
Remove the air baffle if installed (see “Removing the air baffle” on page 135).
Removing and replacing components
159
Summary of Contents for System x3250 M4
Page 1: ...Lenovo System x3250 M4 Installation and Service Guide Machine Type 2583 ...
Page 6: ...iv Lenovo System x3250 M4 Installation and Service Guide ...
Page 74: ...60 Lenovo System x3250 M4 Installation and Service Guide ...
Page 98: ...84 Lenovo System x3250 M4 Installation and Service Guide ...
Page 136: ...122 Lenovo System x3250 M4 Installation and Service Guide ...
Page 144: ...130 Lenovo System x3250 M4 Installation and Service Guide ...
Page 418: ...404 Lenovo System x3250 M4 Installation and Service Guide ...
Page 596: ...582 Lenovo System x3250 M4 Installation and Service Guide ...
Page 604: ...Taiwan BSMI RoHS declaration 590 Lenovo System x3250 M4 Installation and Service Guide ...
Page 612: ...598 Lenovo System x3250 M4 Installation and Service Guide ...
Page 613: ......
Page 614: ......


