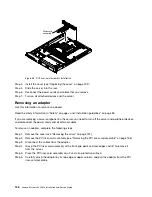


00000
00000
00000
00000
00000
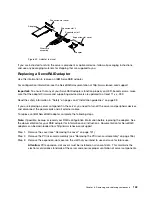
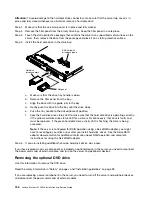
Attention:
To maintain proper system cooling, do not operate the server for more than 10 minutes
without either a drive or filler panel installed in each bay.
If you are instructed to return the server component or optional device, follow all packaging instructions,
and use any packaging materials for shipping that are supplied to you.
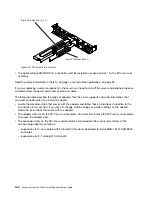
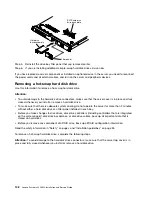
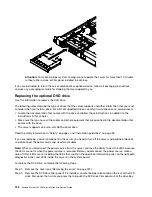
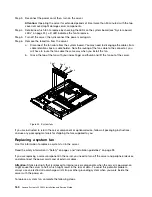
Replacing the optional DVD drive
Use this information to replace the DVD drive.
The following notes describe the type of drives that the server supports and other information that you must
consider when you install a drive. For a list of supported drives, see http://www.lenovo.com/ serverproven/.
• Locate the documentation that comes with the drive and follow those instructions in addition to the
instructions in this chapter.
• Make sure that you have all the cables and other equipment that are specified in the documentation that
comes with the drive.
• The server supports one ultra-slim SATA optical drive.
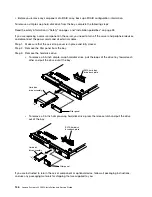
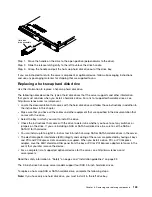
Read the safety information in “Safety” on page v and “Installation guidelines” on page 33.
If you are replacing a server component in the server, you need to turn off the server and peripheral devices,
and disconnect the power cords and all external cables.
Note:
When you disconnect the power source from the server, you lose the ability to view the LEDs because
the LEDs are not lit when the power source is removed. Before you disconnect the power source, make a
note of which LEDs are lit, including the LEDs that are lit on the operation information panel, on the light path
diagnostics panel, and LEDs inside the server on the system board.
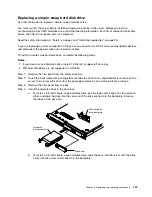
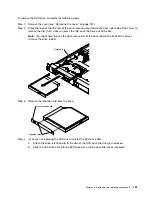
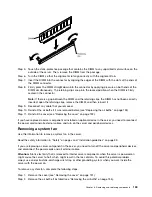
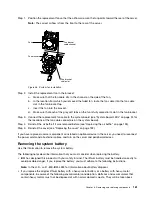
To replace the DVD drive, complete the following steps.
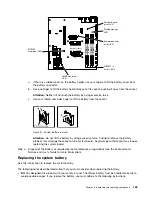
Step 1.
Remove the cover (see “Removing the cover” on page 131).
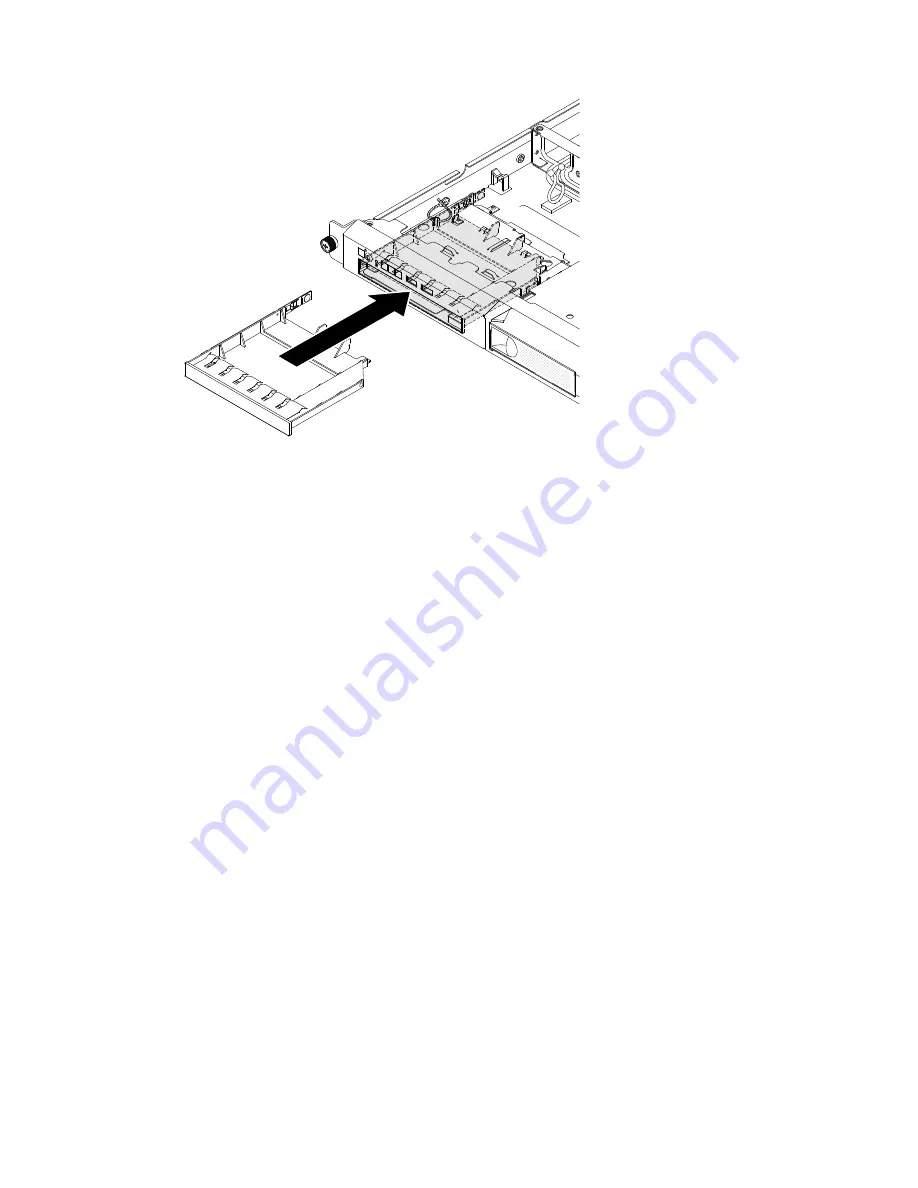
Step 2.
Remove the DVD drive filler panel if it is installed. Locate the blue release tab on the rear of the DVD
drive filler panel; then, while you press the tab, push the DVD drive filler panel out of the drive bay.
152
Lenovo System x3250 M4 Installation and Service Guide
Summary of Contents for System x3250 M4
Page 1: ...Lenovo System x3250 M4 Installation and Service Guide Machine Type 2583 ...
Page 6: ...iv Lenovo System x3250 M4 Installation and Service Guide ...
Page 74: ...60 Lenovo System x3250 M4 Installation and Service Guide ...
Page 98: ...84 Lenovo System x3250 M4 Installation and Service Guide ...
Page 136: ...122 Lenovo System x3250 M4 Installation and Service Guide ...
Page 144: ...130 Lenovo System x3250 M4 Installation and Service Guide ...
Page 418: ...404 Lenovo System x3250 M4 Installation and Service Guide ...
Page 596: ...582 Lenovo System x3250 M4 Installation and Service Guide ...
Page 604: ...Taiwan BSMI RoHS declaration 590 Lenovo System x3250 M4 Installation and Service Guide ...
Page 612: ...598 Lenovo System x3250 M4 Installation and Service Guide ...
Page 613: ......
Page 614: ......


