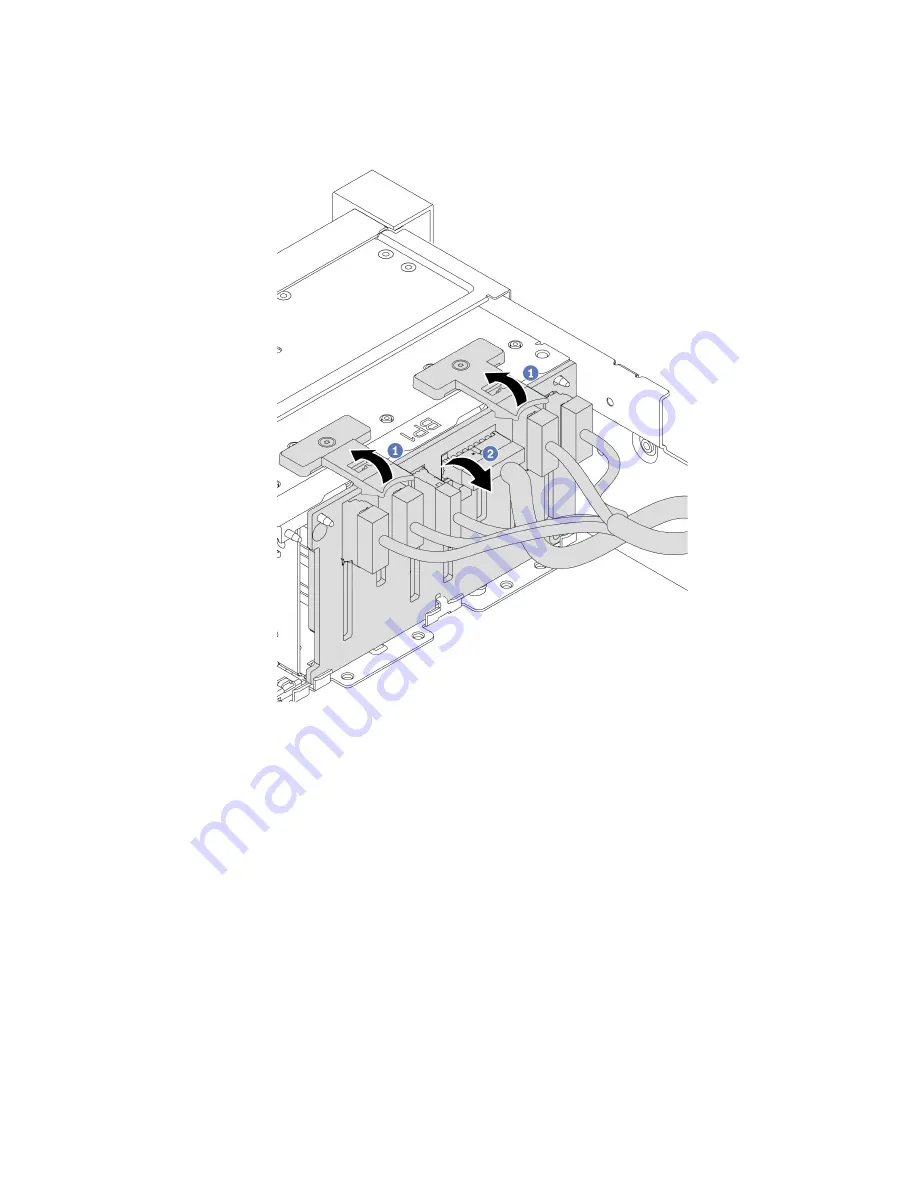
Step 2. Remove the 2.5-inch drive backplane.
Note:
Depending on the specific type, your backplane might look different from the illustration.
Figure 32. 2.5-inch drive backplane removal
a. Lift the release tabs.
b. Rotate the backplane from the top to disengage it from the two pins on the chassis.
Step 3. Record the cable connections on the backplane and then disconnect all cables from the
backplane.
After you finish
If you are instructed to return the defective component, follow all packaging instructions and use any
packaging materials that are provided.
Install the front 2.5-inch drive backplane
Use this information to install the front 2.5-inch drive backplane.
About this task
54
HR650X V2 User Guide
Summary of Contents for HR650X V2
Page 1: ...HR650X V2 User Guide Machine Types 7D4D ...
Page 8: ......
Page 14: ...6 HR650X V2 User Guide ...
Page 30: ...22 HR650X V2 User Guide ...
Page 122: ...114 HR650X V2 User Guide ...
Page 152: ...144 HR650X V2 User Guide ...
Page 176: ...168 HR650X V2 User Guide ...
Page 182: ...174 HR650X V2 User Guide ...
Page 186: ...178 HR650X V2 User Guide ...
Page 190: ...182 HR650X V2 User Guide ...
Page 191: ......
Page 192: ......


