


About this task
Step 1. Make sure the 2.5-drive is removed from drive bay 2, see “Remove a simple-swap drive (bay 1-2)”
Step 2. Make sure the post on the M.2 drive retainer is lifted away from the retainer.
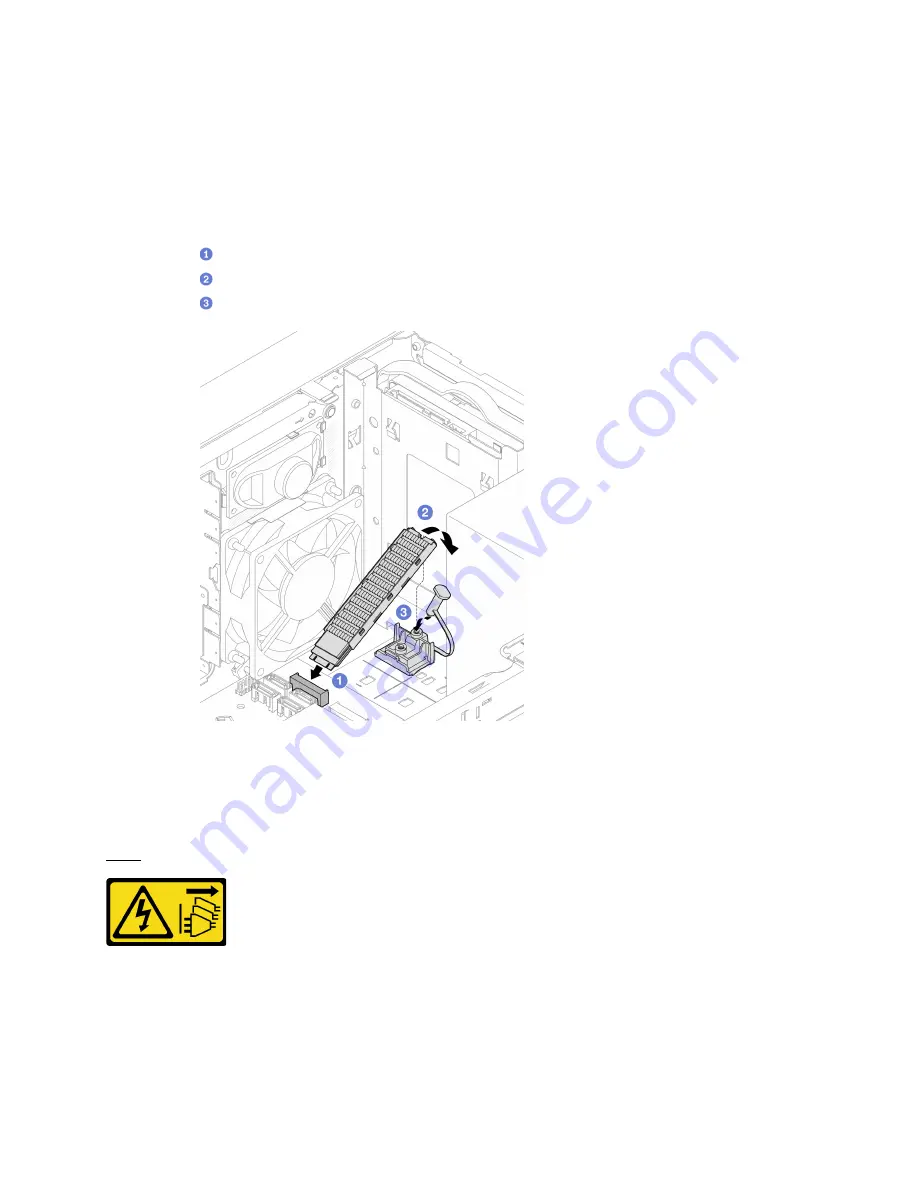
Step 3. Install the M.2 drive.
Note:
The thermal sensor cable should be placed under the M.2 drive.
a.
Position the M.2 drive at an angle and insert it to the M.2 connector.
b.
Place down the M.2 drive onto the M.2 drive retainer.
c.
Insert the retainer post into the retainer to secure the M.2 drive in place.
Figure 68. Installing the M.2 drive
Install the M.2 drive retainer
Follow this procedure to install the M.2 drive retainer.
S002
CAUTION:
The power-control button on the device and the power switch on the power supply do not turn off the
electrical current supplied to the device. The device also might have more than one power cord. To
remove all electrical current from the device, ensure that all power cords are disconnected from the
power source.
.
85
Summary of Contents for 7D8J
Page 1: ...ThinkSystem ST50 V2 Setup Guide Machine Types 7D8J and 7D8K ...
Page 4: ...ii ThinkSystem ST50 V2 Setup Guide ...
Page 14: ...10 ThinkSystem ST50 V2 Setup Guide ...
Page 44: ...40 ThinkSystem ST50 V2 Setup Guide ...
Page 87: ...Figure 66 Opening the memory module retaining clips Chapter 3 Server hardware setup 83 ...
Page 104: ...100 ThinkSystem ST50 V2 Setup Guide ...
Page 116: ...112 ThinkSystem ST50 V2 Setup Guide ...
Page 120: ...116 ThinkSystem ST50 V2 Setup Guide ...
Page 121: ......
Page 122: ......