Note:
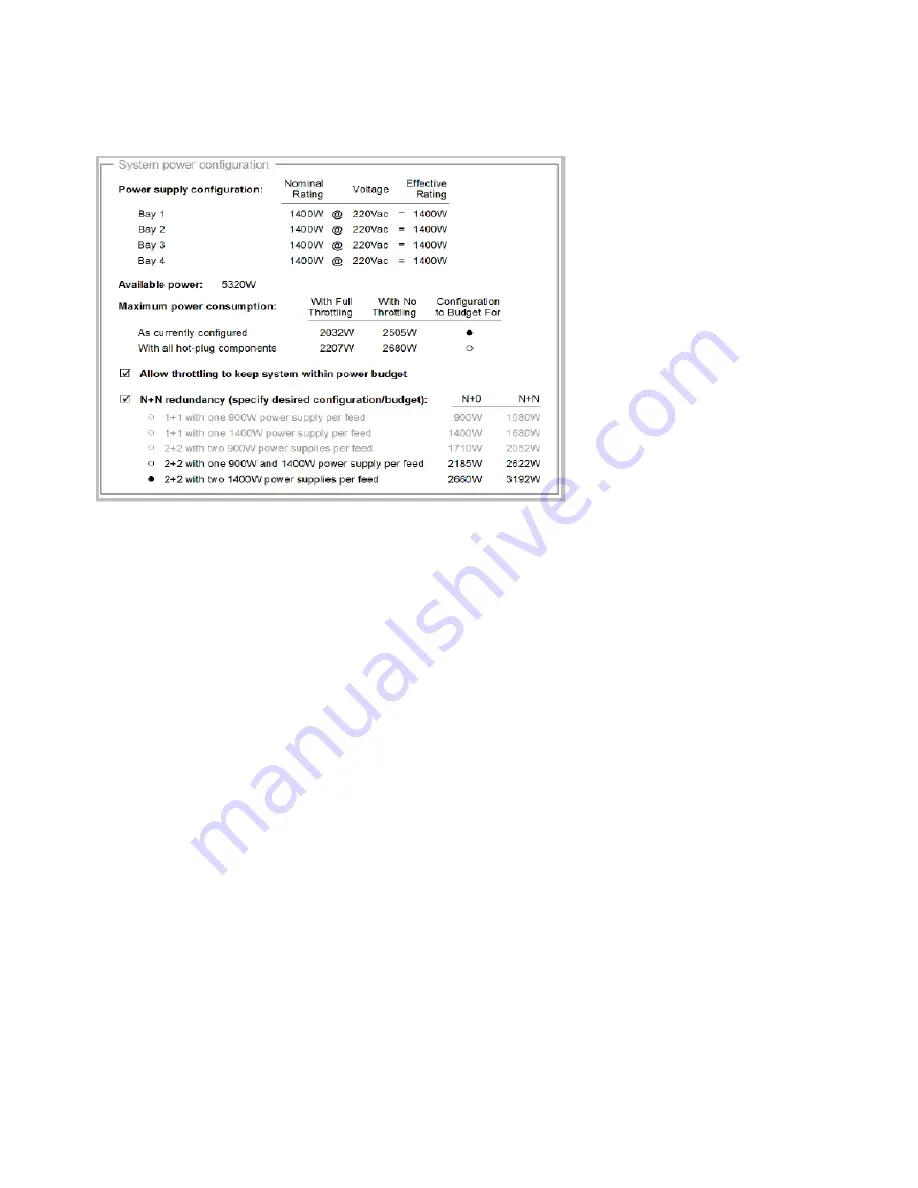
When you change the power configuration settings, make sure you select a redundancy mode and
then select the power supply system configuration that you want.
To log on to the IMM2 web interface, see “Logging on to the IMM web interface” on page 135.
After you log on to the IMM2 web interface, select the
Server Management
tab, then select the
Power
Management
option to set and change power supply configurations information.
Note:
The IMM2 user interface icons (green, yellow, and red) provide additional information when you move
the cursor over the icons.
For more information on using IMM2 see the
Integrated Management Module II User’s Guide
systemx.lenovofiles.com/help/topic/com.lenovo.sysx.imm2.doc/printable_doc.html.
Using the embedded hypervisor software
Use this information to find out how to enable the embedded hypervisor software on the USB flash device.
The VMware ESXi embedded hypervisor software is available on the optional USB flash device with
embedded hypervisor. The USB flash device can be installed in USB flash device connector on the Standard
I/O book (see “Standard I/O book” on page 31 for the location of the connector). Hypervisor is virtualization
software that enables multiple operating systems to run on a host system at the same time. The USB flash
device is required to activate the hypervisor functions.
To start using the embedded hypervisor functions, you must add the USB flash device to the startup
sequence in the Setup utility.
To add the USB flash device to the startup sequence, complete the following steps:
Step 1. Turn on the server.
Note:
Approximately 10 seconds after the server is connected to ac power, the power-on button
becomes active.
Step 2. When the prompt
<F1> Setup
is displayed, press F1.
138
System x3850 X6 and x3950 X6 Installation and Service Guide
Summary of Contents for 6241
Page 1: ...System x3850 X6 and x3950 X6 Installation and Service Guide Machine Type 6241 ...
Page 6: ...iv System x3850 X6 and x3950 X6 Installation and Service Guide ...
Page 56: ...42 System x3850 X6 and x3950 X6 Installation and Service Guide ...
Page 82: ...68 System x3850 X6 and x3950 X6 Installation and Service Guide ...
Page 132: ...118 System x3850 X6 and x3950 X6 Installation and Service Guide ...
Page 158: ...144 System x3850 X6 and x3950 X6 Installation and Service Guide ...
Page 214: ...200 System x3850 X6 and x3950 X6 Installation and Service Guide ...
Page 358: ...344 System x3850 X6 and x3950 X6 Installation and Service Guide ...
Page 1938: ...1924 System x3850 X6 and x3950 X6 Installation and Service Guide ...
Page 1964: ...1950 System x3850 X6 and x3950 X6 Installation and Service Guide ...
Page 1968: ...1954 System x3850 X6 and x3950 X6 Installation and Service Guide ...
Page 1975: ...Taiwan Class A compliance statement Appendix F Notices 1961 ...
Page 1976: ...Taiwan BSMI RoHS declaration 1962 System x3850 X6 and x3950 X6 Installation and Service Guide ...
Page 1988: ...1974 System x3850 X6 and x3950 X6 Installation and Service Guide ...
Page 1989: ......
Page 1990: ......


