


Page 22
2018-08-07
LABvault-HD
Administrative Web Interface
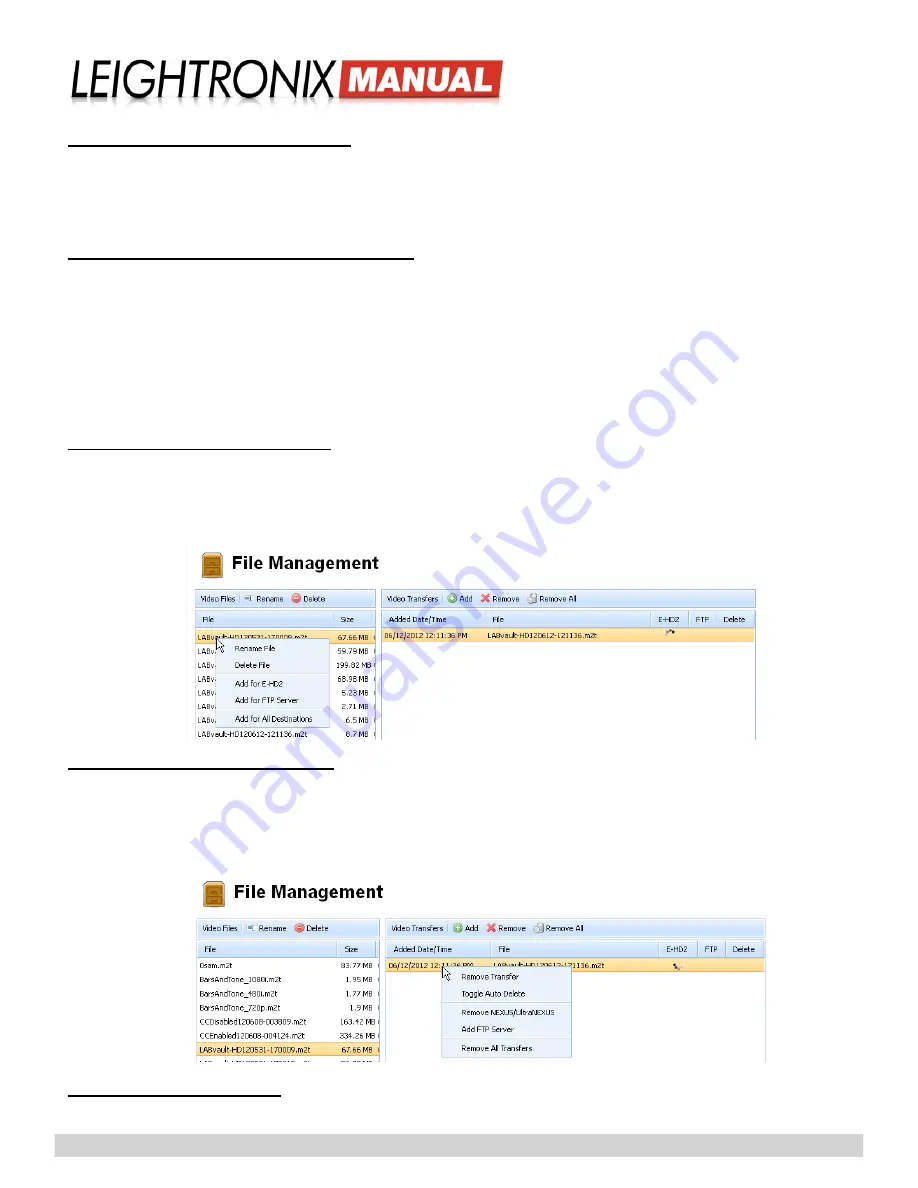
Rename Files on Internal Hard Drive
Under the “Video Files” listing on the left side of the screen, either single click on the file you would like to rename and
then click the “Rename” button or just right click on the file and select “Rename” from the menu that appears. In the
“Rename File” window that appears, enter a new filename of up to 27 alphanumeric characters, no spaces, and click
“Ok” to accept the change or “Cancel” to abort.
Delete Files from Hard Drive/Transfer Queue
• Hard Drive:
under the “Video Files” listing, either single click on the file you would like to delete and then click
the “Delete” button or just right click on the file and select “Delete File” from the pop-up menu. Click “Yes” when
prompted to delete the file or “No” to abort.
• Transfer Queue:
to delete a single file under “Video Transfers,” either single click on the file you would like to
delete and then click the “Remove” button or just right click on the file and select “Remove Transfer” from the
pop-up menu. To remove all files from the transfer catalog, either single click on a file and then click the “Remove
All” button or just right click on the file and select “Remove All Transfers” from the pop-up menu. Click “Yes” when
prompted to delete the file(s) or “No” to abort.
Manually Transfer Recorded Files
Under the “Video Files” listing, either single click on the file you would like to transfer and click the “Add” button to
transfer the file to your configured destination(s) or right click on the file and select a file transfer destination(s) from
the pop-up menu. Ensure you have entered the configuration settings for the selected destination(s) on the “File
Destinations” screen.
Change File Transfer Destinations
Change the destination of any file in the “Video Transfers” queue by right clicking on the file and selecting one of the
add/remove options in the popup menu. The remove options de-select current file transfer destinations, while the add
options transfer the file to the corresponding destinations. Ensure you have entered the configuration settings for the
selected destination(s) on the “File Destinations” screen.
Enable/Disable Auto Delete
Use the “Toggle Auto Delete” option to turn “Delete” on and off for the selected file.
Popup Menu for “Video Files” Listing on the “File Management” Screen
Popup Menu for “Video Transfers” Listing on the “File Management” Screen


