Chapter 7: Using the Web Interface
416
Transport
protocols
Next steps
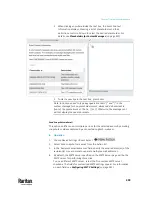
TCP+TLS
A TLS certificate is required. Do the following:
a.
Type an appropriate port number in the 'TCP port' field. Default is 6514.
b.
In the 'CA certificate' field, click
to select a TLS certificate. After importing the
certificate, you may:
▪
Click Show to view its contents.
▪
Click Remove to delete it if it is inappropriate.
c.
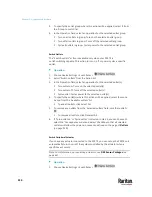
Determine whether to select the 'Allow expired and not yet valid certificates' checkbox.
▪
To always send the event message to the specified syslog server as long as a TLS certificate
is available, select this checkbox.
▪
To prevent the event message from being sent to the specified syslog server when any TLS
certificate in the selected certificate chain is outdated or not valid yet, deselect this
checkbox.
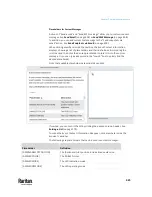
Note: If the required certificate file is a chain of certificates, and you are not
sure about the requirements of a certificate chain, see
TLS Certificate Chain
(on
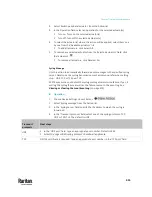
Scheduling an Action
An action can be regularly performed at a preset time interval instead of being
triggered by a specific event. For example, you can make the PX3TS report the
reading or state of a specific sensor regularly by scheduling the "Send sensor
report" action.
When scheduling an action, make sure you have a minimum of 1-minute buffer
between this action's creation and first execution time. Otherwise, the
scheduled action will NOT be performed at the specified time when the buffer
time is too short. For example, if you want an action to be performed at 11:00
am, you should finish scheduling it at 10:59 am or earlier.
If the needed action is not available yet, create it first. See
Available Actions
(on page 394).
Operation:
1.
Choose Device Settings > Event Rules >
.
2.
To select any action(s), select them one by one from the 'Available actions'
list.
▪
To select all available actions, click Select All.
Summary of Contents for Raritan PX3TS
Page 4: ......
Page 6: ......
Page 20: ......
Page 80: ...Chapter 4 Connecting External Equipment Optional 60...
Page 109: ...Chapter 5 PDU Linking 89...
Page 117: ...Chapter 5 PDU Linking 97...
Page 441: ...Chapter 7 Using the Web Interface 421...
Page 464: ...Chapter 7 Using the Web Interface 444...
Page 465: ...Chapter 7 Using the Web Interface 445 Continued...
Page 746: ...Appendix A Specifications 726...
Page 823: ...Appendix I RADIUS Configuration Illustration 803 Note If your PX3TS uses PAP then select PAP...
Page 828: ...Appendix I RADIUS Configuration Illustration 808 14 The new attribute is added Click OK...
Page 829: ...Appendix I RADIUS Configuration Illustration 809 15 Click Next to continue...
Page 860: ...Appendix J Additional PX3TS Information 840...
Page 890: ...Appendix K Integration 870 3 Click OK...
Page 900: ......


