


Chapter 7: Using the Web Interface
358
4.
To verify whether the certificate has been installed successfully, check the
data shown in the Active TLS Certificate section.
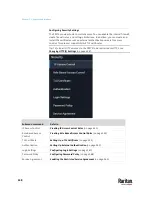
Creating a Self-Signed Certificate
When appropriate certificate and key files for PX3TS are unavailable, the
alternative, other than submitting a CSR to the CA, is to generate a self-signed
certificate.
Note that you must enter information in the fields showing the message
'required.'
To create and install a self-signed certificate:
1.
Choose Device Settings > Security > TLS Certificate.
2.
Enter information.
Field
Description
Country
The country where your company is located. Use the standard ISO country
code, which comprises two uppercase letters. For a list of ISO codes, google
ISO 3166 country codes.
State or province
The full name of the state or province where your company is located.
Locality
The city where your company is located.
Organization
The registered name of your company.
Organizational unit
The name of your department.
Common name
The fully qualified domain name (FQDN) of your PX3TS.
Email address
An email address where you or another administrative user can be reached.
Key length
Select an available key length (bits). A larger key length enhances the
security, but slows down the response of PX3TS.
▪
Only 2048 is available now.
Self-sign
Ensure this checkbox is selected, which indicates that you are creating a
self-signed certificate.
Validity in days
This field appears after the Self-sign checkbox is selected.
Type the number of days for which the self-signed certificate will be valid.
A password is not required for a self-signed certificate so the Challenge and
Confirm Challenge fields disappear.
3.
Click Create New TLS Key to create both the self-signed certificate and
private key. This may take several minutes to complete.
4.
Once complete, do the following:
Summary of Contents for Raritan PX3TS
Page 4: ......
Page 6: ......
Page 20: ......
Page 80: ...Chapter 4 Connecting External Equipment Optional 60...
Page 109: ...Chapter 5 PDU Linking 89...
Page 117: ...Chapter 5 PDU Linking 97...
Page 441: ...Chapter 7 Using the Web Interface 421...
Page 464: ...Chapter 7 Using the Web Interface 444...
Page 465: ...Chapter 7 Using the Web Interface 445 Continued...
Page 746: ...Appendix A Specifications 726...
Page 823: ...Appendix I RADIUS Configuration Illustration 803 Note If your PX3TS uses PAP then select PAP...
Page 828: ...Appendix I RADIUS Configuration Illustration 808 14 The new attribute is added Click OK...
Page 829: ...Appendix I RADIUS Configuration Illustration 809 15 Click Next to continue...
Page 860: ...Appendix J Additional PX3TS Information 840...
Page 890: ...Appendix K Integration 870 3 Click OK...
Page 900: ......


