


Chapter 6: Using the PX3TS
145
Alerts
The "Alerts" menu command shows a list of the following alerted sensors,
including both internal and external sensors.
•
Any numeric sensor that enters the warning or critical range if the
thresholds have been enabled
•
State sensors that enter the alarmed state
•
Any tripped circuit breakers
Tip: The same information is available in the web interface's Dashboard. See
Dashboard - Alerted Sensors
(on page 185).
If there are no alerted sensors, the LCD display shows the message "No Alerts."
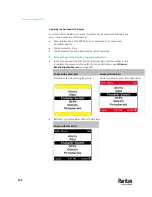
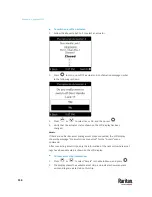
To view alerted sensors:
1.
Press
or
to select "Alerts" in the Main Menu, and press
.
2.
Alerted sensors, if any, are highlighted in either red or yellow. For color
definitions, see
Yellow- or Red-Highlighted Sensors
(on page 264).
▪
The top and bottom bars on the LCD display may be yellow or red,
depending on the type(s) of available alerts. See
Operating the
Dot-Matrix LCD Display
(on page 142).
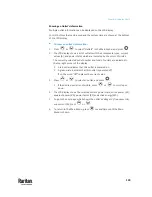
3.
Press
or
to view additional pages. When there are multiple
pages, page numbers appear in the top-right corner of the display.
PDU
Depending on the model you purchased, the "PDU" menu command may show
one or all of the following data.
•
Internal beeper states -- Active or Off
•
Total active power
•
Total active energy
•
Energy pulse output settings -- available on PX3TS-5000 series only
•
12V power supply status
Tip: The internal beeper state information is also available in the PX3TS web
interface. See
PDU
(on page 206).
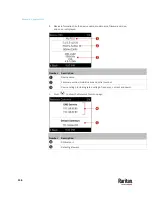
To view or configure PDU information:
1.
Press
or
to select "PDU" in the Main Menu, and press
.
2.
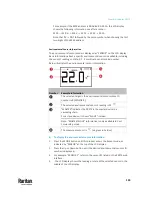
The internal beeper state is shown: Active or Off.
▪
In the Active state, the reason of turning on the beeper is indicated,
and the top/bottom bars turn red.
▪
To mute the beep sound immediately, press
. See Muting the
Internal Beeper.
Summary of Contents for Raritan PX3TS
Page 4: ......
Page 6: ......
Page 20: ......
Page 80: ...Chapter 4 Connecting External Equipment Optional 60...
Page 109: ...Chapter 5 PDU Linking 89...
Page 117: ...Chapter 5 PDU Linking 97...
Page 441: ...Chapter 7 Using the Web Interface 421...
Page 464: ...Chapter 7 Using the Web Interface 444...
Page 465: ...Chapter 7 Using the Web Interface 445 Continued...
Page 746: ...Appendix A Specifications 726...
Page 823: ...Appendix I RADIUS Configuration Illustration 803 Note If your PX3TS uses PAP then select PAP...
Page 828: ...Appendix I RADIUS Configuration Illustration 808 14 The new attribute is added Click OK...
Page 829: ...Appendix I RADIUS Configuration Illustration 809 15 Click Next to continue...
Page 860: ...Appendix J Additional PX3TS Information 840...
Page 890: ...Appendix K Integration 870 3 Click OK...
Page 900: ......


