


4/11/03
Tools Menu
3-3
nels will have the same units. The choices are: m/s
2
, cm/s
2
,
ft/s
2
, in/s
2
, g, and dB.
NOTE: The HVM100 uses a reference
acceleration of 10
-6
m/s
2
(velocity refer-
ence = 10
-9
m/s, displacement reference
= 10
-12
m) or a reference of 10
-5
m/s
2
(velocity reference = 10
-8
m/s, displace-
ment reference = 10
-11
m) to display
acceleration, velocity and displacement
in dB units. Please see the section in the
RANGE key for details on changing the
reference acceleration.
Integration
Hint:
This setting is in the Tools menu. To access the Tools menu press the
TOOLS
key and then use the
u
and
d
arrow keys to navigate
through the menu items.
NOTE: Integration is a mathematical
process of changing the displayed units
from acceleration to velocity to displace-
ment. Single integration changes the dis-
played parameter from acceleration to
velocity by dividing the acceleration
by:
2
π
f
(i.e. ft/s
2
to ft/s). Double integra-
tion changes the parameter from accel-
eration to displacement by dividing the
acceleration by:
4
π
2
f
2
(i.e. m/s
2
to
meters).
Integration applies only to the Vibration mode. There is no
integration available in the Hand Arm or Whole Body
Modes. Integration is the process of converting the data
from acceleration, which is the standard method of display-
ing the data, into velocity and displacement.
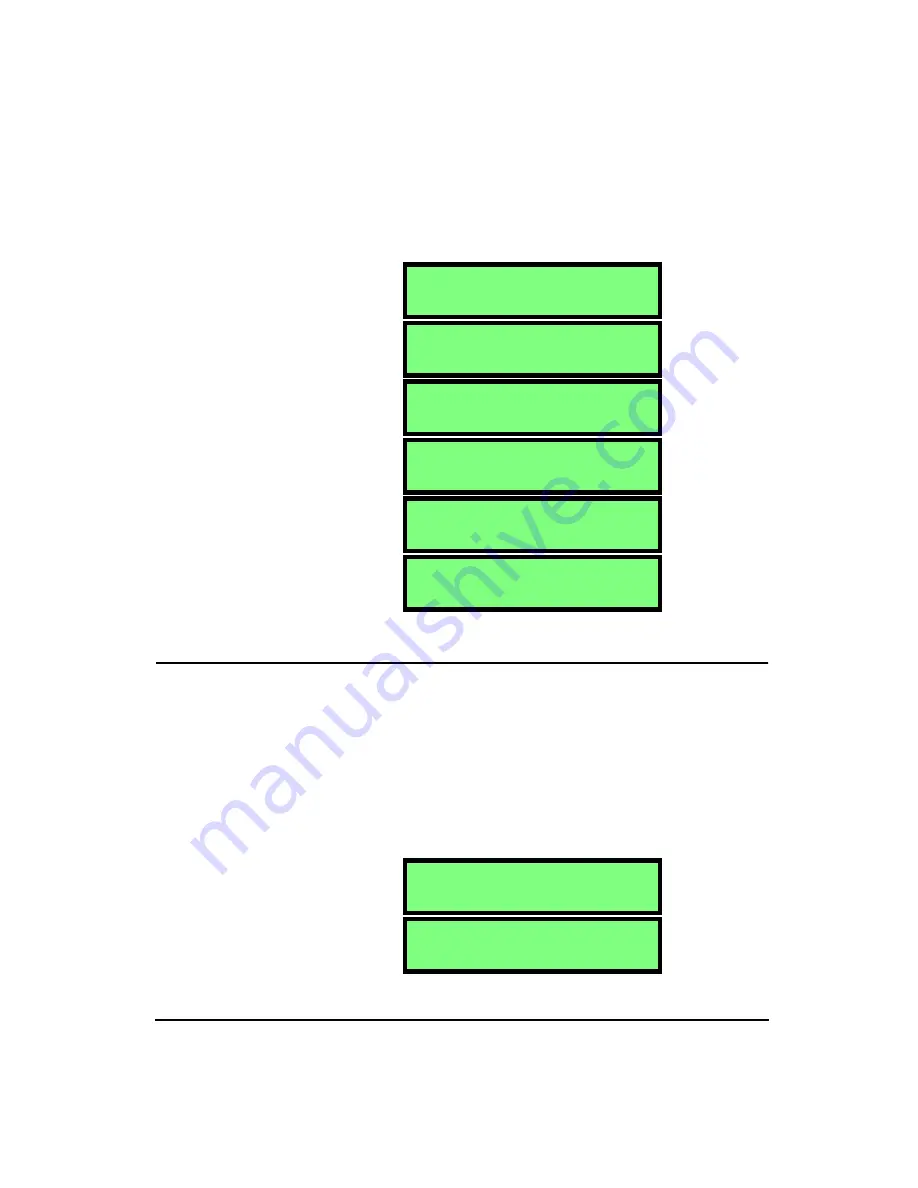
D i s p l a y U n i t s
m / s
2
D i s p l a y U n i t s
c m / s
2
D i s p l a y U n i t s
f t / s
2
D i s p l a y U n i t s
i n / s
2
D i s p l a y U n i t s
g
D i s p l a y U n i t s
d B
I n t e g r a t i o n
N o n e
I n t e g r a t i o n
S i n g l e
Summary of Contents for HVM100
Page 8: ...HVM100 User Manual 6...
Page 18: ...1 10 HVM100 User Manual 4 11 03...
Page 29: ...4 11 03 Getting Started 2 11 Weighting X Wk...
Page 30: ...2 12 HVM100 User Manual 4 11 03...
Page 44: ...3 14 HVM100 User Manual 4 11 03...
Page 50: ...4 6 HVM100 User Manual 4 11 03...
Page 57: ...4 11 03 Printing 5 7 Step 7 Press the OK button...
Page 58: ...5 8 HVM100 User Manual 4 11 03 Step 8 The Connect to dialog box will appear...
Page 62: ...5 12 HVM100 User Manual 4 11 03 Left click the Properties button Properties Settings...
Page 67: ...4 11 03 Printing 5 17...
Page 68: ...5 18 HVM100 User Manual 4 11 03...
Page 80: ...6 12 HVM100 User Manual 4 11 03...
Page 94: ...8 6 HVM100 User Manual 4 11 03...
Page 102: ...9 8 HVM100 User Manual 4 11 03...
Page 146: ...D 2 HVM100 User Manual 4 11 03...
Page 147: ...4 11 03 D 3...
Page 148: ...D 4 HVM100 User Manual 4 11 03...
Page 149: ...4 11 03 D 5...
Page 150: ...D 6 HVM100 User Manual 4 11 03...
Page 151: ...4 11 03 D 7...
Page 152: ...D 8 HVM100 User Manual 4 11 03...
Page 153: ...4 11 03 D 9...
Page 154: ...D 10 HVM100 User Manual 4 11 03...
Page 155: ...4 11 03 D 11...
Page 156: ...D 12 HVM100 User Manual 4 11 03...
Page 157: ...4 11 03 D 13...
Page 158: ...D 14 HVM100 User Manual 4 11 03...
Page 170: ...F 4 Warranty Customer Satisfaction April 11 2003...
Page 174: ...HVM100 User Manual 4...


