Installing the SLK
3-6
SecureLinx SLK Remote KVM
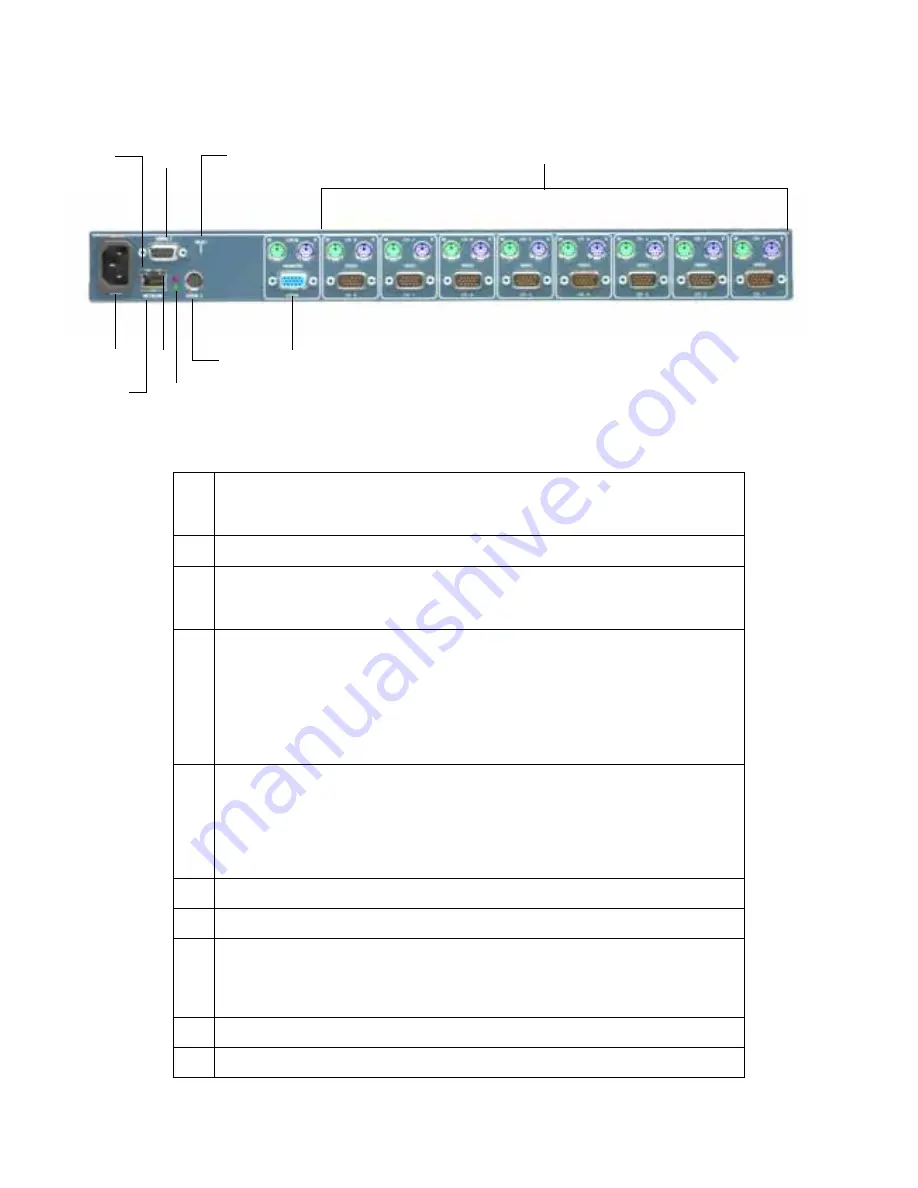
Figure 3-4. SLK8 Back Panel
Table 3-5. SLK8 Back Panel Description
1
10/100 Speed LED:
Green
= 100 Base-T connection
Orange
= 10 Base-T connection
2
Serial port 1 (DB9 female, DCE).
3
Recessed reset button. Use a paper clip (or equivalent) to reset the
SLK. Does not affect attached server. This unit only controls one
device.
4
Eight groups of
Server
connectors, labeled
CH-1
through
CH-8
, for
managing up to eight target servers. Each connector is labeled and
color coded:
M/green
PS/2 mouse connector (6-pin mini-DIN female)
K/purple
PS/2 keyboard connector (6-pin mini-DIN female)
Video/black
VGA monitor connector (HDDB15 male)
5
One group of
Local
connectors for connecting a local console. Each
connector is labeled and color coded.
M/green
PS/2 mouse connector (6-pin mini-DIN female)
K/purple
PS/2 keyboard connector (6-pin mini-DIN female)
Monitor/blue
VGA monitor connector (HDDB15 female)
6
Serial port 2 (8-pin mini-DIN, DCE)
7
Red and green indicator lights that alternate during normal operation
8
Link/Activity LED:
ON = good link connection
OFF = no connection
Blinking = network activity
9
RJ45 network connector
10
SLK power connector
❿
❾
❷
❻
❹
❺
❸
❶
❼
❽
Summary of Contents for SecureLinx SLK Series
Page 4: ......
Page 8: ...iv SecureLinx SLK Remote KVM ...
Page 12: ...viii SecureLinx SLK Remote KVM ...
Page 120: ...Using a VNC Viewer to Access the SLK 6 4 SecureLinx SLK Remote KVM User Guide ...
Page 140: ...Defining Custom Send Keys 9 6 SecureLinx SLK Remote KVM ...


