


HTCA-6400 User Manual
32
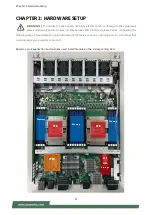
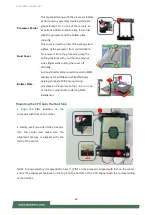
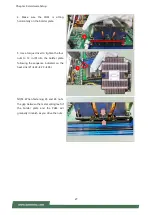
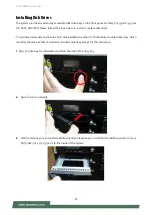
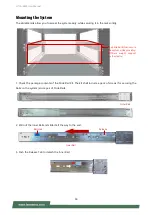
Installing Disk Drives
The system provides six externally accessible disk drive bays on the front panel. Notably, the system requires
3.5” SATA HDD/SSD. Please follow the steps below to install or replace disk drives.
The pictures below demonstrate the hard disk installation method of horizontally-mounted disk trays, which
is exactly the same as that of vertically mounted disk trays except for the orientation.
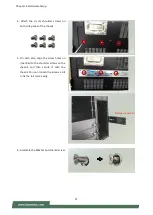
1.
Select a drive bay for installation and hold the lock of the drive bay.
2.
Open the lock outwards.
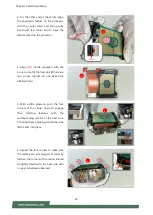
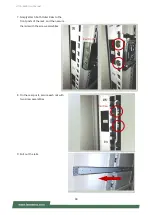
3.
Pull the drive bay out and install a SATA disk drive. Please keep in mind that the SATA connector of your
SATA disk drive should point to the inside of the system.
Summary of Contents for HTCA-6400
Page 45: ...Chapter 4 BIOS Setup 45 Trusted Computing TPM 2 0...
Page 47: ...Chapter 4 BIOS Setup 47 Trusted Computing PTT Enable...
Page 49: ...Chapter 4 BIOS Setup 49 AST2500 Super IO Configuration...
Page 68: ...HTCA 6400 User Manual 68 Server ME Configuration...
Page 71: ...Chapter 4 BIOS Setup 71 Processor Configuration...